
In this post, we will discuss in detail the step-by-step procedure of two different methods to add meta tag to WordPress website.
What is a Meta Tag?
Meta tags form an important part of On-page SEO. Meta tags like the title, description tell us what the page is about. There are various WordPress SEO plugins such as Yoast, RankMath, etc. that make it easy to add and customize the title tag & the description tag for each WordPress post or page.
However, apart from the title & description meta tags, other meta tags are used, such as adding the custom meta tag for website ownership verification in Google Webmaster Tools or the meta tag for Bing Webmaster Tools site verification.
List of commonly used WordPress Meta Tags
<meta charset='UTF-8'>
<meta name='keywords' content='your, tags'>
<meta name='description' content='150 words'>
<meta name='subject' content='your website's subject'>
<meta name='copyright' content='company name'>
<meta name='language' content='EN'>
<meta name='robots' content='index,follow'>
<meta name='abstract' content=''>
<meta name='topic' content=''>
<meta name='summary' content=''>
<meta name='Classification' content='Business'>
<meta name='author' content='name, email@gmail.com'>
<meta http-equiv='Expires' content='0'>
<meta http-equiv='Pragma' content='no-cache'>
<meta http-equiv='Cache-Control' content='no-cache'>
<meta http-equiv='x-dns-prefetch-control' content='off'>
<meta name='og:title' content='How to add meta tag to wordpress'>
<meta name='og:type' content='newsarticle'>
<meta name='og:url' content='https://www.example.com'>
<meta name='og:image' content='image.jpg'>
<meta name='og:site_name' content='oppilla'>
<meta name='og:description' content=''>

Google Webmaster Tools Meta Tag for site verification
<meta name="google-site-verification" content="abcd-efghigjklmno-qrstuvwxyzkadeeee-xkdow" />
Popular WordPress SEO plugins like the Yoast & Rankmath allow only adding or editing the title & description meta tags.
How to Add Meta Tag to WordPress Website
- Adding Meta tag to WordPress website using a plugin
- Adding Meta tag to WordPress website without Plugin
Method 1: Add meta tag to WordPress using plugin
In this method, we will see the easiest way of adding the meta tags to WordPress. We will use the insert headers and footers WordPress plugin to accomplish this.
Step 1: First, log in to your WordPress admin dashboard through the /wp-admin/ URL, prefixing it with our website URL. Once you are logged in to your admin dashboard, you should see the screen as shown below:

Step 2: From the wp-admin dashboard, click on the plugins option in the left sidebar menu. You will get a screen as shown below:
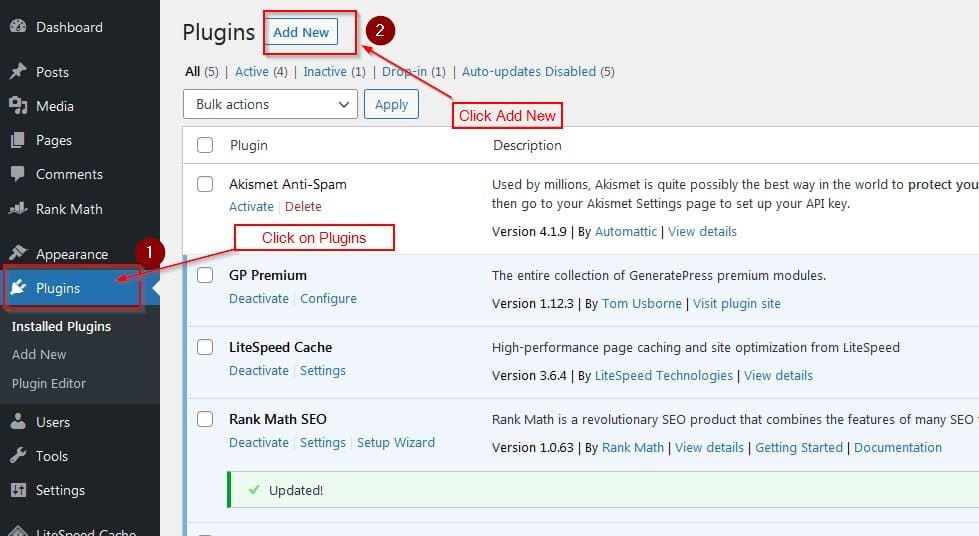
You should see an Add New button next to the page heading from the plugins page, as highlighted in the above image. We can add new plugins by clicking on this Add New button by manually uploading the plugin zip file or from the official WordPress plugin repository.
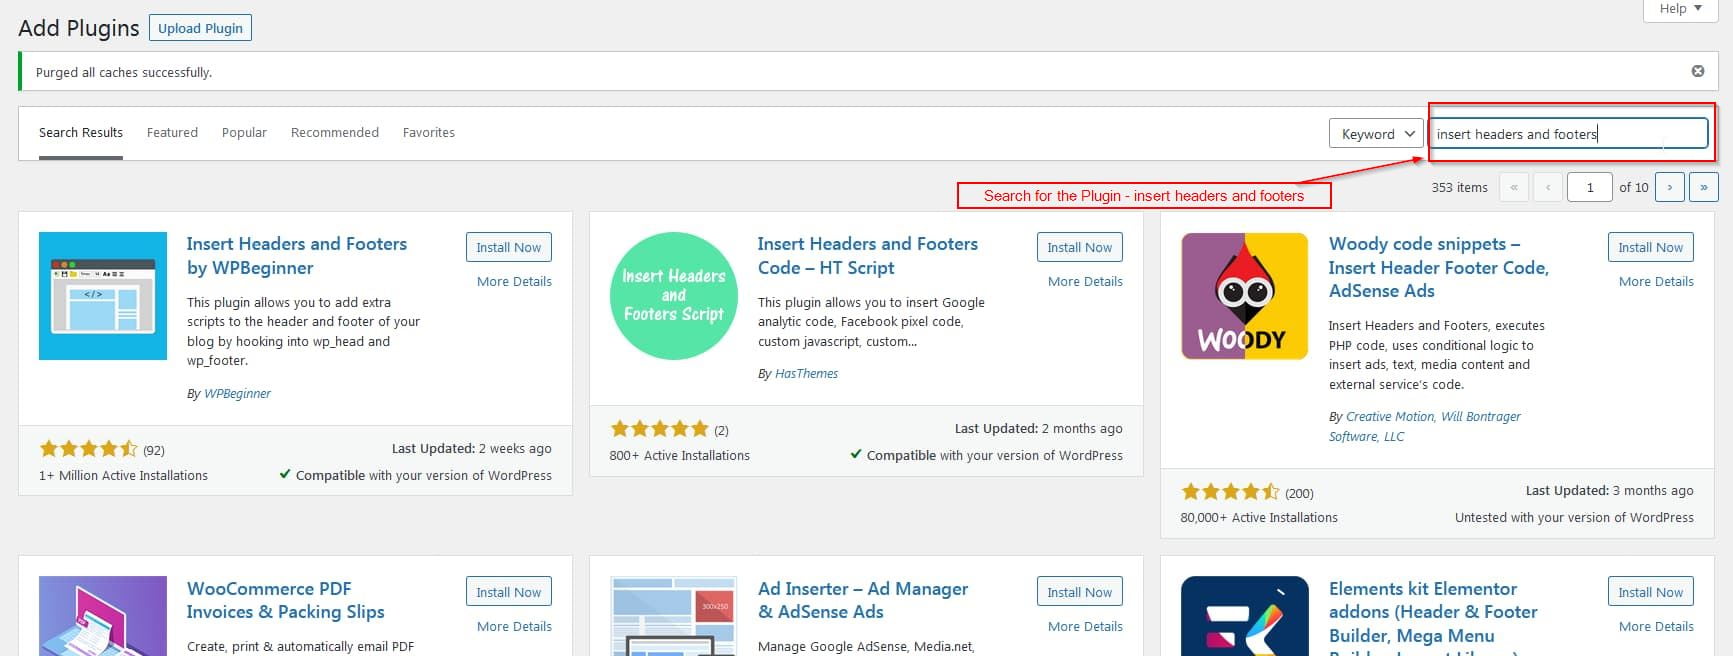
Step 3: on the Add New Plugin page, towards the right side you should see a search box, using which we can search plugins by keyword. The plugin we use to add meta tag to the WordPress website will be ‘Insert headers and footers‘ by WPBeginner. Type headers and footers in the search box, you should see a list of plugins as shown in the below screen.
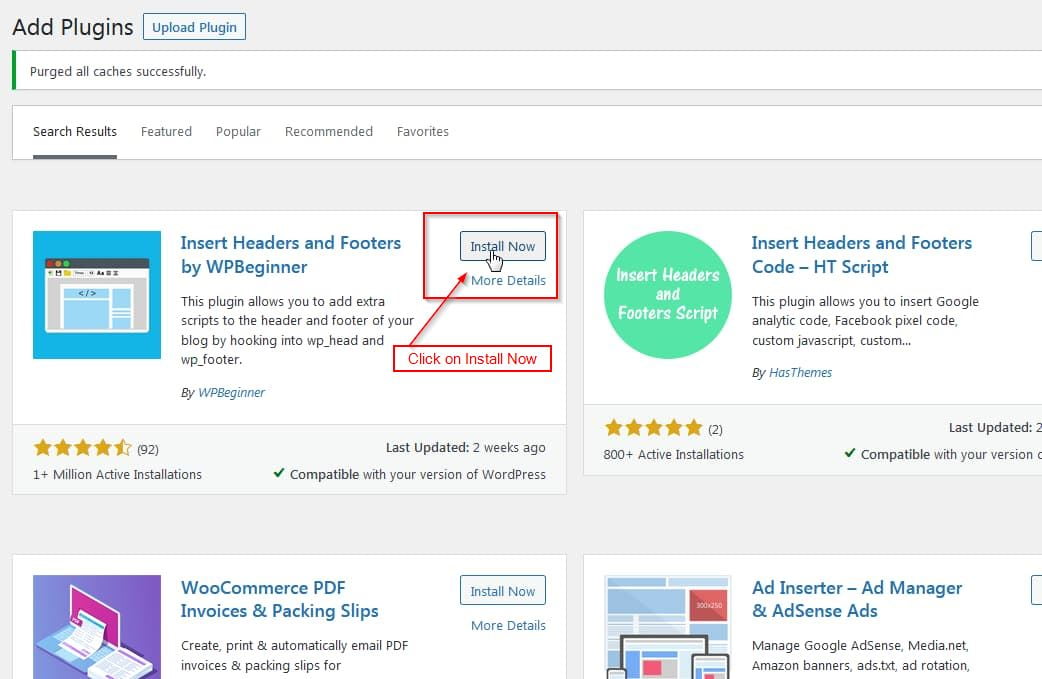
Step 4: The first search suggestion is the required Insert Headers and Footers plugin, click on the Install Now button as highlighted in the image below to start the installation of the WordPress plugin.
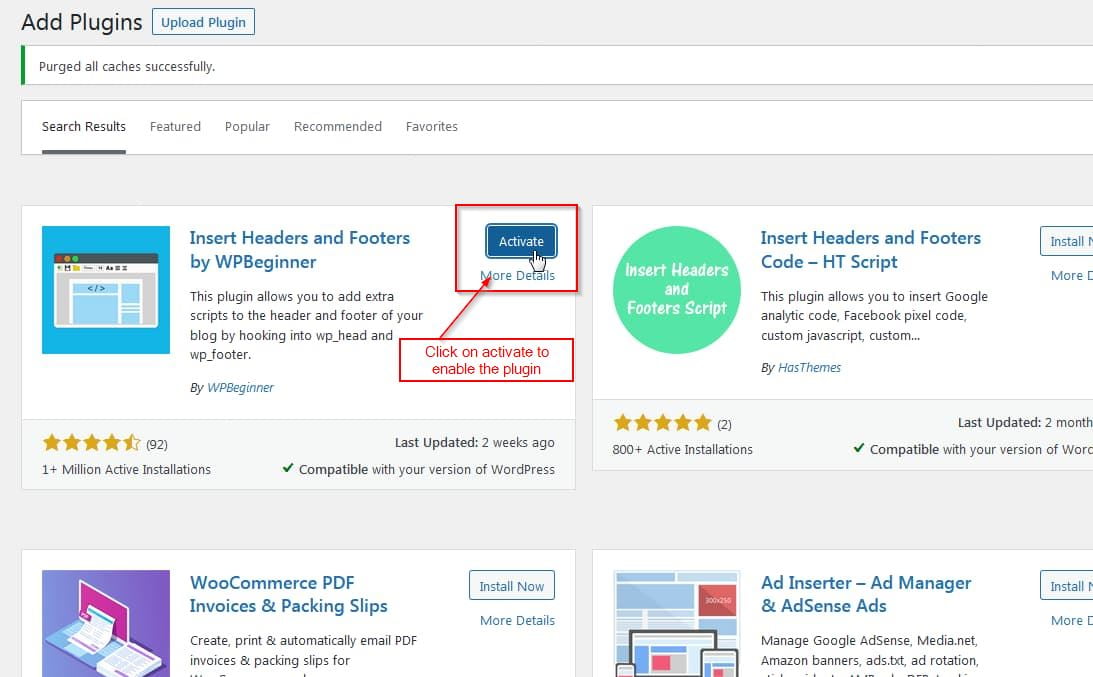
Step 5: Once the plugin installation is complete, the install now will change to Activate as shown in the below image. Now click on the activate button as highlighted, this is a required step as the plugin options will not be visible in the wp-admin dashboard if the plugin is not activated.
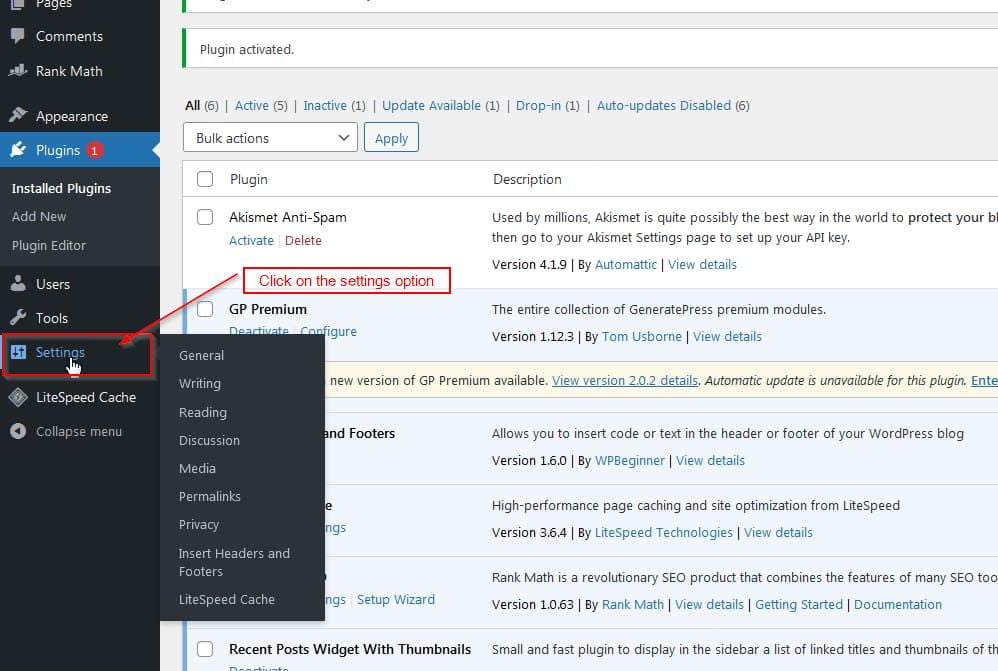
Step 6: After the plugin is activated, we can go back to the admin dashboard and click on the Settings option from the left sidebar menu, or you could also move your mouse pointer over the settings option. A sub-menu will popup and show the Insert Headers and Footers option, as highlighted in the image below.
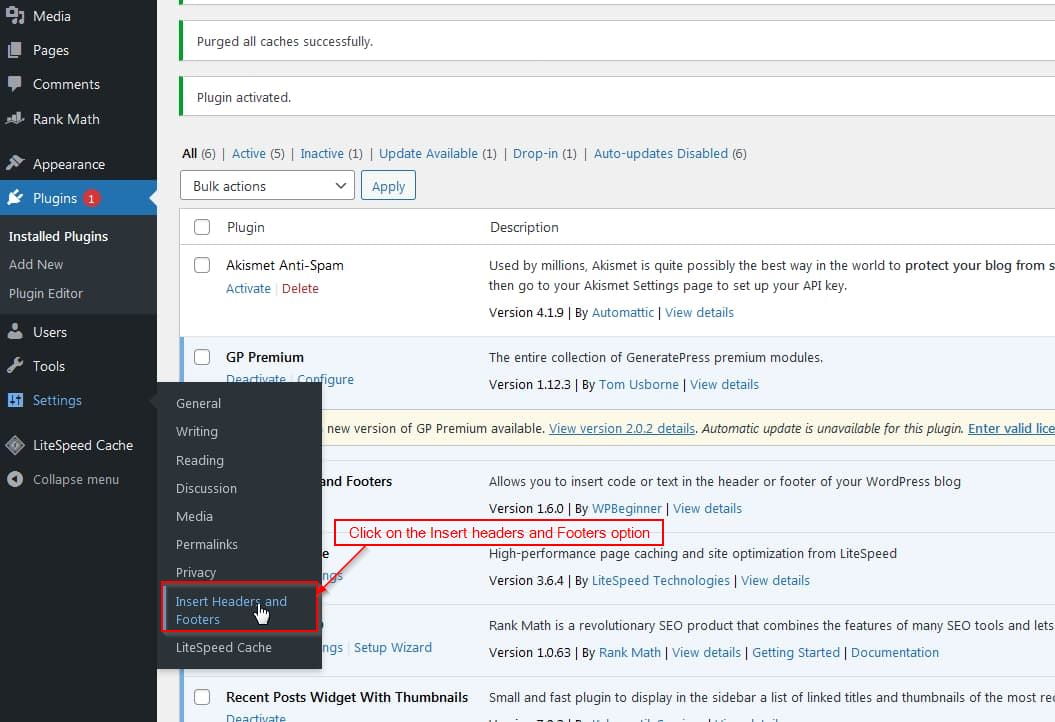
Step 7: Click on the Insert Header and Footers option as shown below, this will open all the configuration options of the plugin.
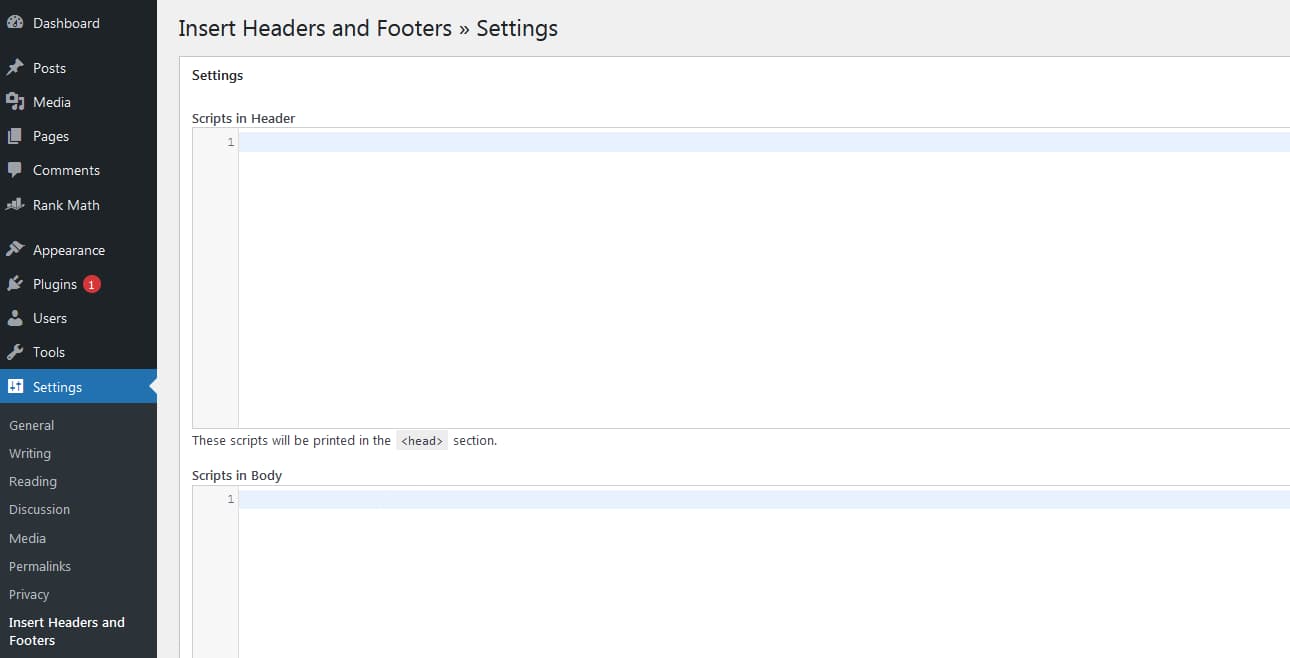
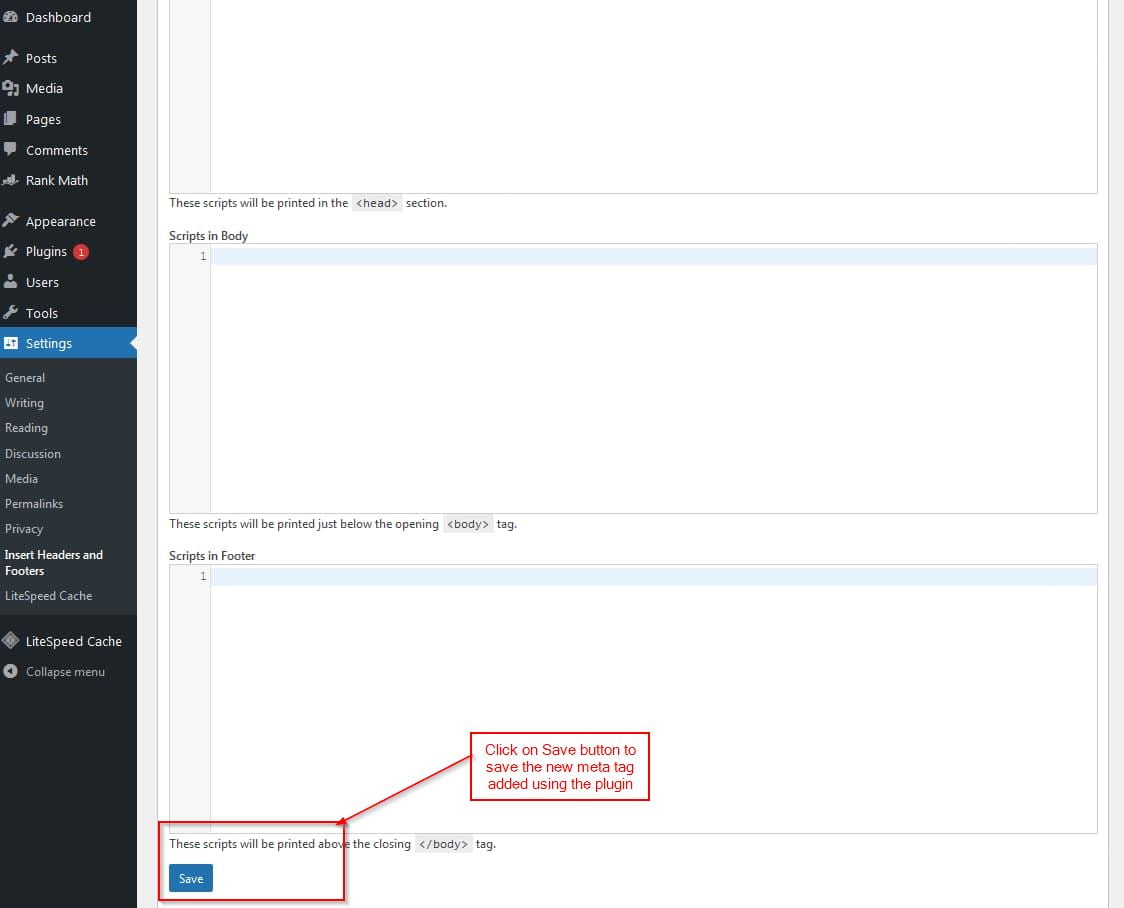
Step 8: The Insert headers and footers plugin page will open with three text boxes, headers, body, footers as shown in the image below:
Step 9: As an example, We take the Google Search Console site verification meta tag to add to our WordPress website using the plugin. Copy the meta tag provided by Google Search Console, add the meta tag inside the first text box (scripts in the header) just as shown in the image below:
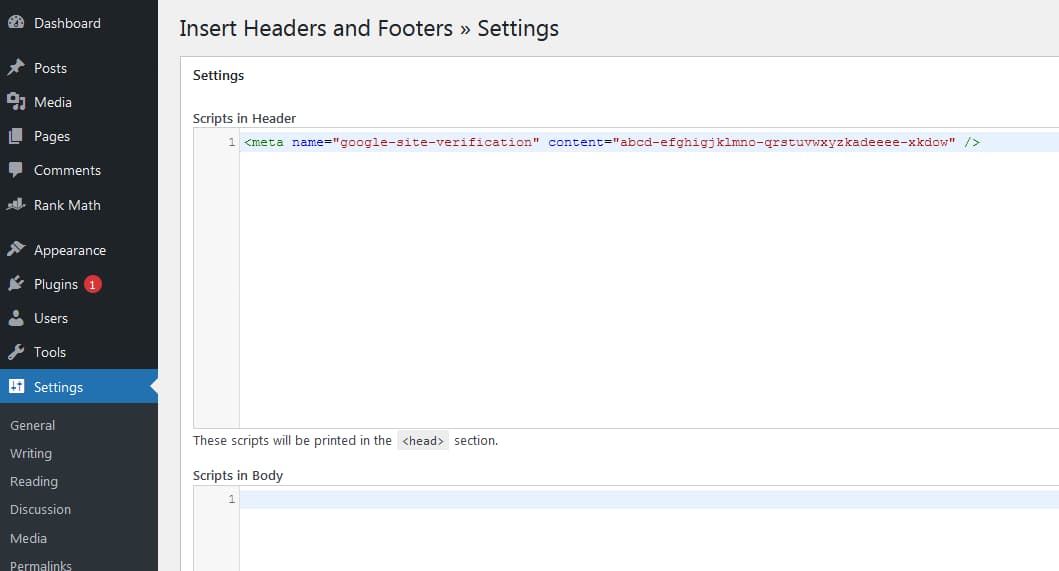
This way we could add any meta tag to WordPress, just by including it in the headers text box.
Step 10: After adding the meta tag, scroll down and click on the save button as highlighted in the image below. They will insert the custom meta tag that we just added within the head section along with all the other default WordPress meta tags.
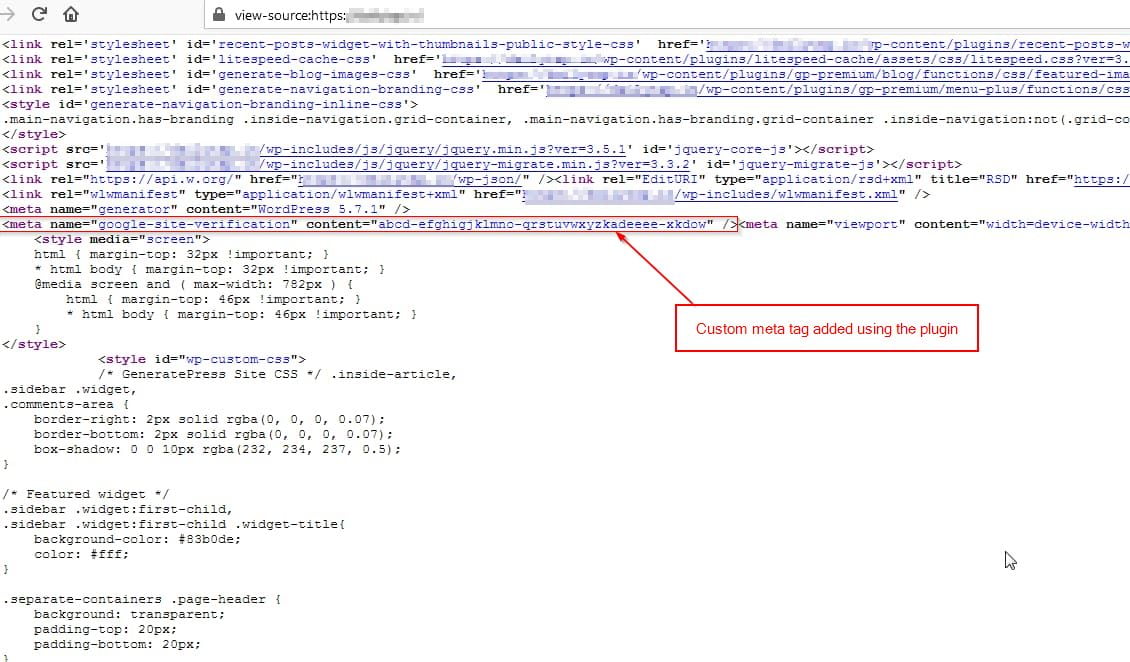
Step 11: In the final step, go back to your website URL and reload the page. You should see the newly added meta tag visible in the head section of your WordPress website. If in case you have caching enabled make sure you purge the cache to check for the updated website displaying the newly added meta tag. Just as shown in the image below.
Method 2: Add meta tag to WordPress without Plugin
The second method is a more straightforward way to add meta tag to WordPress website. But it involves a little bit of code editing within the WordPress admin dashboard.
In this, we will be using the WordPress theme editor to add the meta tag. For this writing, we will do this with Generate press theme, this procedure would be the same for any WordPress theme Free or paid.

Step 1: Login to your WordPress Admin dashboard. You should see a screen as shown above.
Step 2: Click on the Appearance option from the left sidebar menu or just hover the mouse pointer over it. You should see another menu show up giving additional options, click on the Theme Editor option as highlighted in the image below.

Step 3: Once the theme Editor page opens up, you should see a screen similar to the image below, but it could vary depending on the WordPress theme currently installed.
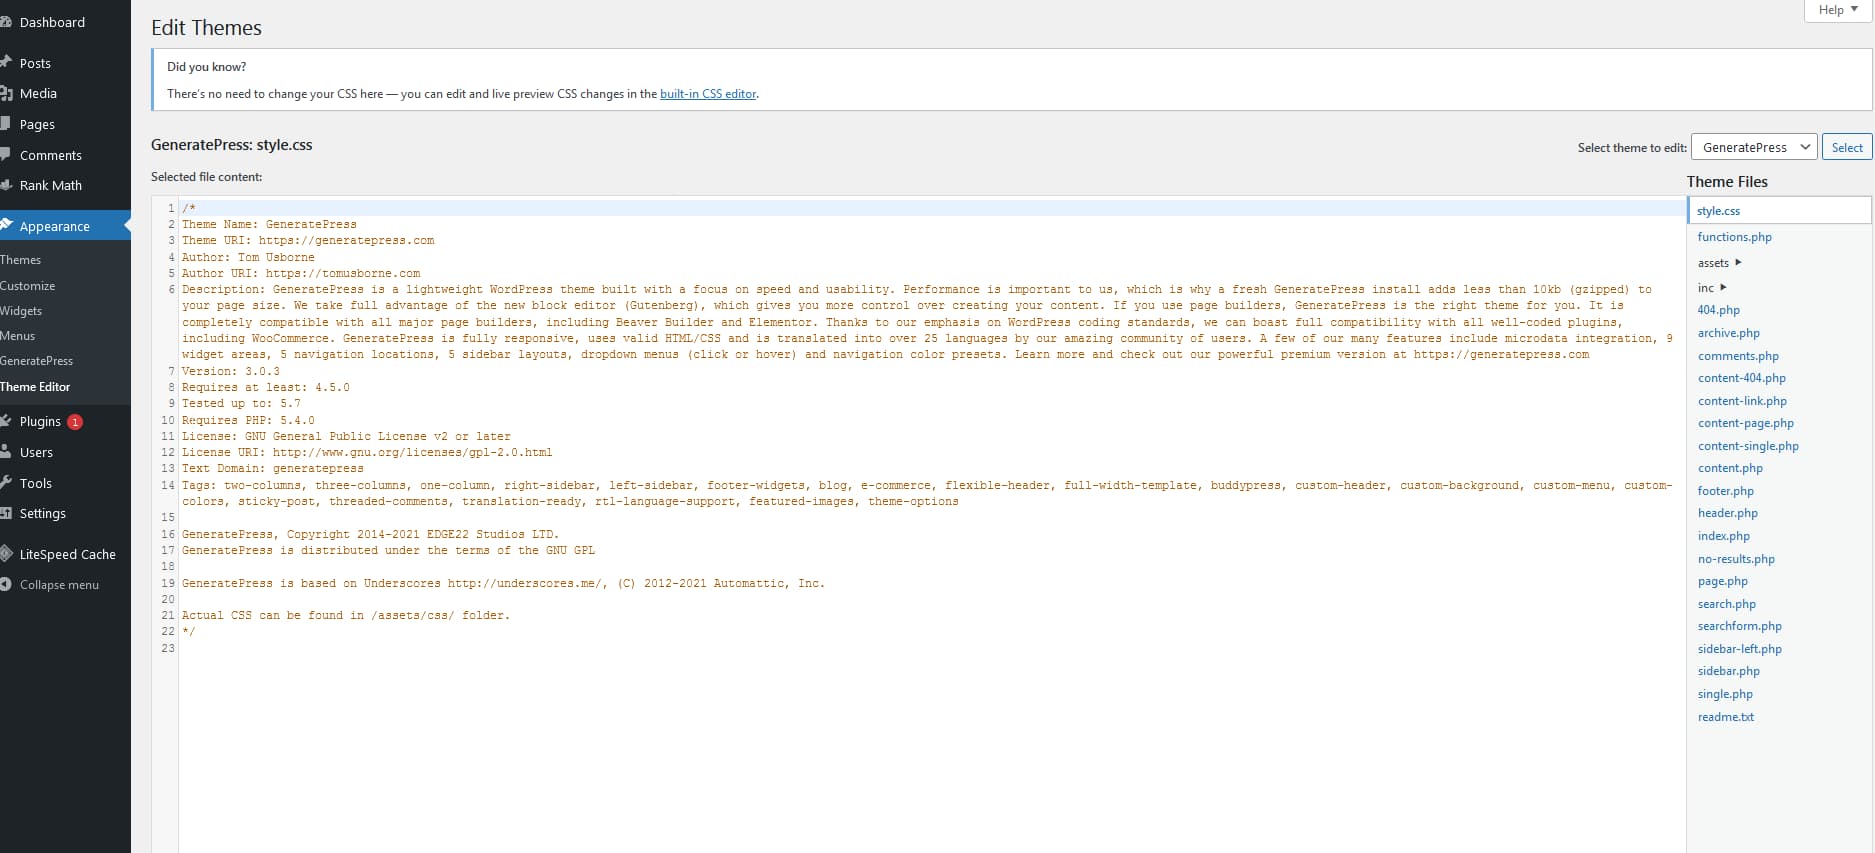
Step 4: On the right-hand side, you should see a list of theme files. From the list of files click on the header.php file. This will open the header.php file within the WordPress editor to make changes to the file.

Step 5: The header.php file will look similar to the image shown below inside the WordPress editor.
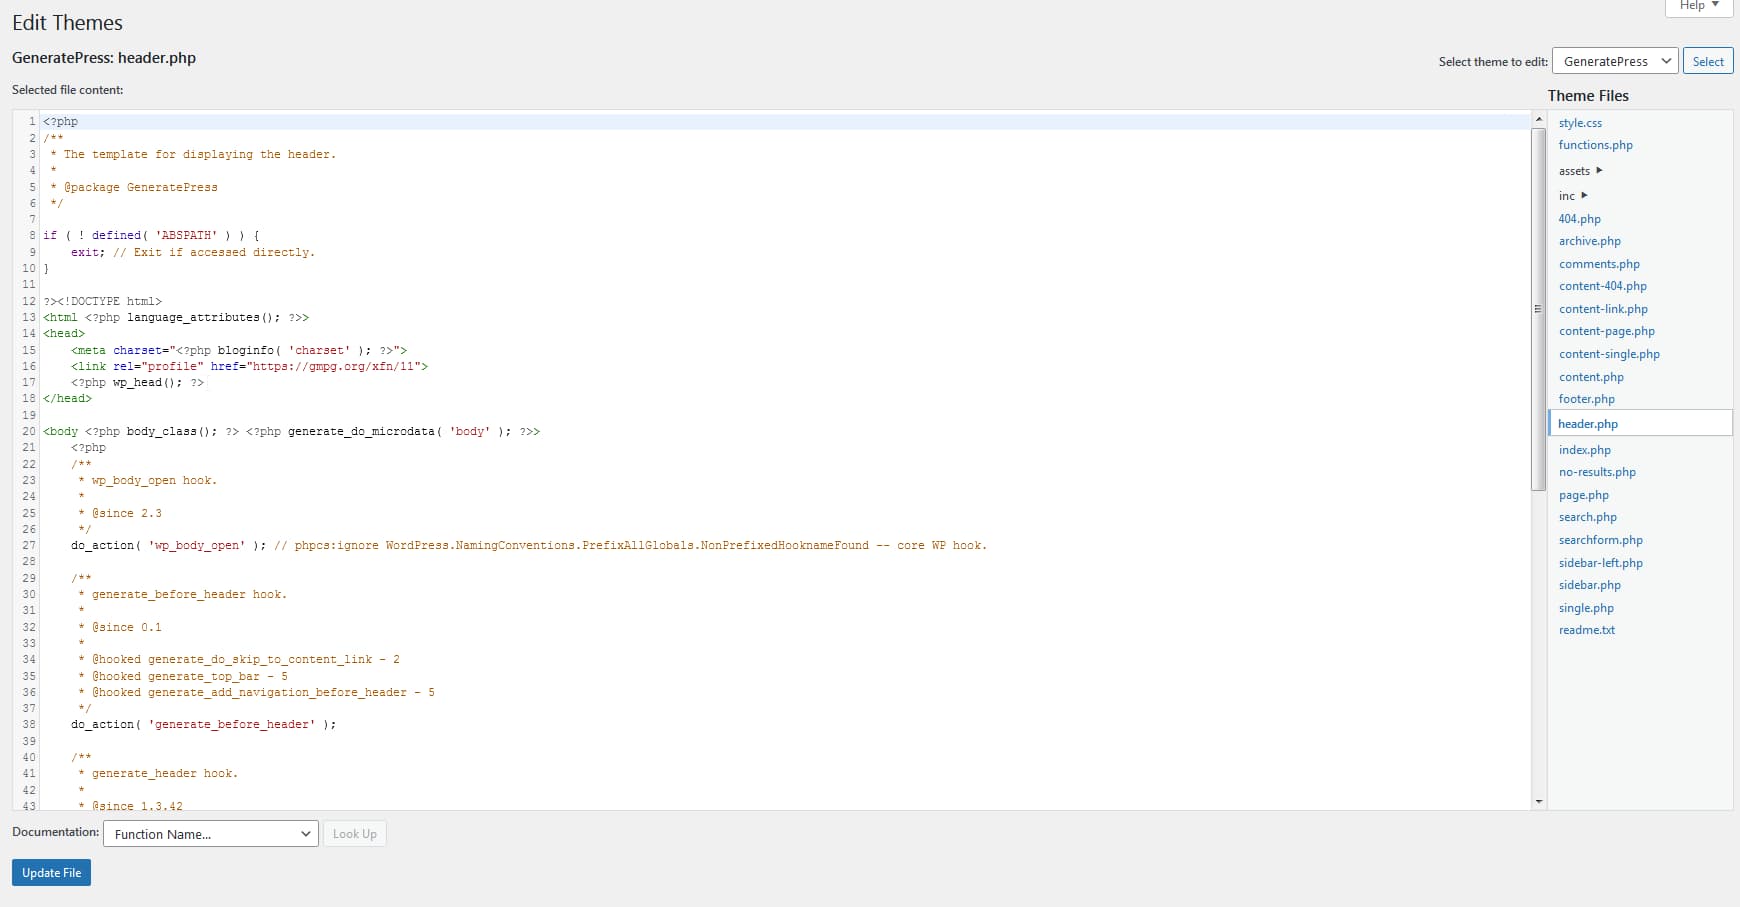
Step 6: Add the meta tag before the closing </head> tag as highlighted in the image below. In this case, the Google site verification meta tag was added. After the meta tags are added, click on the Update File button as shown in the image below to save the changes made to the header.php file.

Step 7: You can now reload your website URL, you should be able to see the newly added meta tags show up. And when you look at the source of any page on your WordPress website you should something similar to this.
Add Meta Tag to WordPress FAQs
List of wp plugins that can be used to add meta tag to wordpress?
-Headers and Footers Plugin
-Meta Tag manager
-Yoast SEO plugin can also be used to add meta tag to wordpress website.