
In this post, we will explore three easy methods to add google analytics to WordPress website.
Google Analytics is a website analytics software that is free to use and gives great amount of details such as where your website visitors are coming from, which page they spend more time, what kind of devices they use to access your website mobile device, desktop or tablet, how each page performs and a lot of other performance metrics that can be used to improve the overall performance of your website.
Google recently announced an upgrade from the Universal google analytics to event based analytics called GA4.
We will see the various steps involved in adding the google analytics code to your website, both the Universal Analytics code and GA4 analytics code.
How to Add google analytics to WordPress using Google Site Kit
The most simplest way to add google analytics to WordPress website is using the official google analytics plugin- Google Site kit.
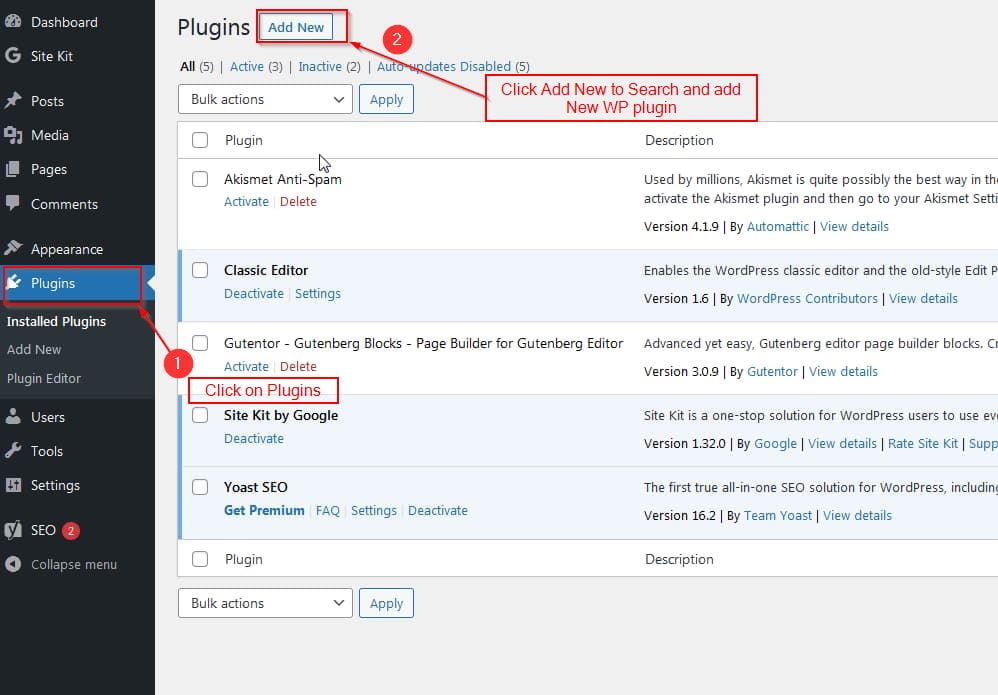
Step 1: Login to WordPress admin dashboard, from the left sidebar menu click on plugins option. This will open the plugin page, click on the Add New button as highlighted in the image below marked as 2.

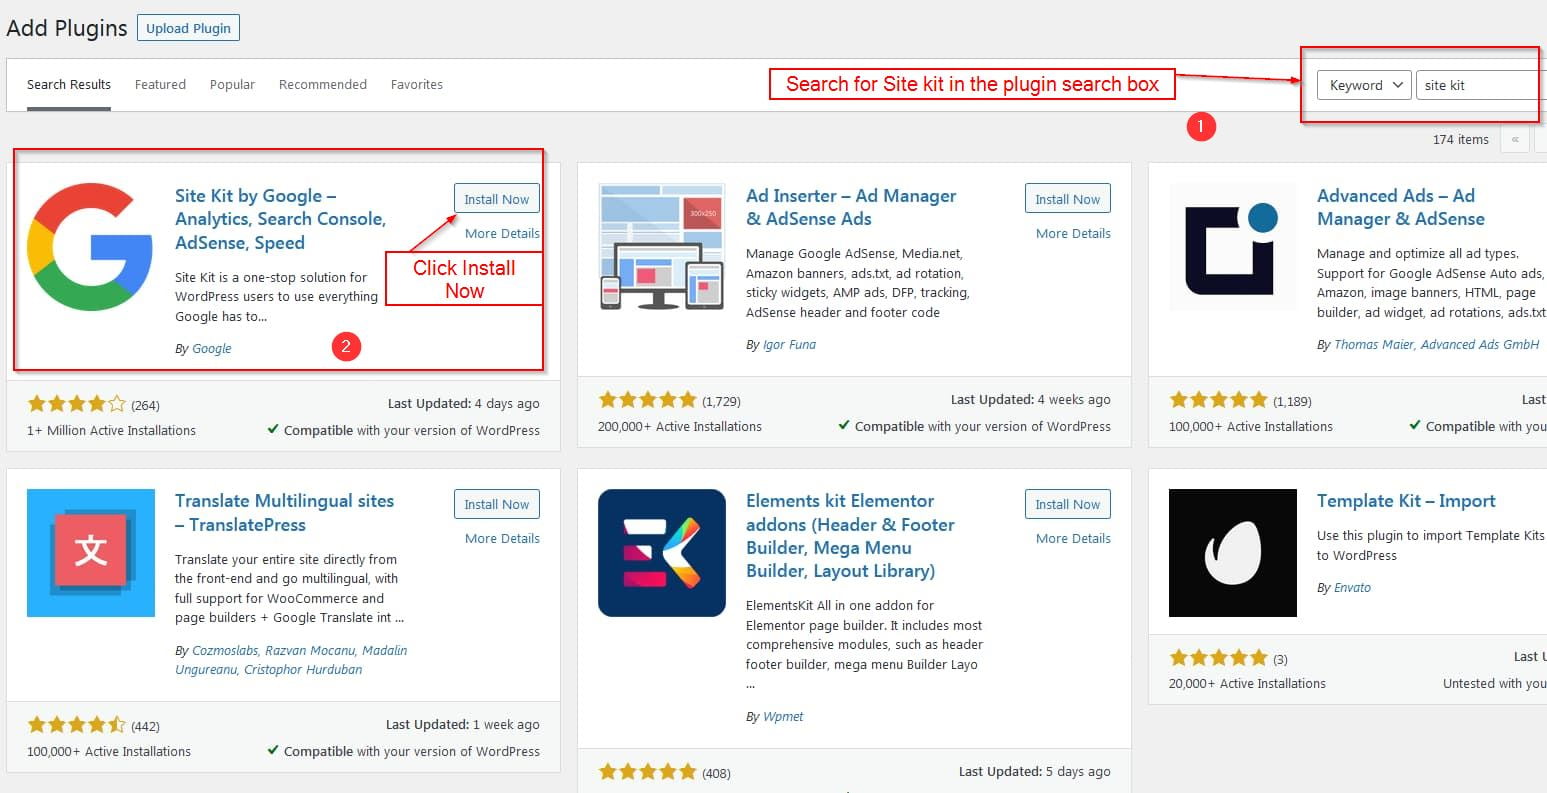
Step 2: In the add plugin page, on the right hand side use the search box to search for the Site Kit Plugin as highlighted in the image [1]. The first search result is the site kit plugin from google that we will be using for this writing as highlighted [2] in the image below. Click on Install Now button to install the Site Kit plugin.
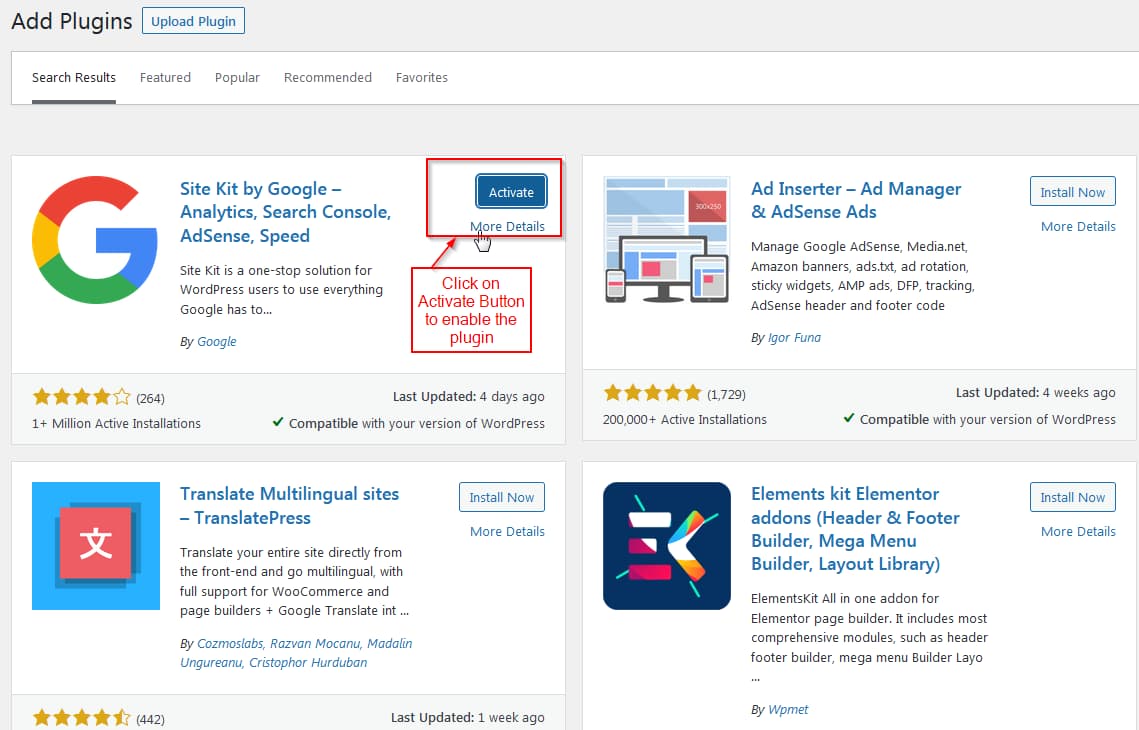
Step 3: After successfully installing the site kit plugin, click on activate now button to enable the plugin as shown in the image below:
Step 4: Clicking on activate button will redirect you back to the plugins page, and display a success message from google site kit. You should see a screen similar to the image below:
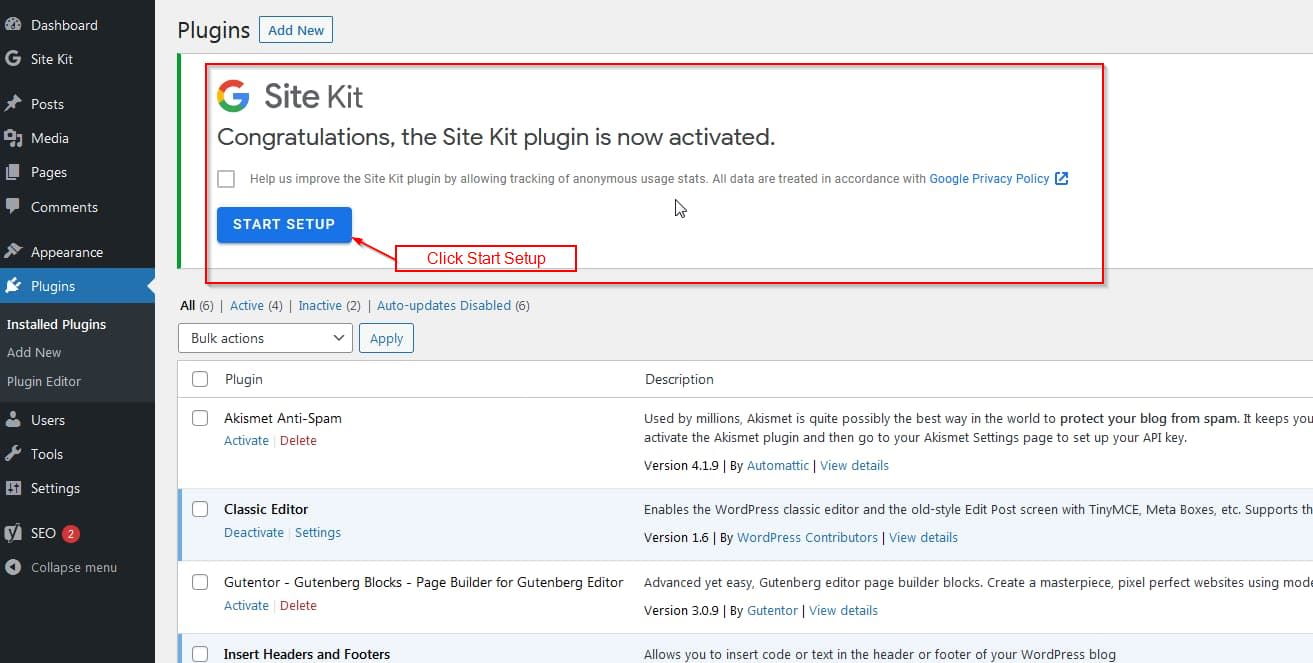
Click on START SETUP button to continue setting up and configuring Google Site kit.
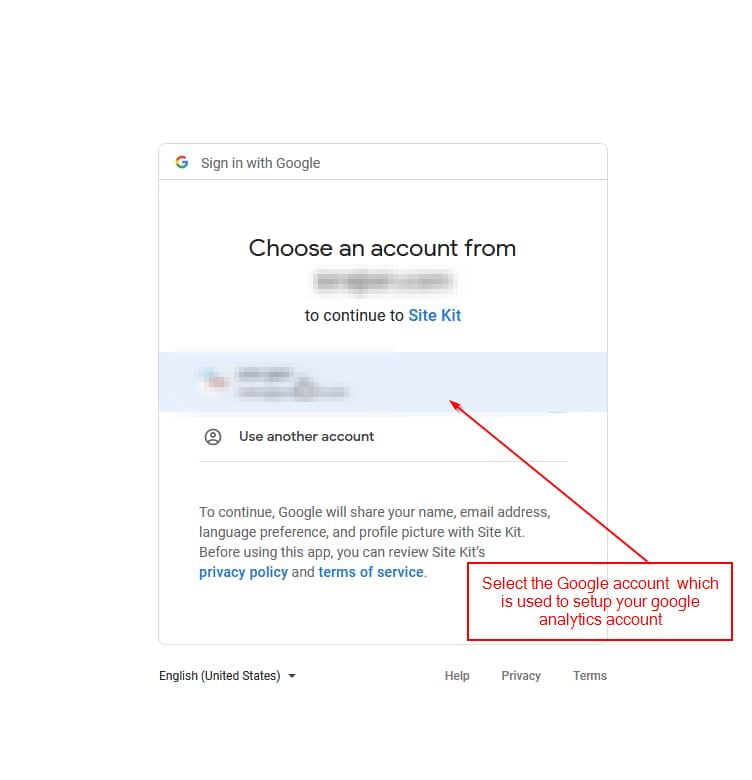
Step 5: After you click on start setup button, you will be redirected to Google login page. Here you will have to login to your gmail account which is linked to your WordPress website, this step is a mandatory step that will main verify that you own and control the website to which you are planning to add the google site kit plugin. The screen will look like the image below:

Step 6: Select the google account which you have used to verify your website in Google search Console or have used it to setup Google Analytics account.

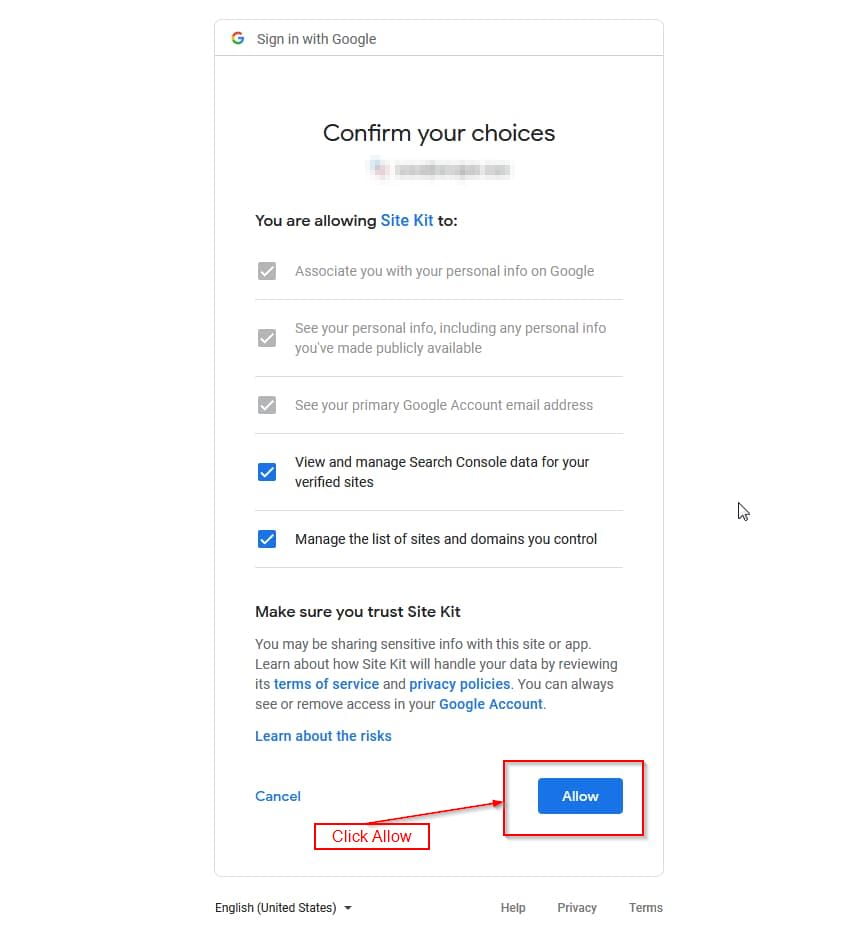
Step 7: Once you authenticate with your correct google login, it will ask you grant access to site kit. Click on allow for both the permissions, just as in the below two images:


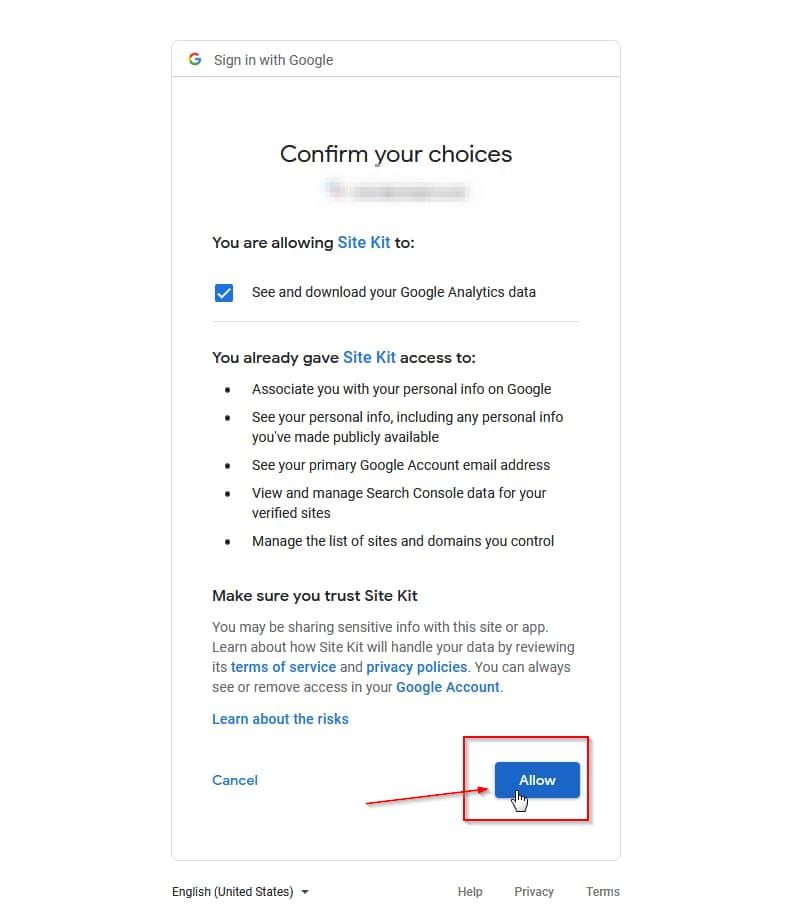
Step 8: In this step, Google site kit will show you a pre confirmation screen and also the list of things that it will access from the google account. Click on Allow to proceed further. Just as the illustrated in the image below:
Step 9: Now that you have allowed Google site kit to access your google webmaster tools or Google Search Console to verify website ownership. Once Site kit is able to successfully verify the website ownership you will then be redirected to the next step as shown in the image below:

Step 10: Click allow and proceed to complete the setting up of Google site Kit on your wordpress website. You should then be redirected to the final screen which will like the one below:

Step 11: You Should now see a confirmation screen, displaying that Google site kit has been successfully setup. Click on Go to my Dashboard button to access the Google site Kit dashboard and other settings.
Step 12: The Google site kit admin dashboard will look something similar to the image shown below:
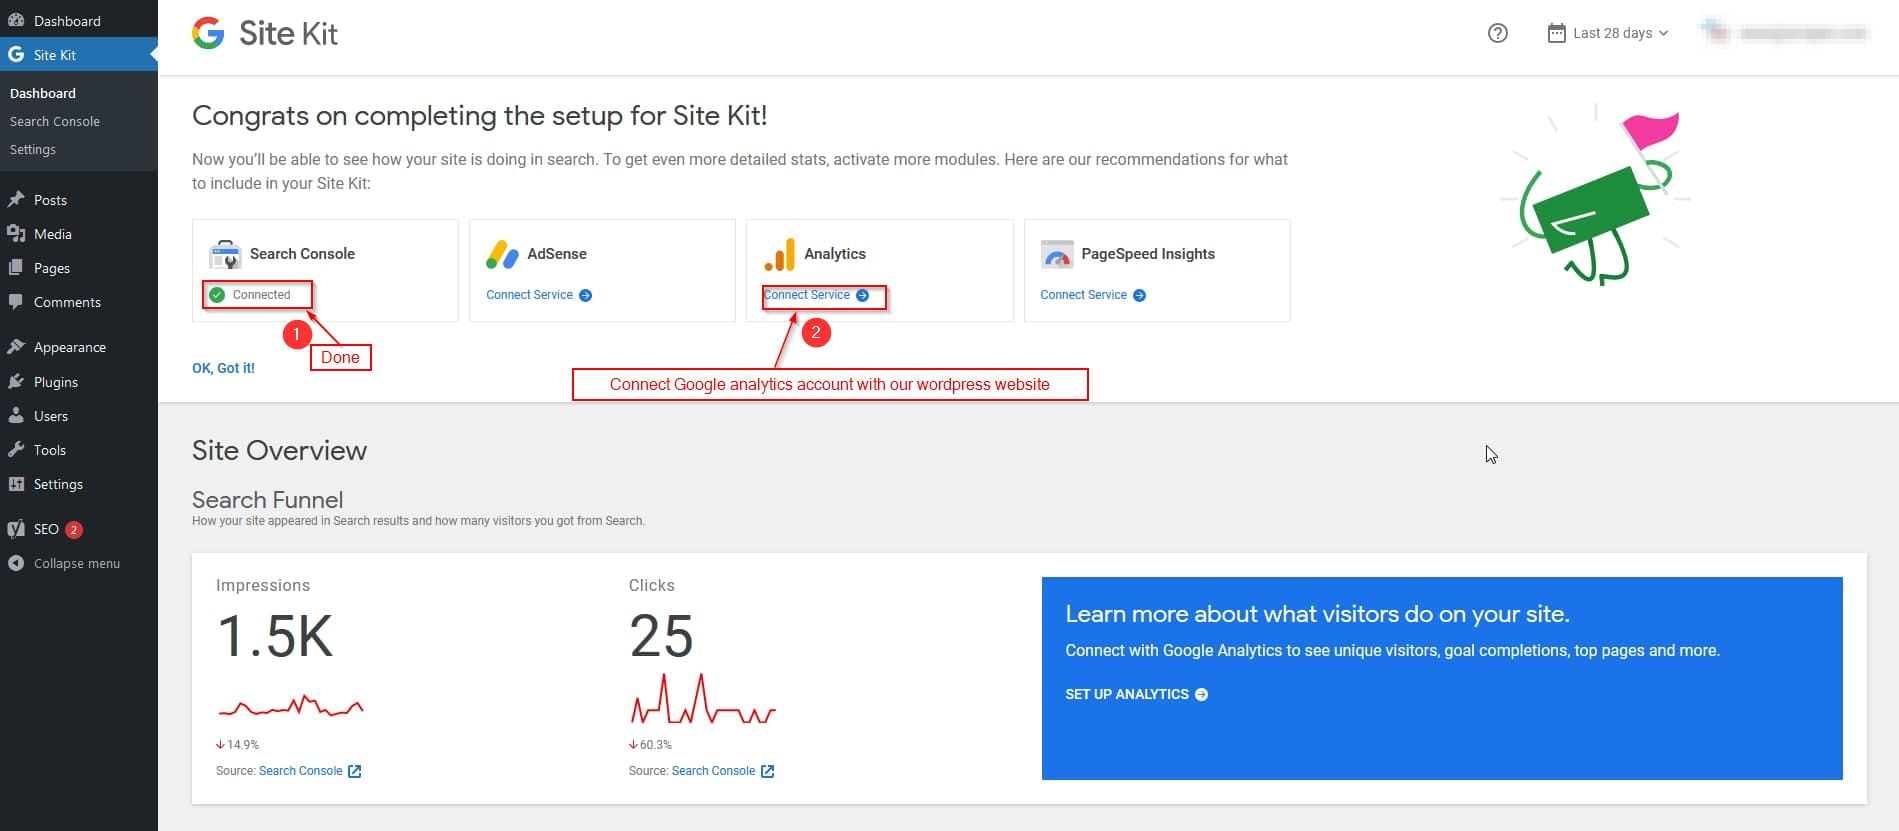
Now that we have successfully installed and configured Site Kit and linked it to Google Search console. Our next step and the main requirement is to add google analytics to WordPress website. For that we click on Connect service under the google analytics icon as highlighted in the image above marked [2].
Step 13: Clicking on connect service will again take us to Google login page, where we will have to again authenticate with the gmail account which is connected to google analytics.
Step 14: Once you have logged in with the correct google account, you will then have to grant permission to Google site kit to access your analytics data.
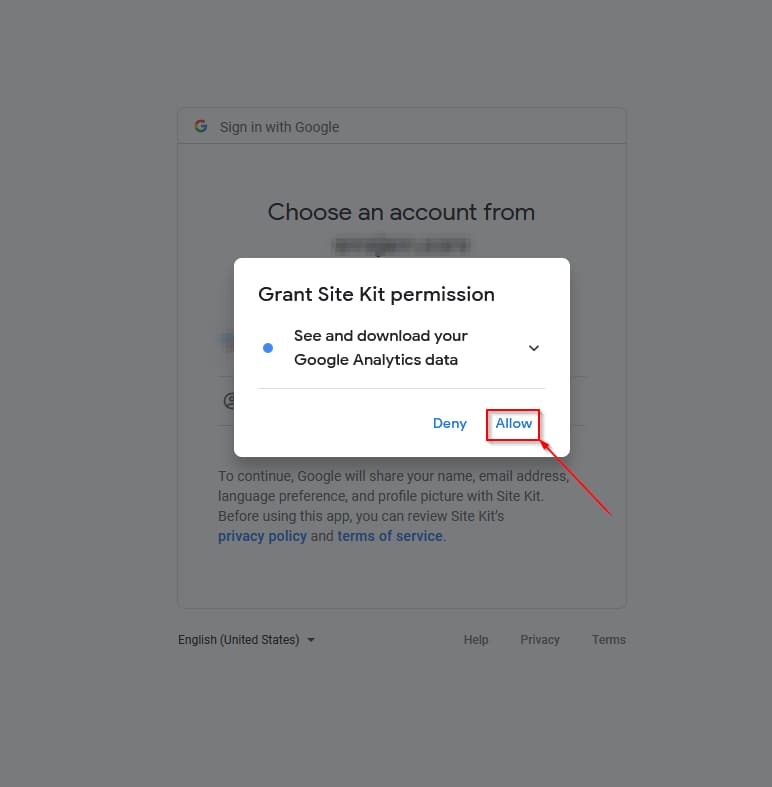
Click allow as highlighted in the above two images, to grant all the required permissions to Google site kit so that WordPress website can be linked to your google analytics account.
Step 15: You should then see a Google analytics configuration page within the Google site kit dashboard, as shown in the image below:
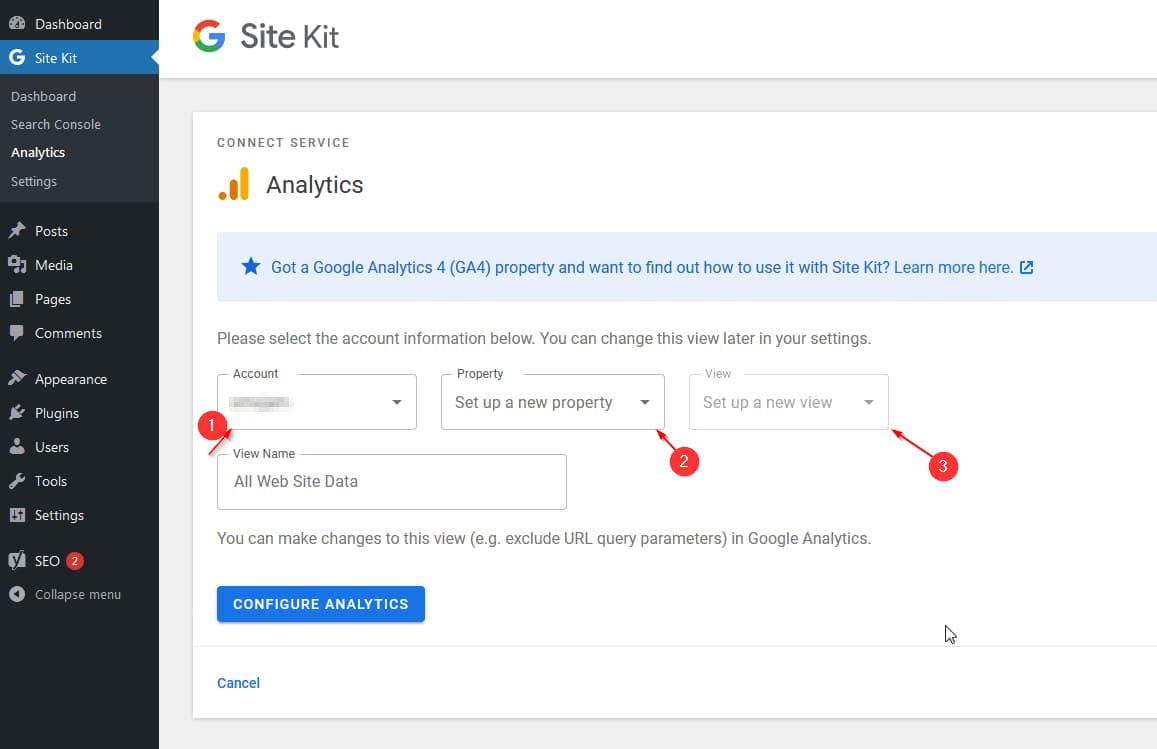
Here you will have to select the google analytics account from the dropdown menu marked as [1] in case there are multiple google analytics accounts within your gmail account. Next select the property from the 2nd dropdown marked [2], you may have multiple property based on if it is webapp, or mobile etc. Select the correct property here. Next in the third dropdown marked as [3] select the view, in basic website setups usually there will only be one view. But in case of a large website, there could be multiple views.
Finally, click on configure analytics button.
Step 16: You will then be redirected to the Google Site kit admin Dashboard, and showing a green tick below the google analytics icon. This indicates that we were able to successfully add google analytics to WordPress website using the Site Kit plugin as illustrated in the image below:
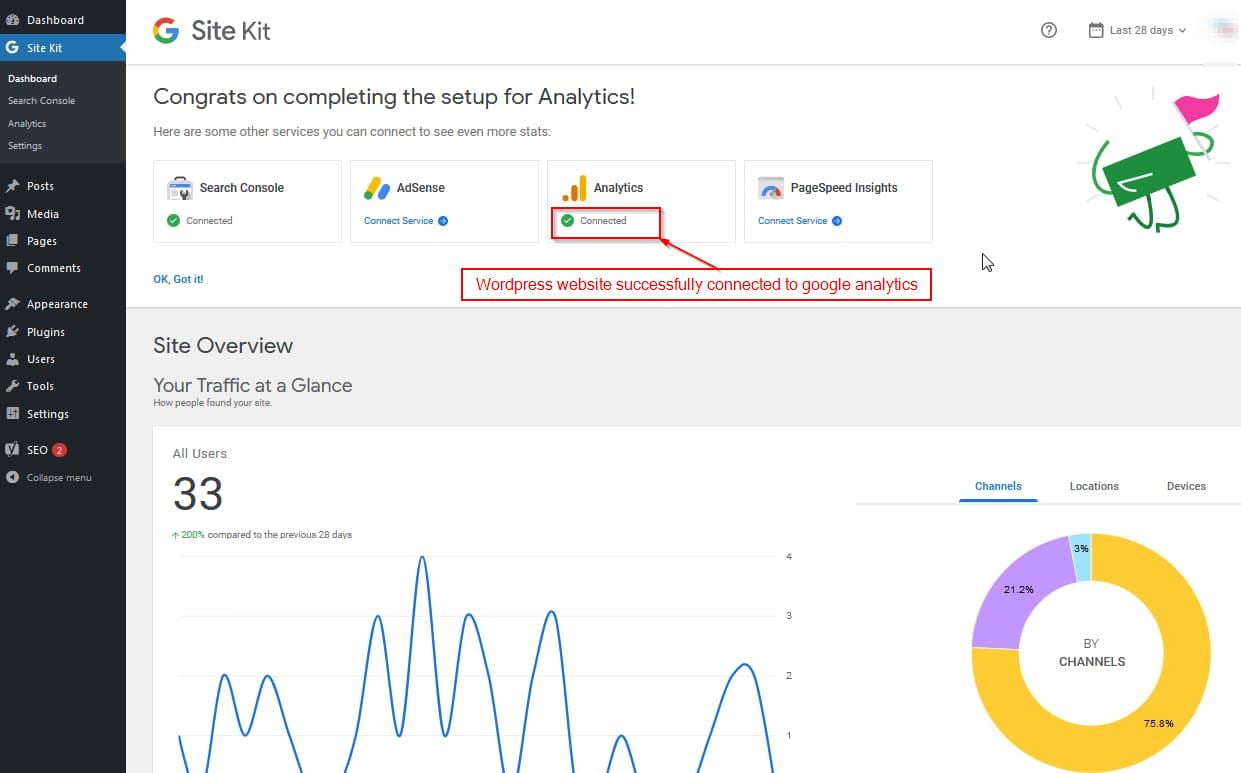
You should now be able to access all the analytics data within your WordPress website using the Site kit Plugin.
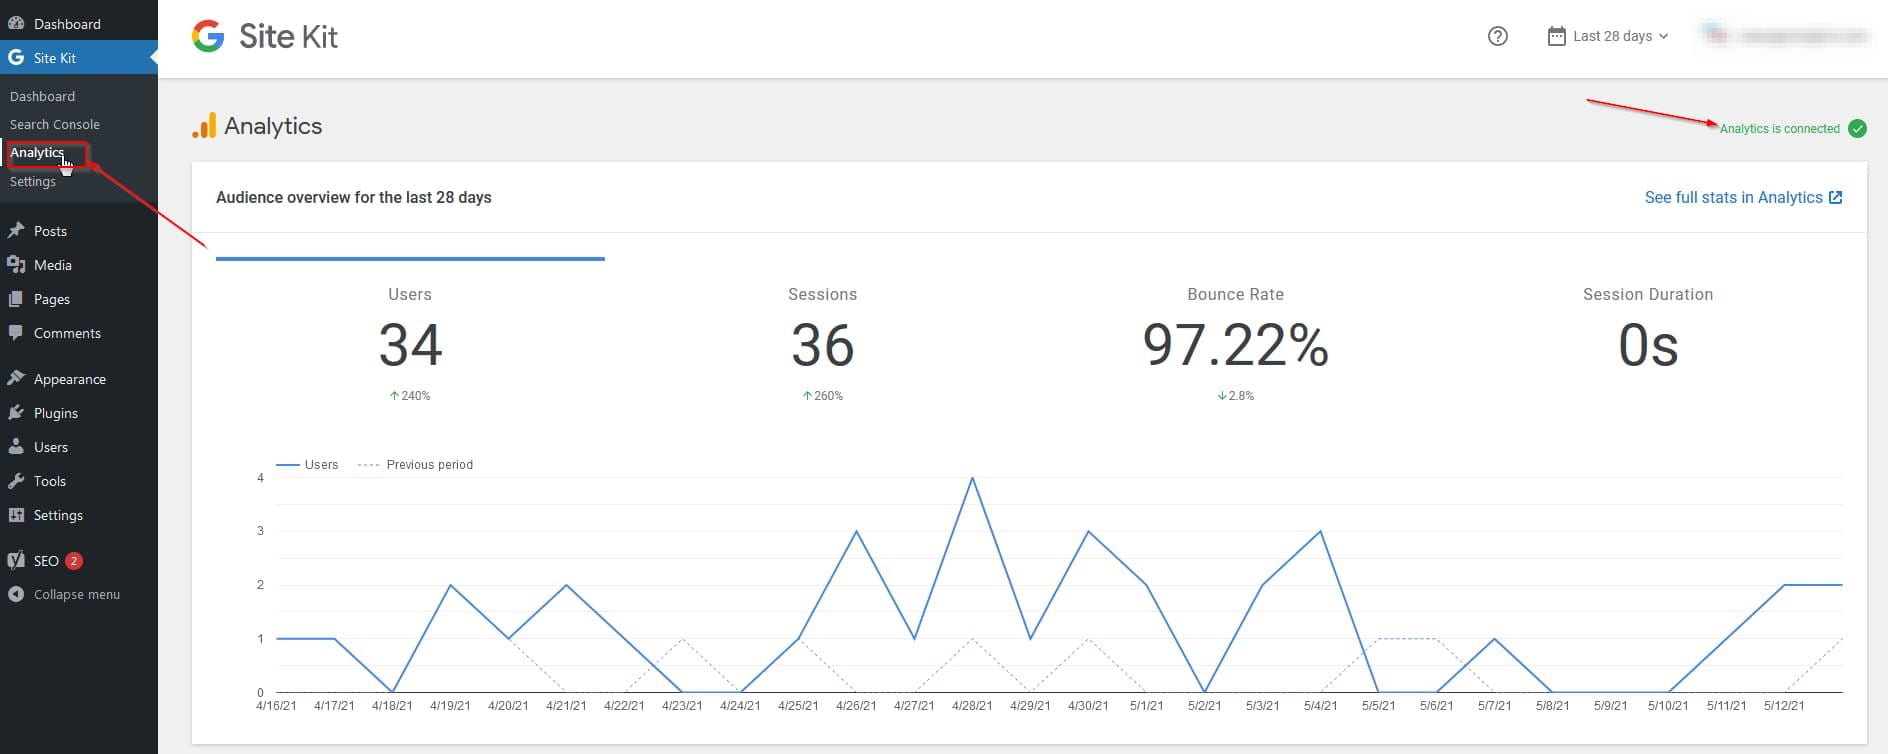
From the WordPress admin dashboard, clicking on the analytics option under the Site Kit category on the left sidebar menu will give access to all the Google analytics data as illustrated in the image above.
How to Add Google Analytics to WordPress using Headers & Footers Plugin
This method of adding Google analytics to WordPress is similar to the way we used this WP plugin to add meta tags to WordPress website.
Step 1: Login to your WordPress admin dashboard, from the left sidebar menu Click on the plugins option, you should see the plugin page open up.
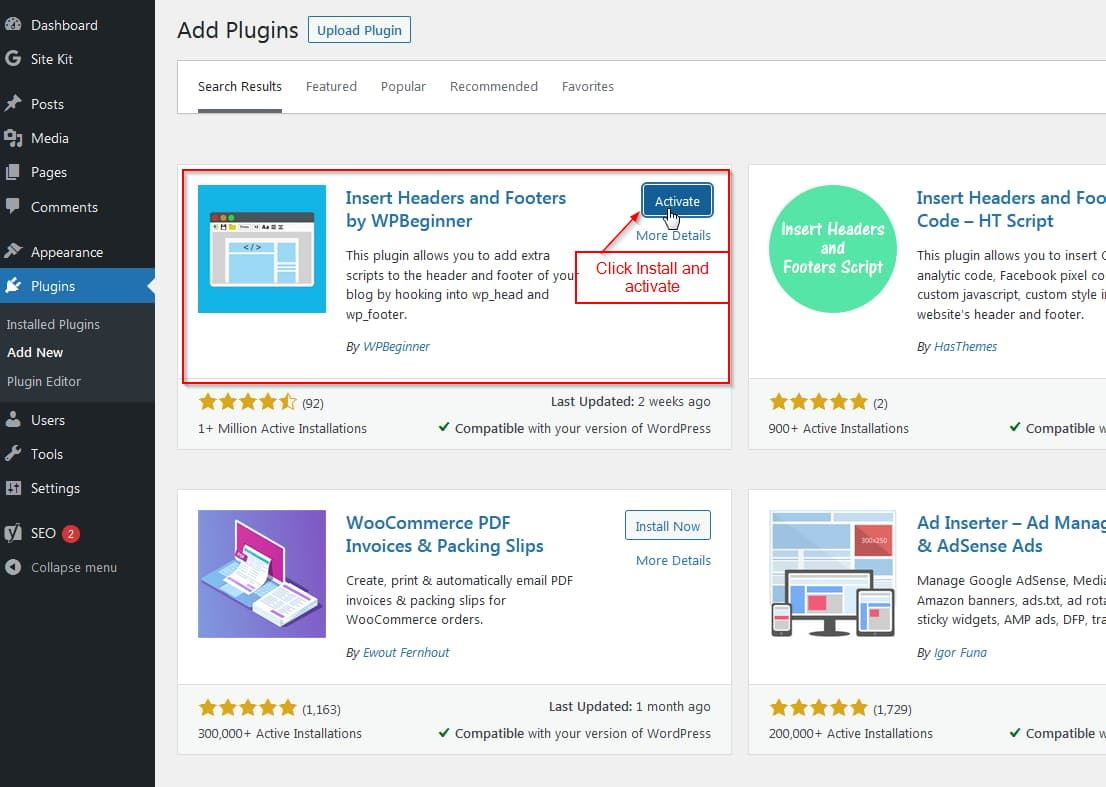
Click on the Add New button to search and add new plugin, search for ‘Insert Headers and Footers plugin’. Click on the first plugin by WPBeginner, click on install and activate to enable the plugin. As illustrated in the image below:
Step 2: Login to your Google analytics account which is linked to the WordPress website. From the left bottom corner from Google Analytics home page click on the Admin option. You should see a screen similar to the one shown in the image below:
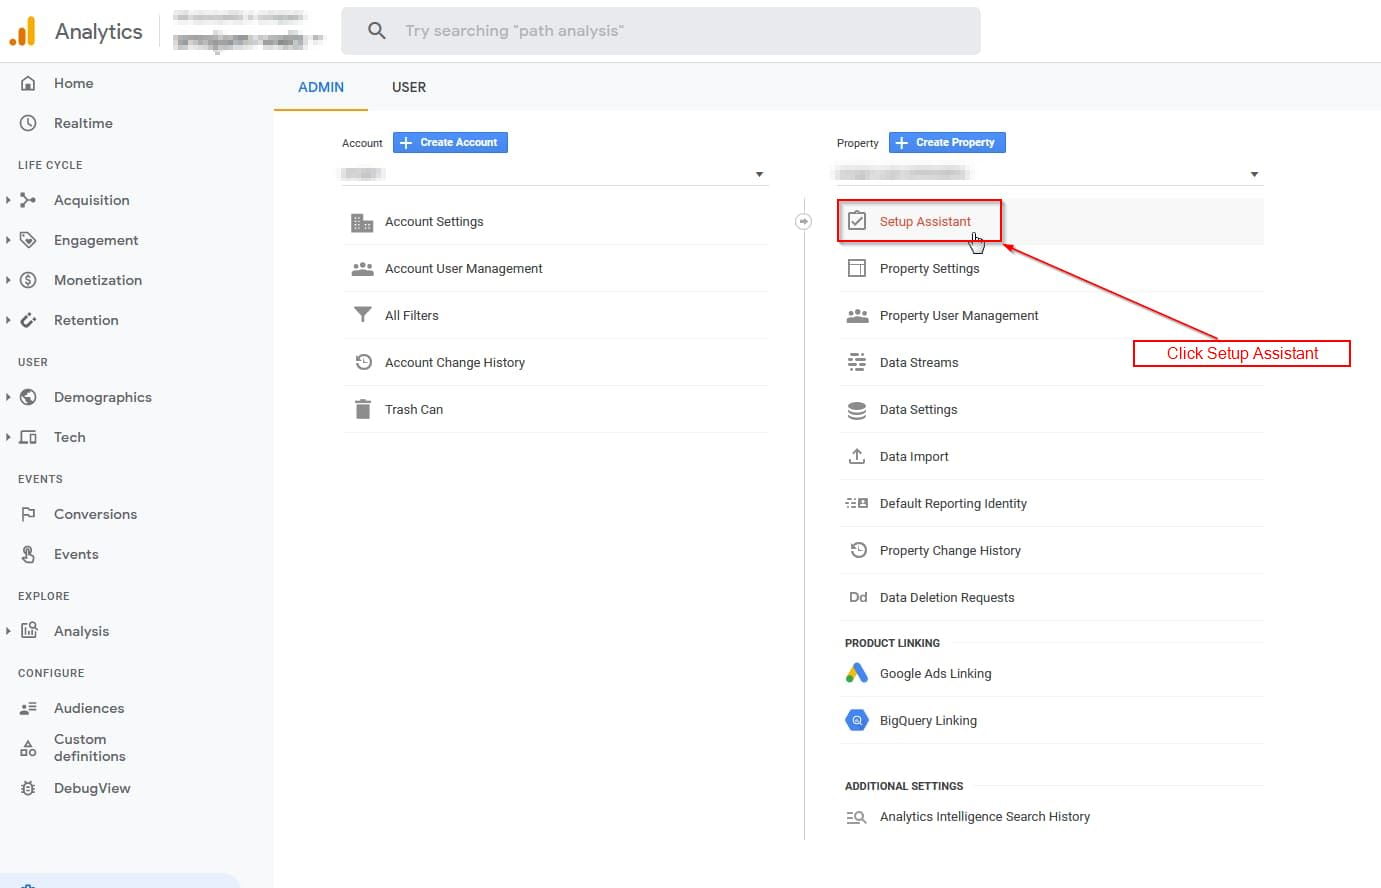
On the Google analytics admin page, under property click on Setup Assistant.
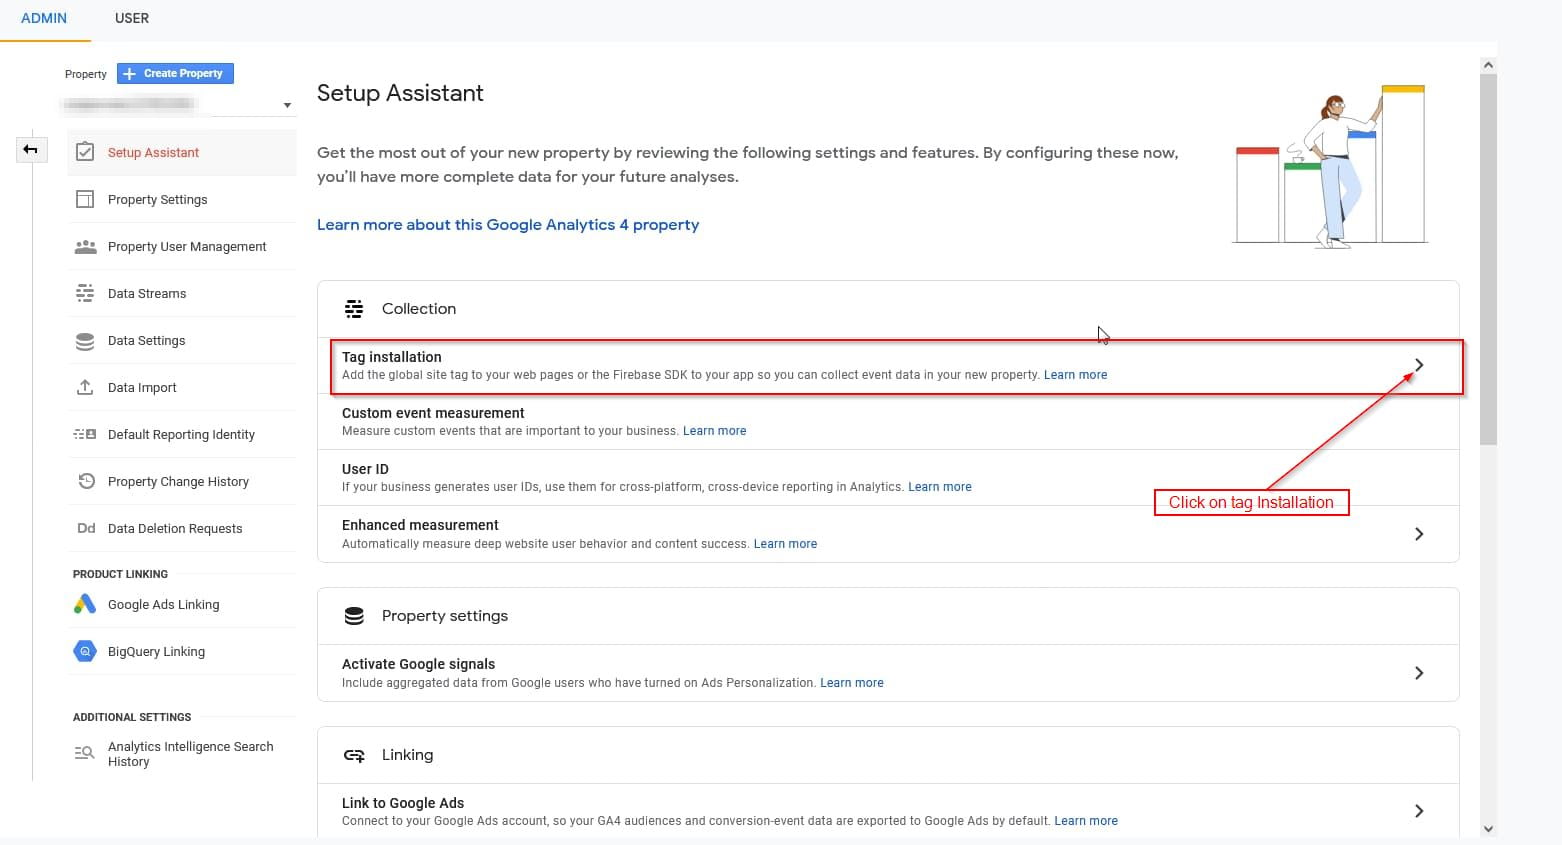
Step 3: From the Google Analytics Setup Assistant page, there are number of options provided. Click on the Tag Installation option as shown in the image below:
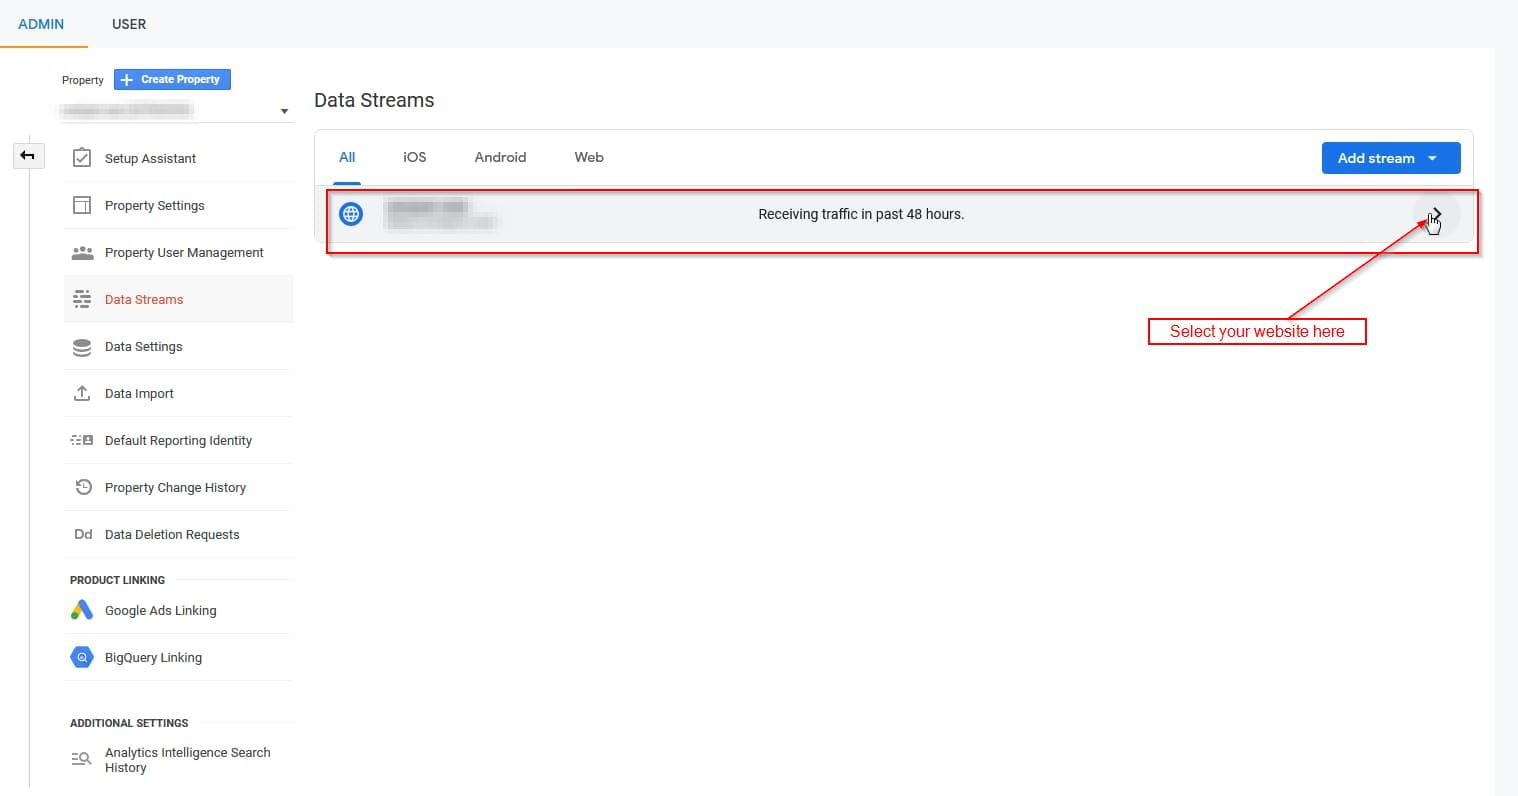
Step 4: Select the correct website with which you would want to link under Data Streams as illustrated in the image below:
Step 5: On the web streams page of google analytics, click on Tagging instructions marked as [1]. From there under the Add new on-page tag tab, click on Global site tag (gtag.js) as shown in the image below marked as [2]. You should now see a small javascript code snippet, this is the google analytics tracking code that we need to add to WordPress. Copy this entire code as illustrated in the image below marked as [3].
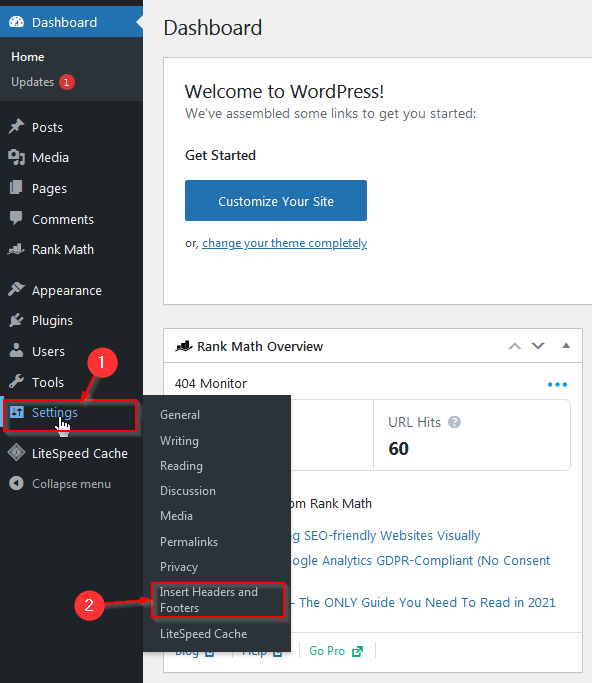
Step 6: We now go back to WordPress admin dashboard, from the left sidebar menu click on settings or just move your mouse pointer over it. You should see another sub menu with the insert headers and footers option. Click on it as shown in the image below:
Step 7: On the Insert Headers and Footers plugin page, paste the Google analytics tracking code inside the first text box which says ‘scripts in header’. As indicated in the image below:
Scroll to the bottom of the page and click on the Save button to save the changes. Now go back to your website URL and refresh the page, you should see the analytics code on all pages of the website within the <head> section.
How to Add Google Analytics to WordPress using WordPress internal Editor (Without Plugin)
This is the most easiest way of all the methods to add Google analytics to WordPress website, using the WordPress internal code editor we add the analytics tracking code directly into the Header.php code. Below is the step-by-step procedure
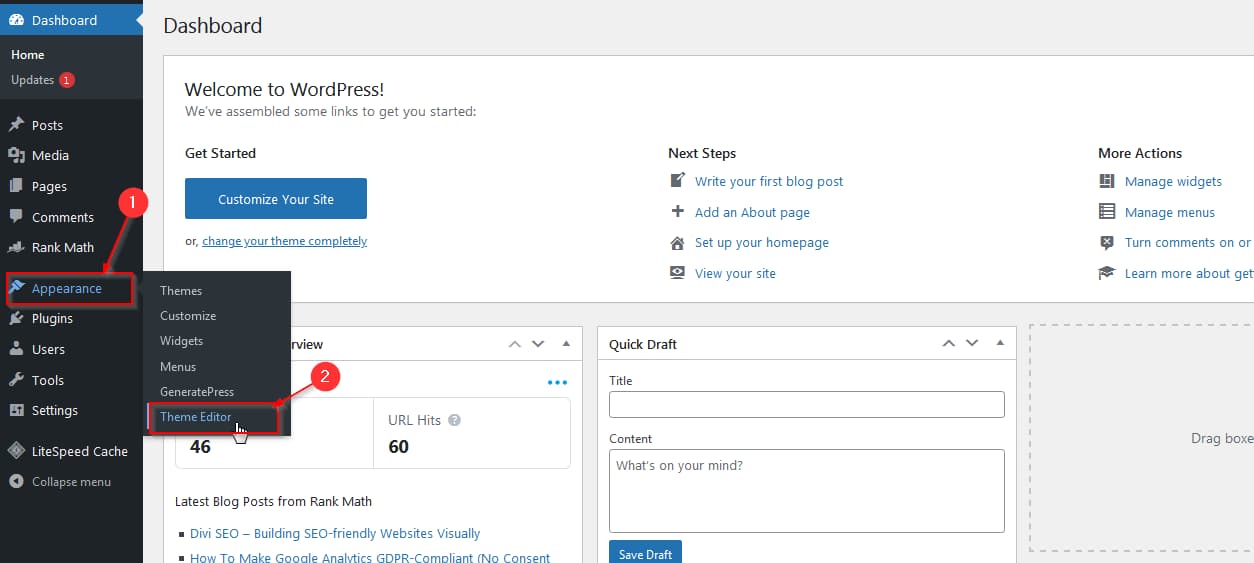
Step 1: Login to the WordPress admin dashboard, from the left sidebar menu Click on appearance, then from the sub menu click on Theme Editor just as illustrated in the image below:
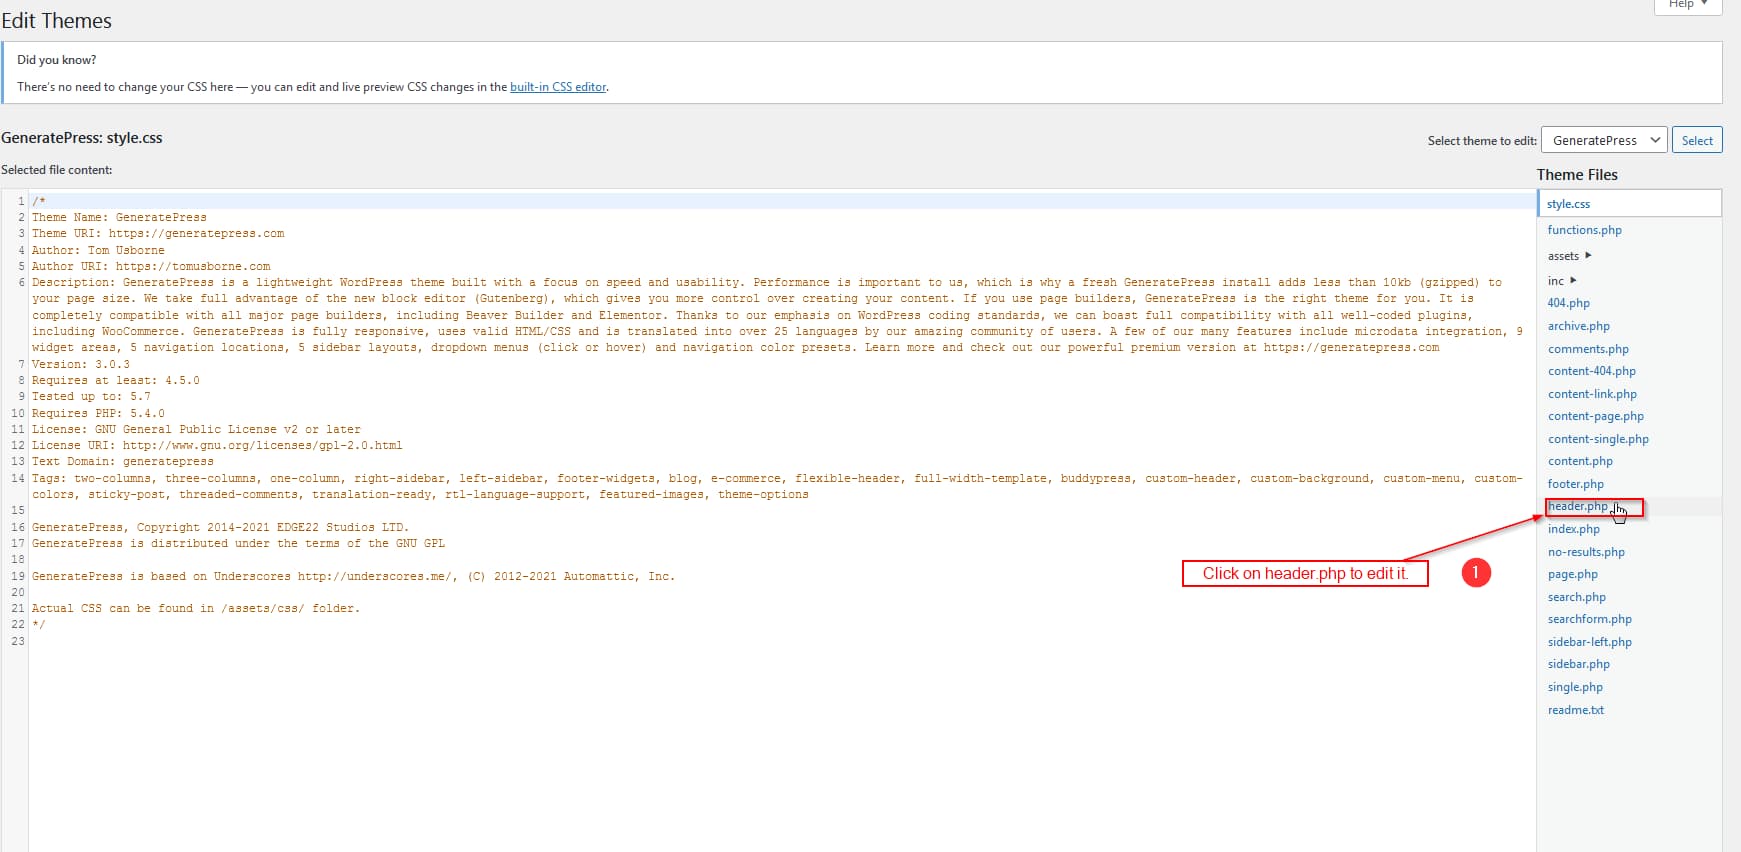
Step 2: Select the header.php file from the list of theme files on the right hand side to start editing header.php using the WordPress internal code editor as shown in the image below:
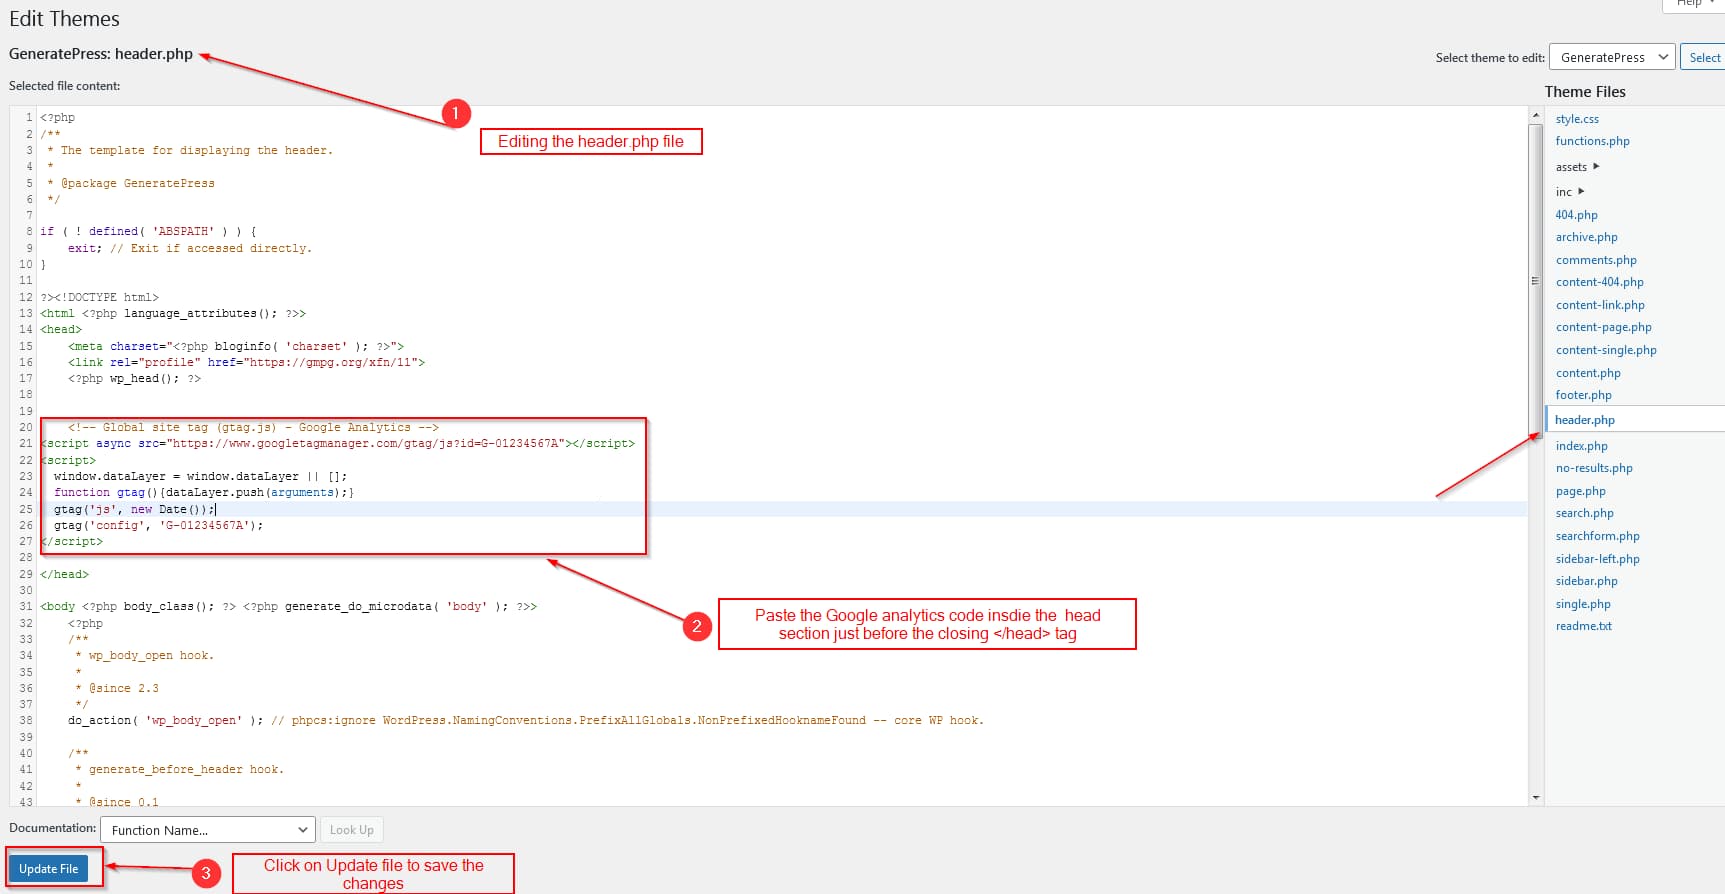
Step 3: Paste the copied Google analytics code snippet inside the head section of the header.php file just before the closing </head> tag. Scroll down and click on the update file button to save the changes made to the header.php file as illustrated in the image below:
That is all. Now you should see Google analytics code added to all pages of your WordPress website. This is the easiest way to add Google analytics code to your WordPress website.
This method to directly edit the WordPress theme files and add the analytics code is the most efficient way to do, as it has very little impact on the website pagespeed. You may not be able to access the entire analytics within the WordPress interface like the data provided by Google Site kit plugin.