Cloudflare add user is an amazing feature provided by Cloudflare for free that every DNS service provider or every domain name registrar must provide. Cloudflare multi-user account feature can be used to grant access to multiple users to manage & control Cloudflare settings of multiple websites. Cloudflare invite members functionality allows the account owner to invite users by sending them an email invitation to manage the account on their behalf.
Cloudflare Add user – roles and permissions
Cloudflare multi-user accounts allow for setting the permission level to the users who are granted access to manage your Cloudflare account settings. Cloudflare access control allows for two user roles to be assigned to any user or member while granting them access to your Cloudflare account.
Cloudflare User Roles
1- Super Administrator: The initial email id or the user who creates the Cloudflare account is by default given super administrator privileges. The Super administrator user role grants access to all Cloudflare settings including Billing, audit logs, add user, remove user, change Cloudflare user membership, add or remove a website from Cloudflare.
2 Administrator: The Cloudflare administrator privileges provides access to all the Cloudflare settings except the Billing section & Cloudflare user management section.
These two user privileges are available to Cloudflare Free, Pro & Business users.
Cloudflare Enterprise customers can assign additional user roles to multiple users granting them multiple access control levels apart from the Super administrator & administrator roles which is available in all cloudflare plans.
How to Add User to Cloudflare & Share Access or Delegate access
As a Cloudflare user, you can grant access or share access to Cloudflare domain DNS settings with developer or server administrator to allow them to make changes to the DNS settings whenever you change your server or hosting provider. With Cloudflare shared accounts, you can share Cloudflare account access and still control the ownership.
With the Cloudflare invite user functionality you can add user to Cloudflare by inviting your developer or IT administrator to access Cloudflare domain settings. The steps given below demonstrate the Cloudflare add user functionality.
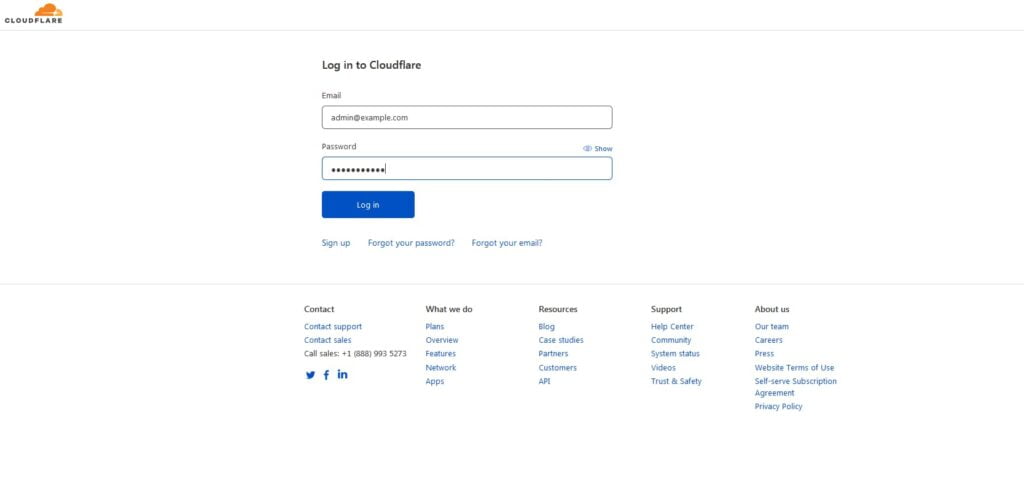
Step 1: Firstly, open the Cloudflare login https://dash.cloudflare.com in your browser as shown below:

Step 2: Enter your email id linked to your Cloudflare account, enter the Cloudflare password. Make sure you use the super admin credentials to log in to Cloudflare. As only the primary account owner used initially to setup your Cloudflare will be able to invite members and share access to Cloudflare.
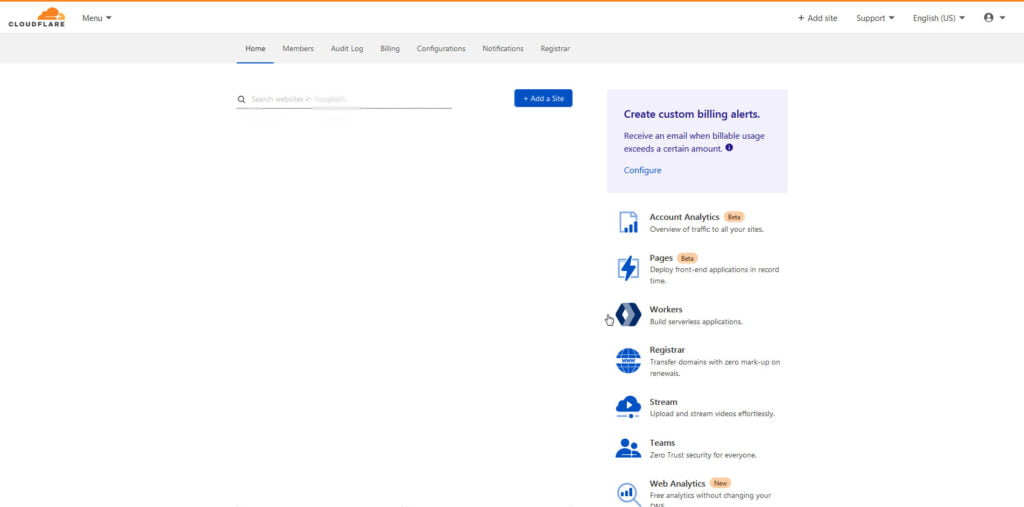
Step 3: After successfully logging into your cloudflare account. You will see your cloudflare dashboard, you should see the list of websites or domains that you have added to cloudflare (this includes both active and inactive websites).
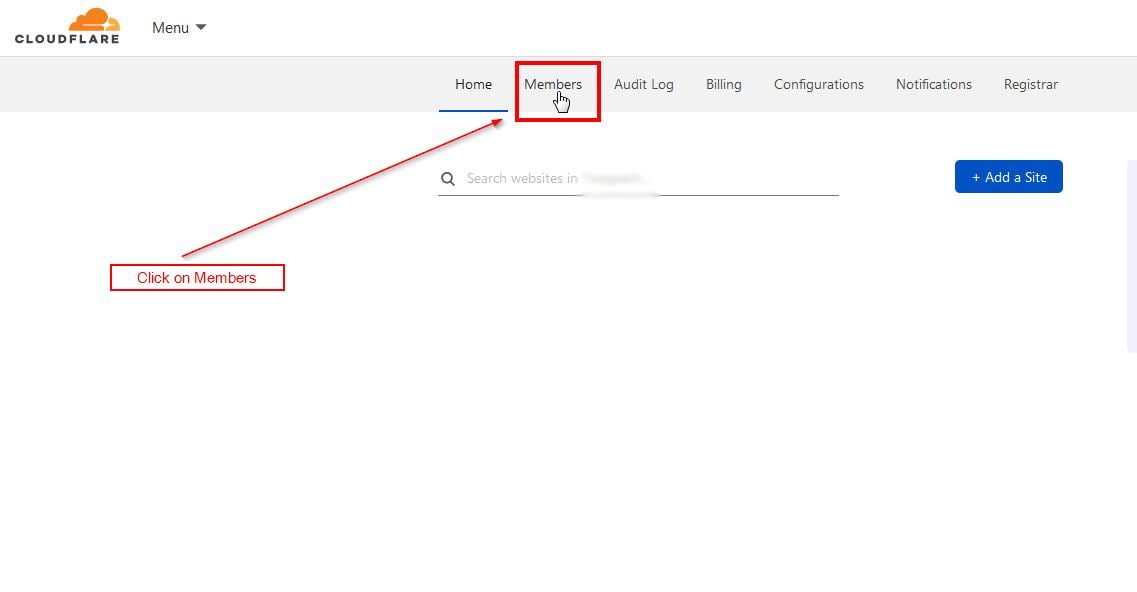
Step 4: From the top navigation bar you will be able to see an option ‘Members’ click on members option.
Step 5: Clicking the members option will take you to the invite members screen as shown below:

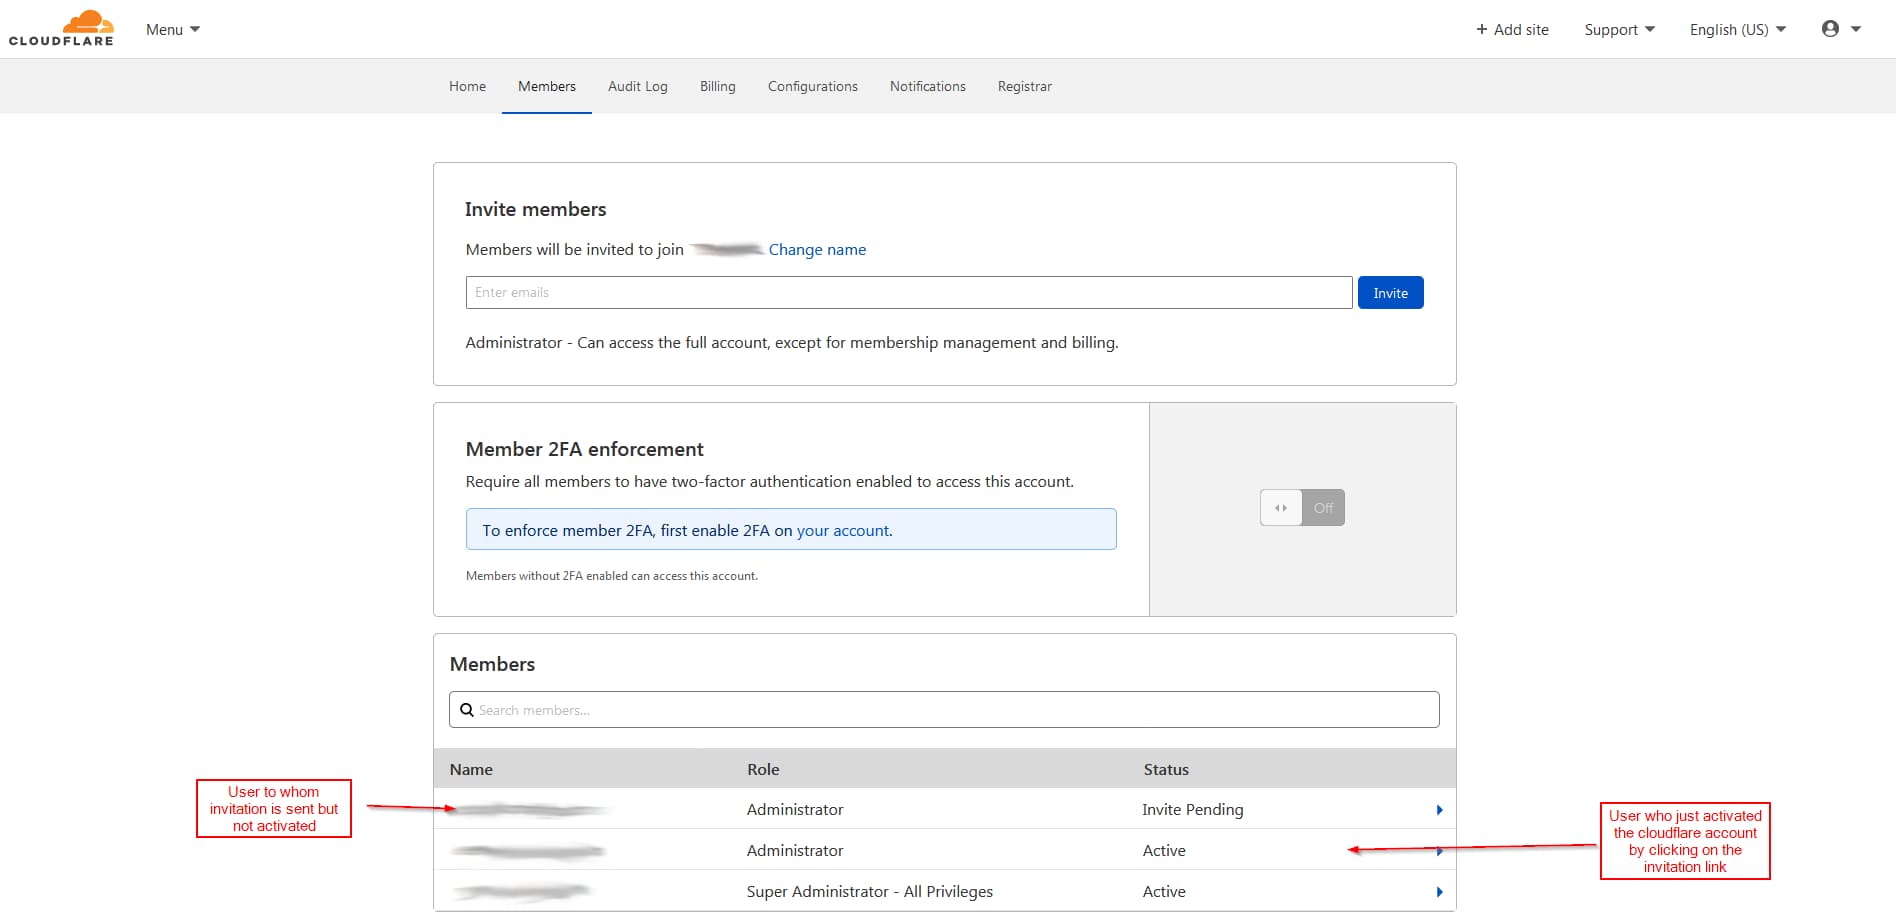
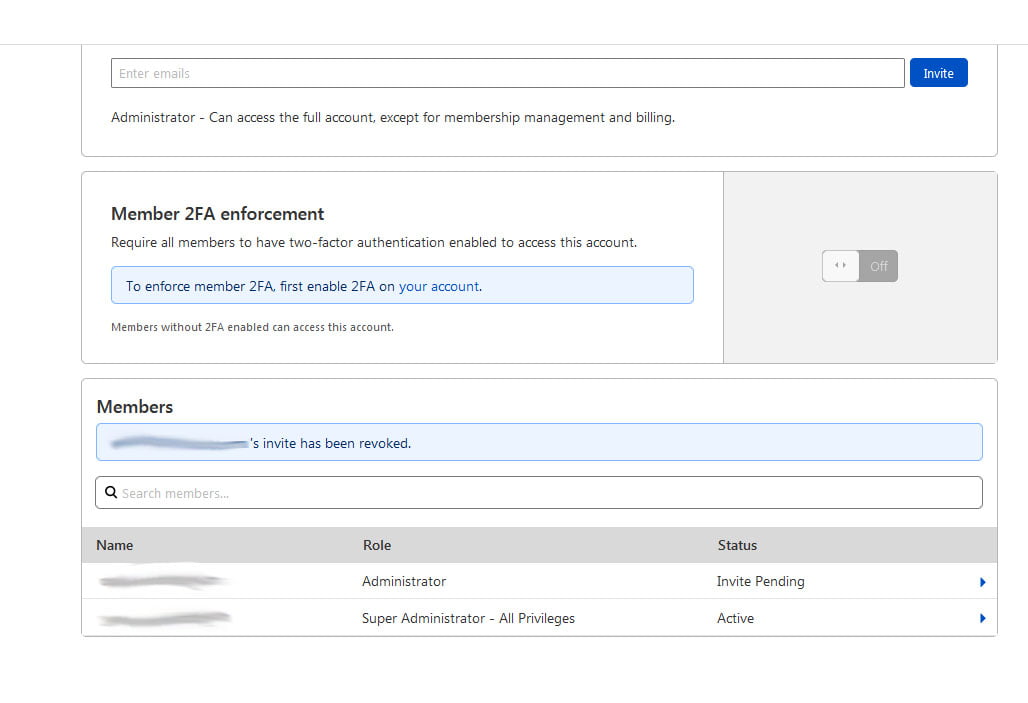
Step 6: Here you will be able to see 3 sections: invite members, Member 2FA enforcement and Members. In order to grant access or share Cloudflare access to another user or member you will have to send an invite to their email id from the Cloudflare add member panel. To invite, in the invite member section enter the email id of the user to whom you would like to grant access to your Cloudflare account as shown in the below screen.
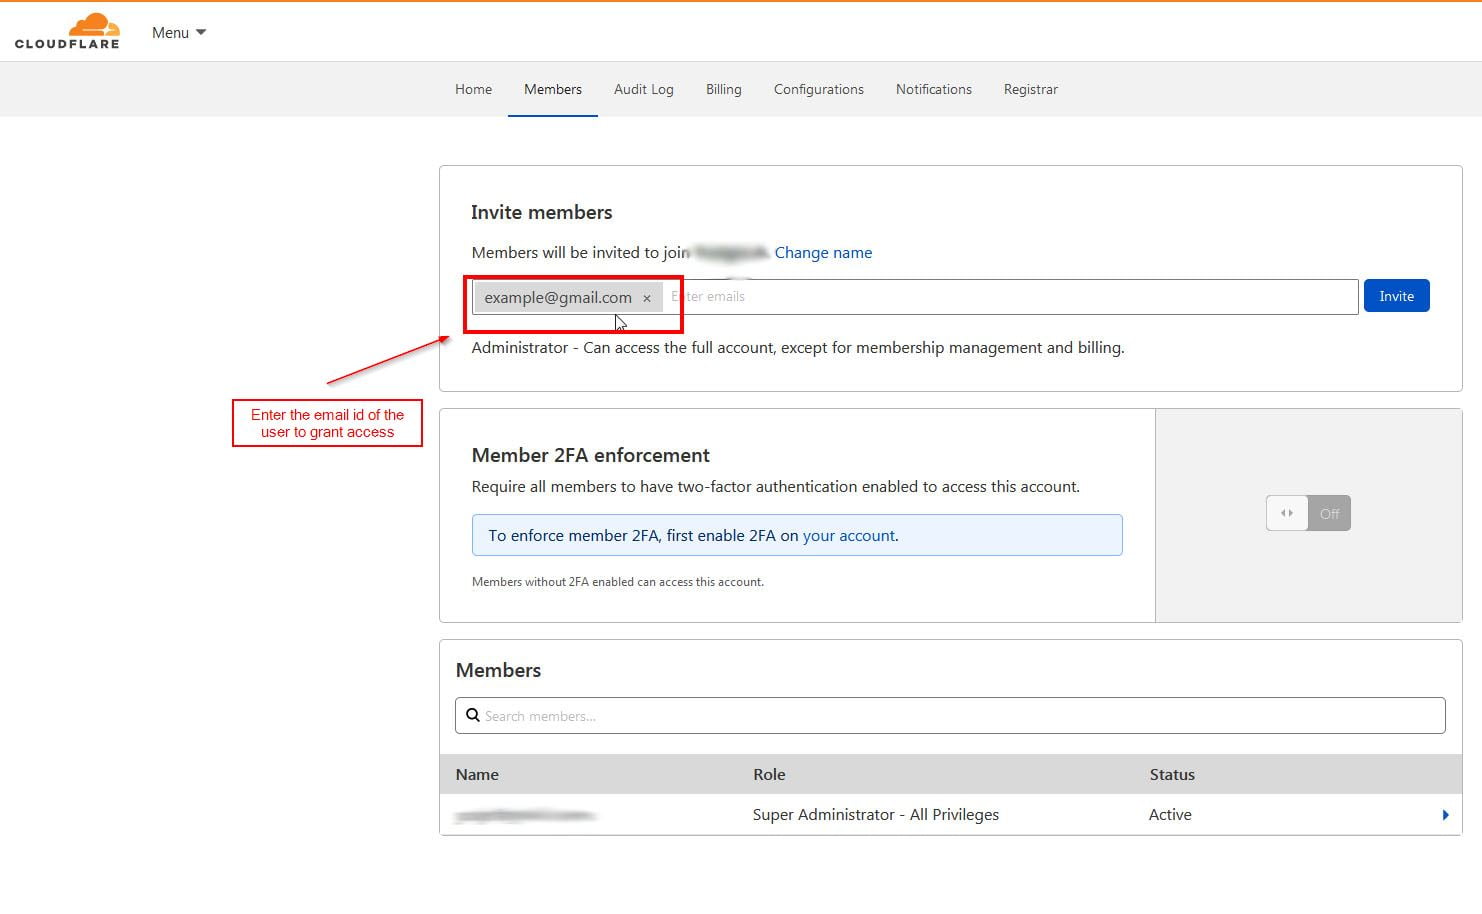
In case, you would like to invite multiple users you can do so by adding all the email ids separated by comma.
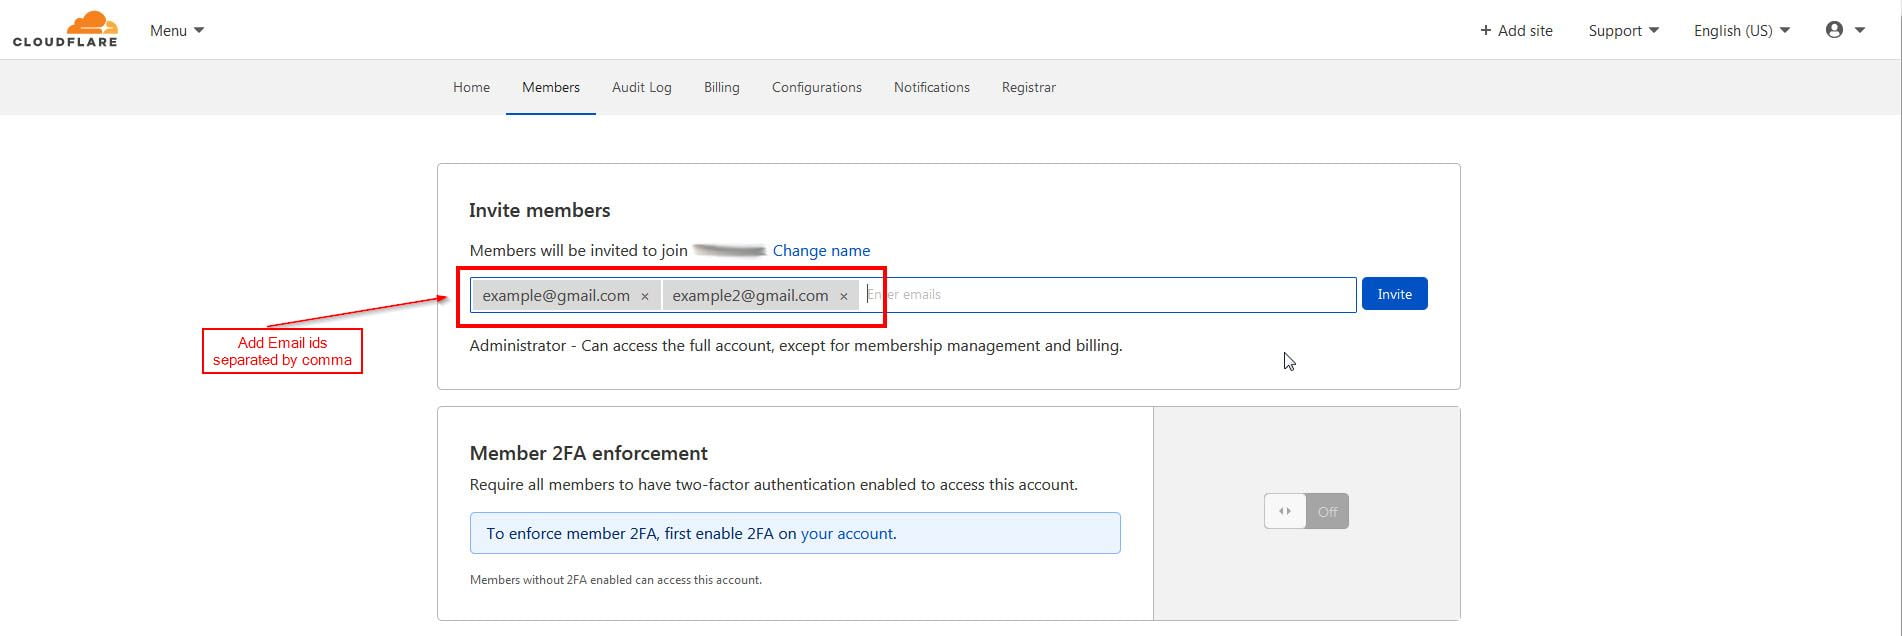
Step 7: After adding all the email ids click on invite button as shown below.
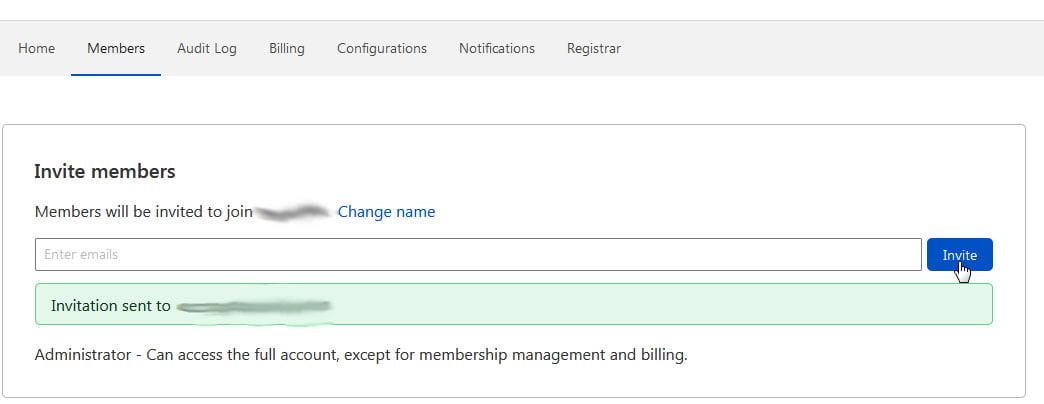
Step 8: An email will be sent to all the email ids added with a unique invitation link as shown below:
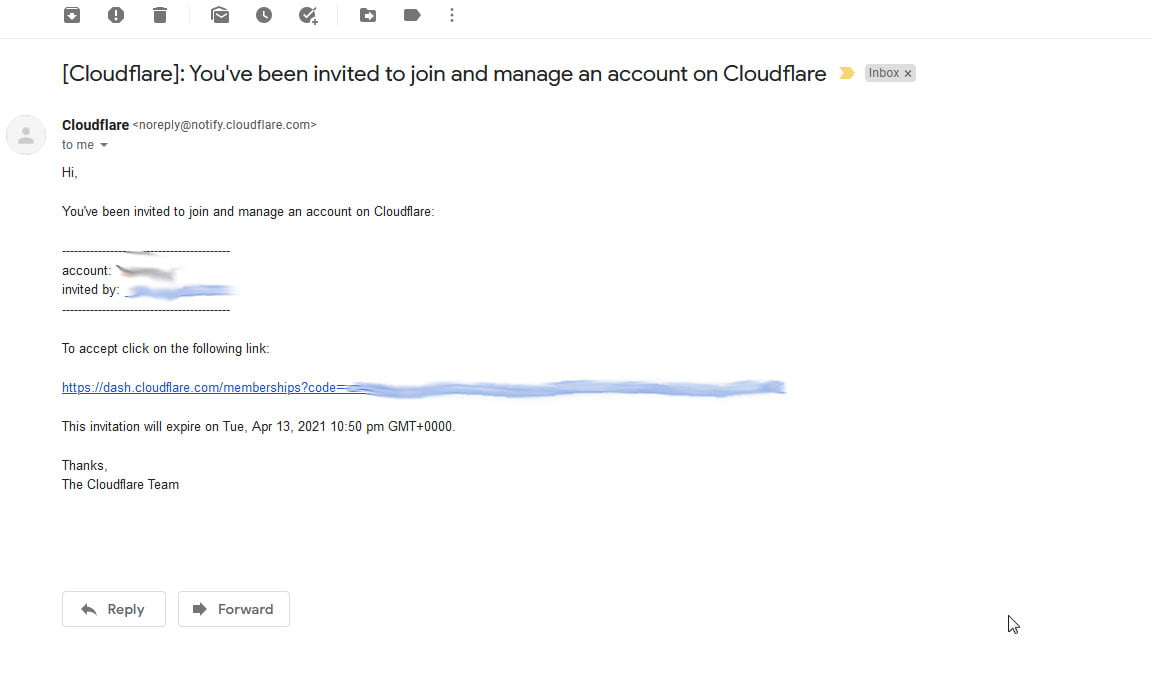
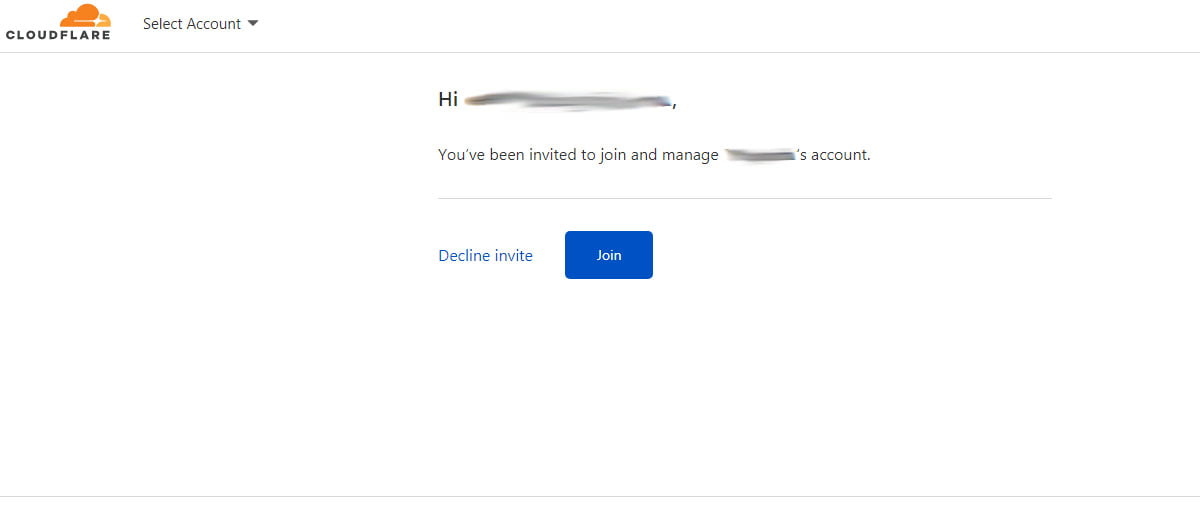
Clicking on the cloudflare add user invitation link the user will be taken to the login screen as shown below:

The user will then have to login with their cloudflare credentials and then click on the Join button.
After clicking the join button the user will now have access to all your cloudflare settings with administrator privileges excluding access to members & Billing.
Now in the members section you will be able to see the list of active members (users who have accepted your invitation to join) and inactive members (Users who are yet to accept the invitation) and the permission level mentioned against the particular member (as administrator).
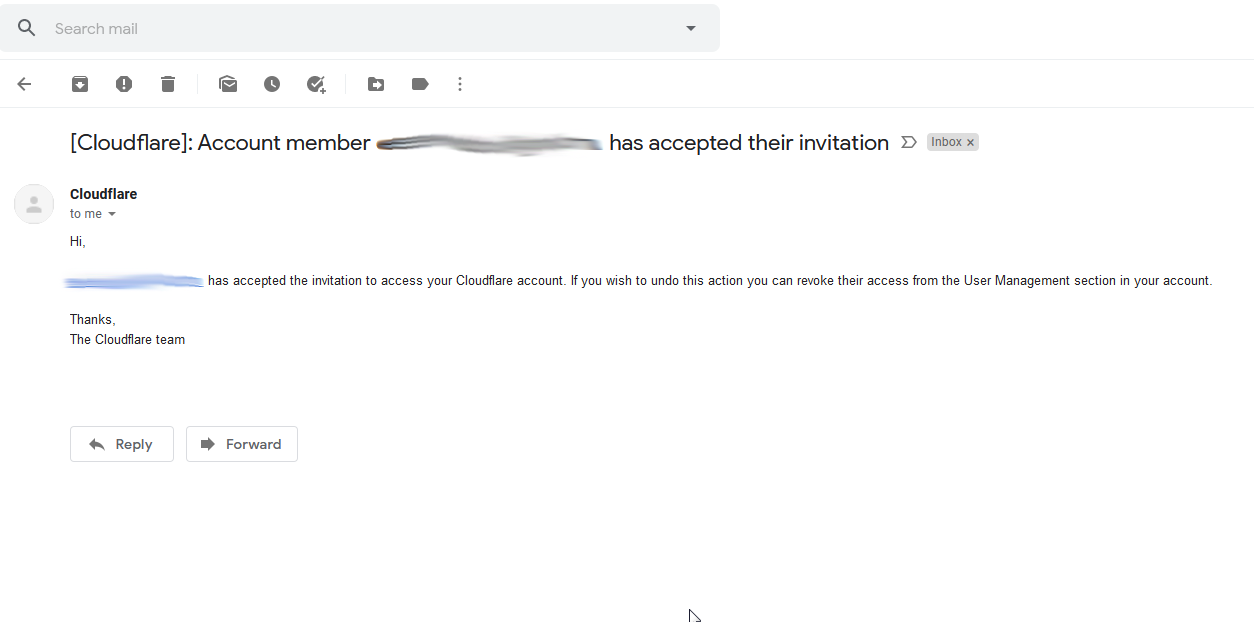
You or the cloudflare account owner will also receive a confirmation email from cloudflare once the user has accepted the invitation to join your cloudflare account as shown below:
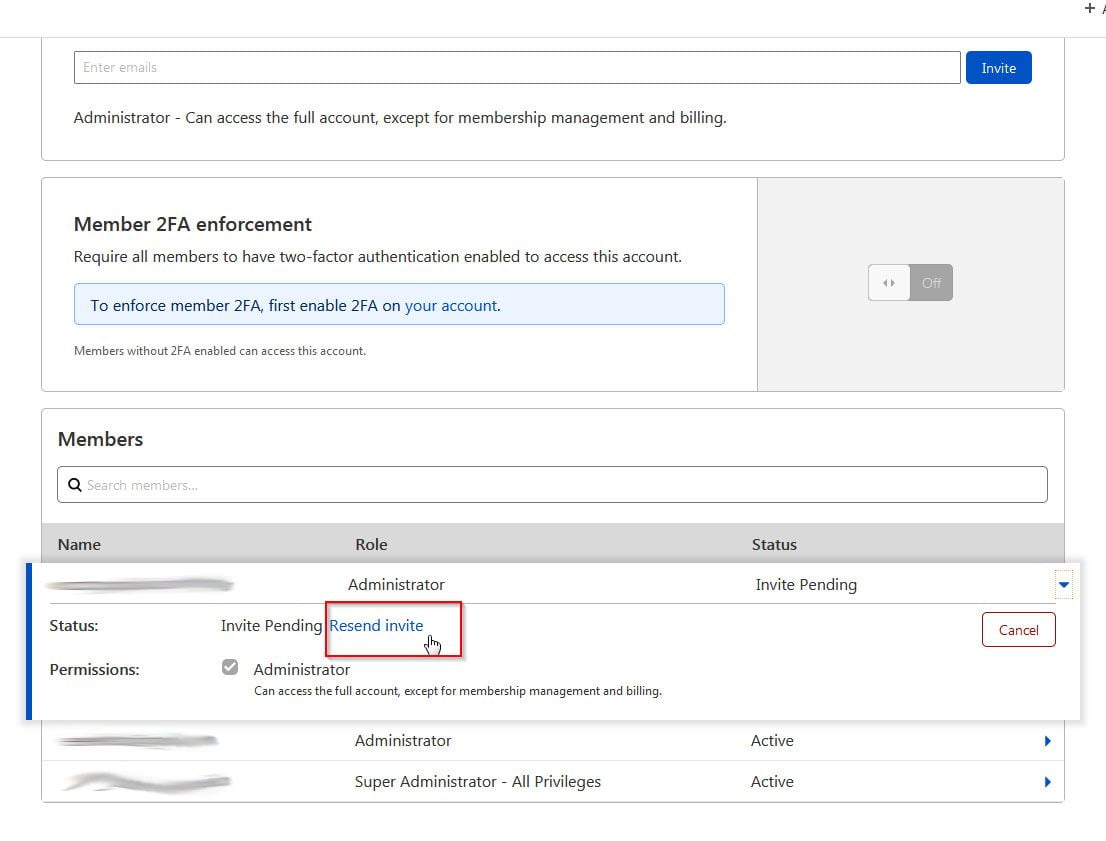
Resend Cloudflare Add User Invitation Link
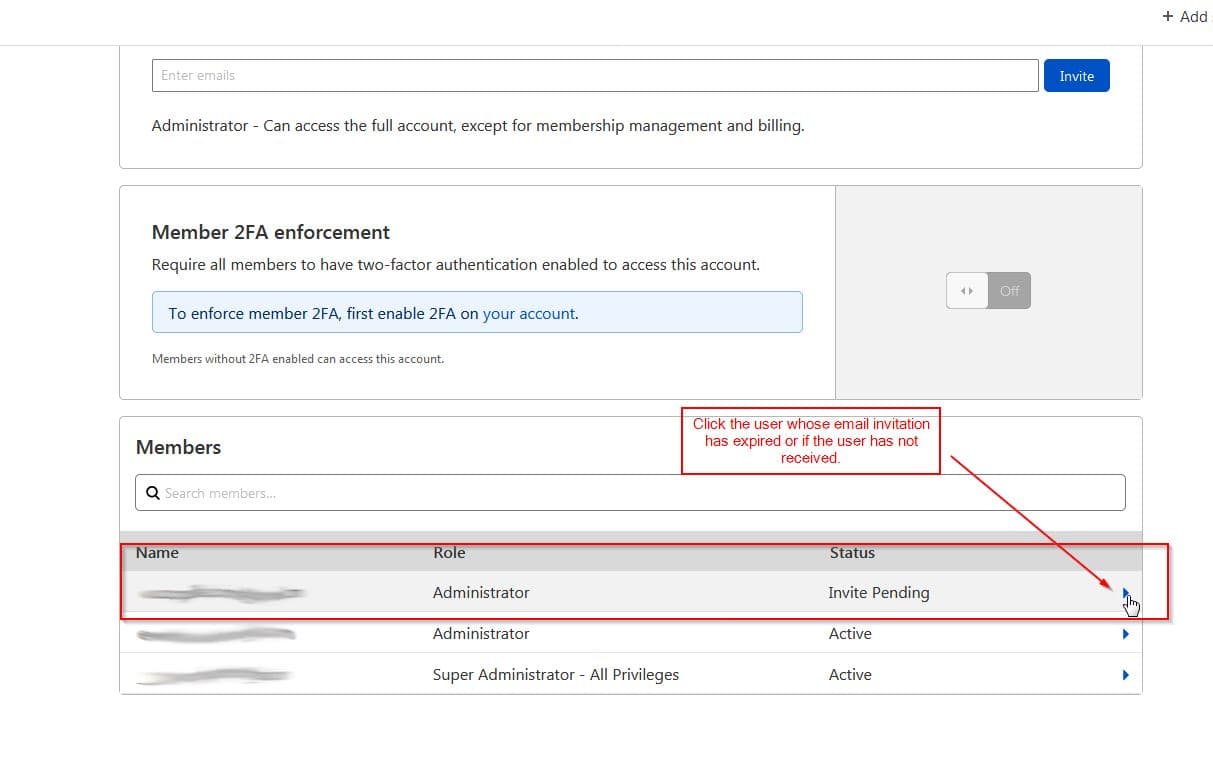
In case the user hasn’t received the cloudflare add user invitation link or if the link has expired, you can resend the add user invitation link by clicking on the button next to the inactive user whose invite status is showing as pending as shown in the screen below:
Then click on the resend invite link as shown below:
You will see a confirmation message from cloudflare saying the email invitation has be resent successfully as shown below:

How to Remove user from Cloudflare account
Granting access to your cloudflare account or your domain DNS settings is easy, now let us see how we can revoke the access to a particular user or a member from the cloudflare add user or members panel.
Step 1: Login to your cloudflare dashboard from https://dash.cloudflare.com, after logging in click on the members option as shown below:
Step 2: Scroll down to the bottom, where you will see the members section listing out all the members as shown in the cloudflare add user screenshot below:

Step 3: Click on the user or cloudflare member whose access you would like to revoke as show in the screen below:
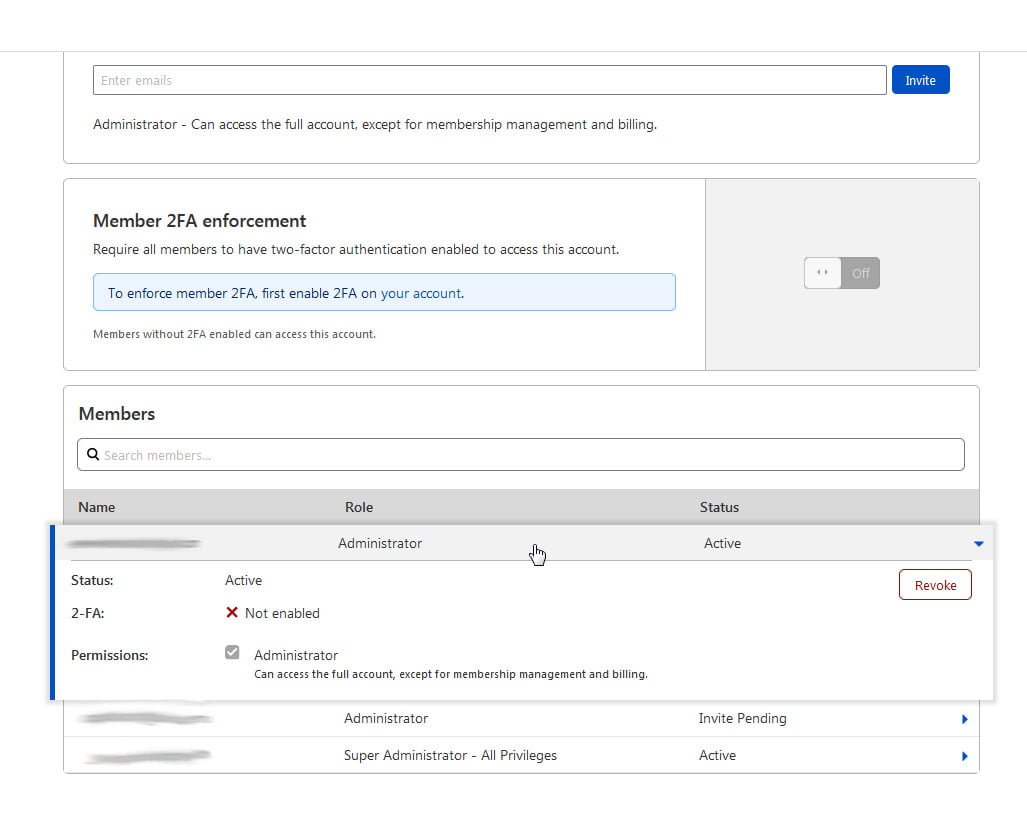
Step 4: You should now see a screen as shown below, highlighting a Revoke button on the right hand side.
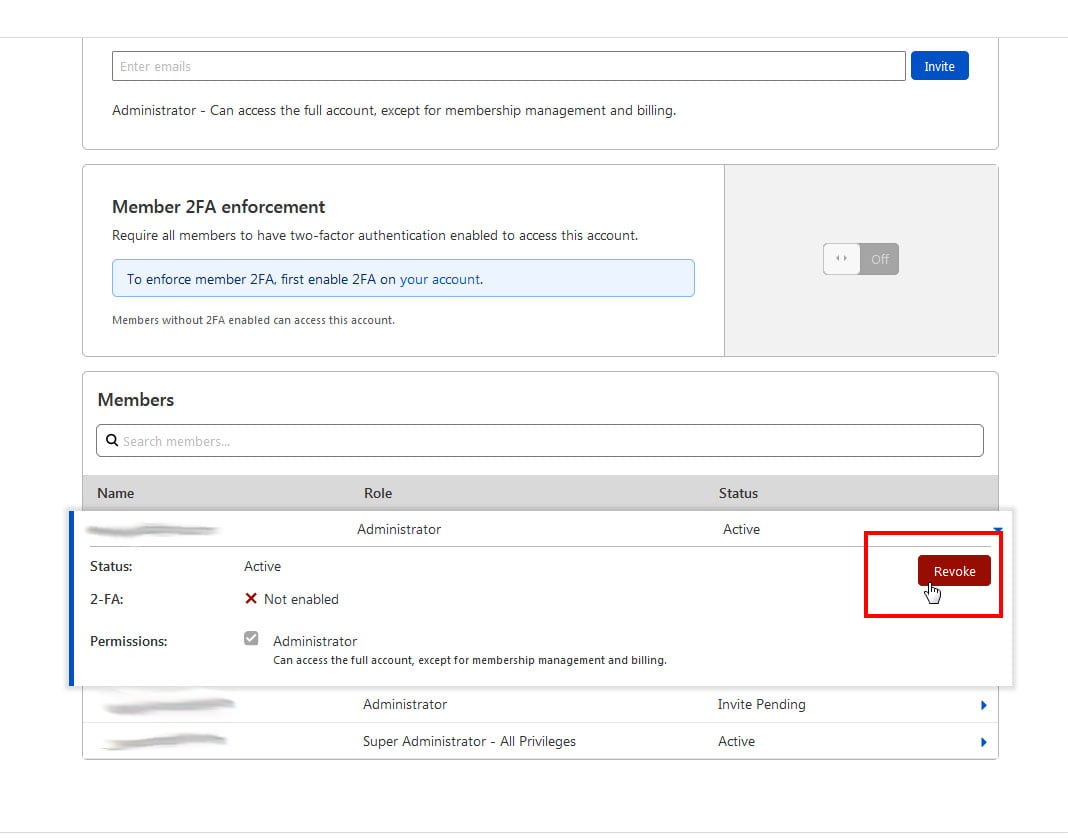
Step 5: Click on the revoke button to remove the shared member access to your cloudflare DNS settings, you will see a confirmation message as shown below:
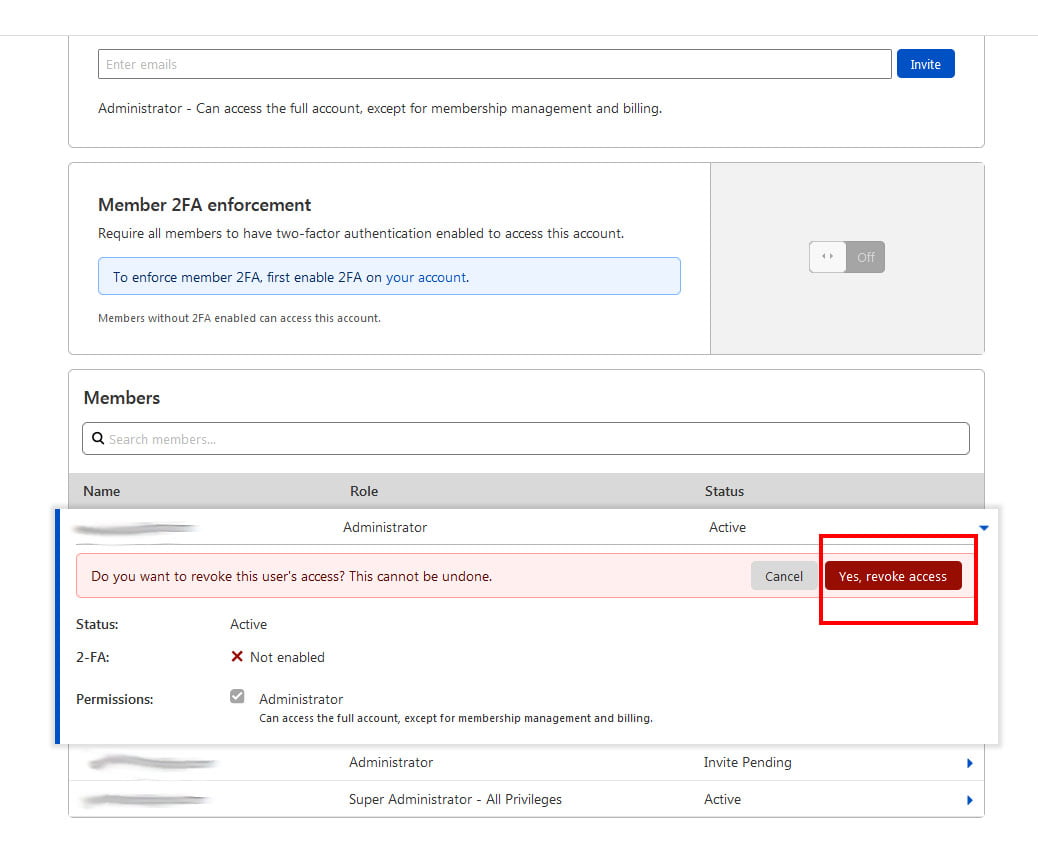
In the Dialog box, Do you want to revoke this user’s access? This cannot be undone. Click on Yes, revoke access button
After clicking on the Yes, revoke access button. The member or user will be removed from the list of members in your cloudflare account as shown below:
Cancel Cloudflare Add User invitation
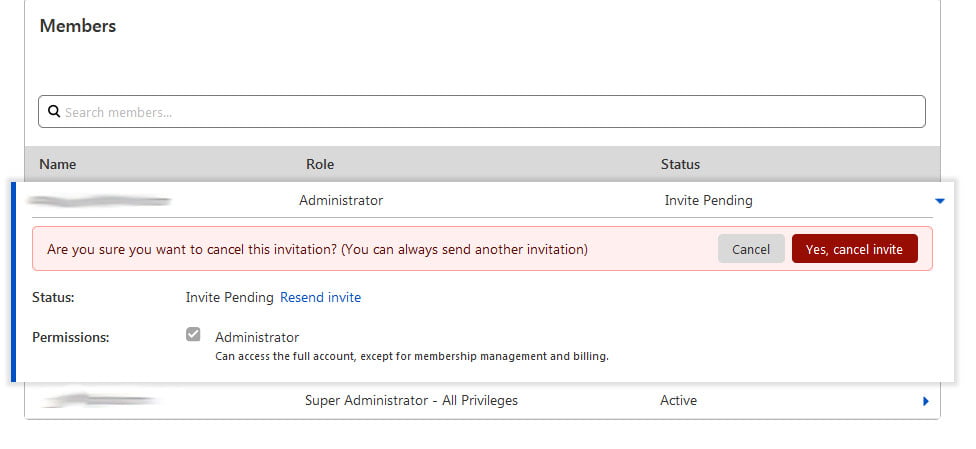
In some rare cases or accidentally if you have sent out an invitation to wrong email id or an invalid email id you can void the invitation or cancel the cloudflare add user invitation by clicking on the email id to whom the invitation was incorrectly sent and then click on the cancel button highlighted in red on the right hand side as shown in the screen below:

It will ask you for a confirmation
“Are you sure you want to cancel this invitation? (You can always send another invitation)”
Click on the Yes, cancel invite button as shown in the image below:
The invitation will be voided and the incorrect email id will be removed from the list of members and you will get a confirmation message saying example@gmail.com’s invite has been cancelled.

Cloudflare Manage Shared Accounts
If you are a developer or if you are a business owner managing taking the responsibility of managing all your client domains. Cloudflare makes it very easy.
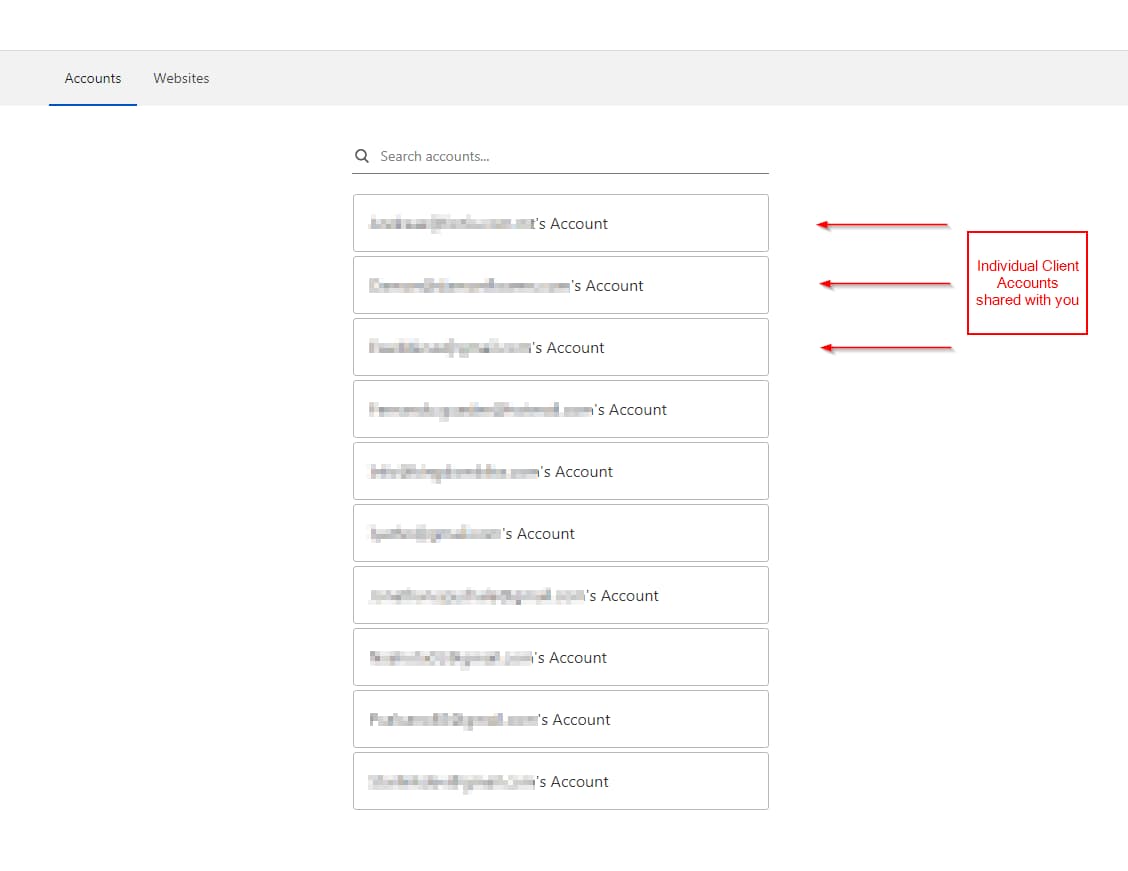
Cloudflare allows you to manage all your shared accounts in a single place, you don’t need to login to multiple accounts each time you need to make any changes to Cloudflare settings.
The screen below shows an example of managing multiple Cloudflare shared accounts, when you click on any shared account. You will be able to access the cloudflare settings of all the domains under that particular account depending on the permission level set by the account owner.
Cloudflare Add user FAQs
How many users can be added to cloudflare account?
At present, cloudflare does not have any limitation on the how many users can be given access to your cloudflare account.
Cloudflare Share account is a paid version?
Sharing account access with others is available by default for all the users under Free, Pro and Business cloudflare plans. The cloudflare enterprise plan has some additional roles and permission levels that can be assigned to each user.
Cloudflare add user and grant access to one website is not working?
Currently, except the cloudflare enterprise plan in all other plans each time a user is added by default the user is assigned with administrator privileges who can access all the domains in your account except that access to Manage users and Billing is restricted and can be accessed only by users with super admin privileges.
Is cloudflare Free?
Both free & paid plans are available. Cloudflare DNS service is free by default.