In this post, we will explore different methods to add a table of contents in Google Docs. Every document contains titles, subtitles, headings, paragraphs and when the document contains lot of pages with text & images. It becomes difficult for the reader to keep track, we could make use of Table of contents in Google docs to organize entire document improve the overall readability.
How to add table of Contents in Google Docs with Page Numbers
Let’s explore with the help of a sample document with headings on each page, so it contains heading 1 to heading 6 from page 1 to page 6. Now we will see how we can add table of contents in Google docs with page numbers.
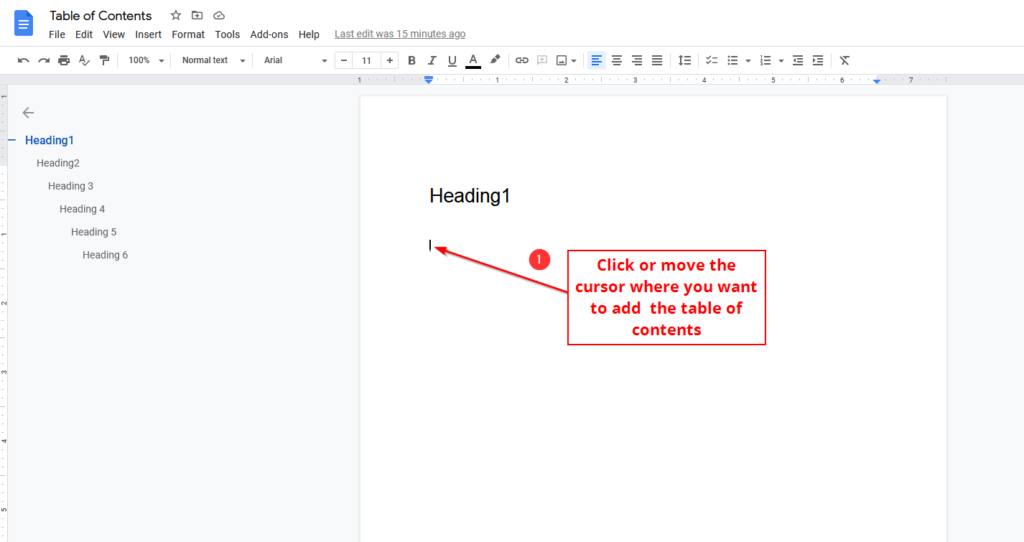
Step 1: Open your document or create a new document in Google docs. Click or move the cursor where you would want add the table of contents in Google Docs, just as shown in the image below:
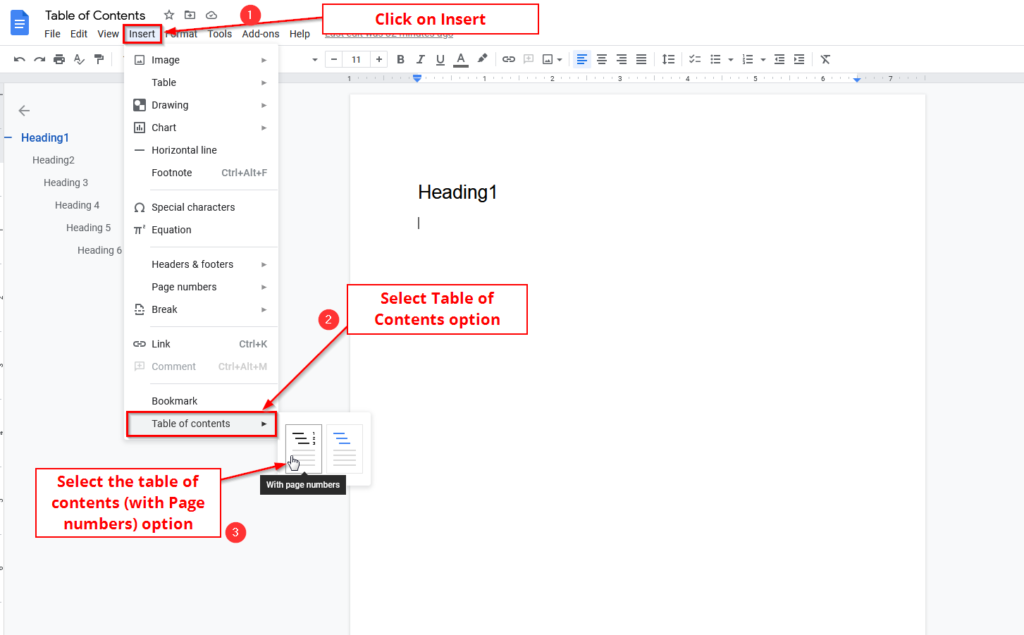
Step 2: After you select the location to add the table of contents, click on Insert option from the Google docs main menu as indicated in the image below marked as [1]. A sub menu will show up with additional options, select or move your mouse pointer over the bottom most option Table of Contents as shown in the image below marked as [2]. Under Table of Contents option we have two sub options to select the type of Table of contents to add
- Table of Contents with Page Numbers
- Table of Contents with links
Click on Table of contents with page numbers option as illustrated below marked as [3]
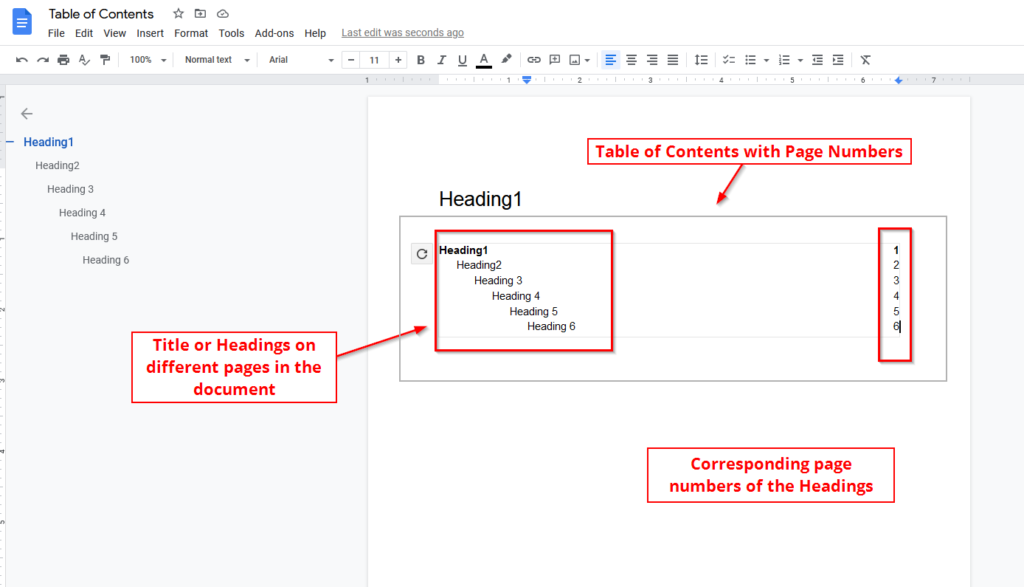
Step 3: You should now see that table of contents added along with page numbers as highlighted by the grey box in the image below, Each heading and the corresponding page number is added automatically.
How to edit the table of contents in Google Docs
Editing the table of contents inside a Google doc is straight forward. But there are some important points to note while we edit the auto inserted Table of contents.
Method 1: We can directly edit a particular heading inside the table of contents as per our requirement and save the google doc. This does not change the actual Heading text inside the doc content. Just as shown in the image below:
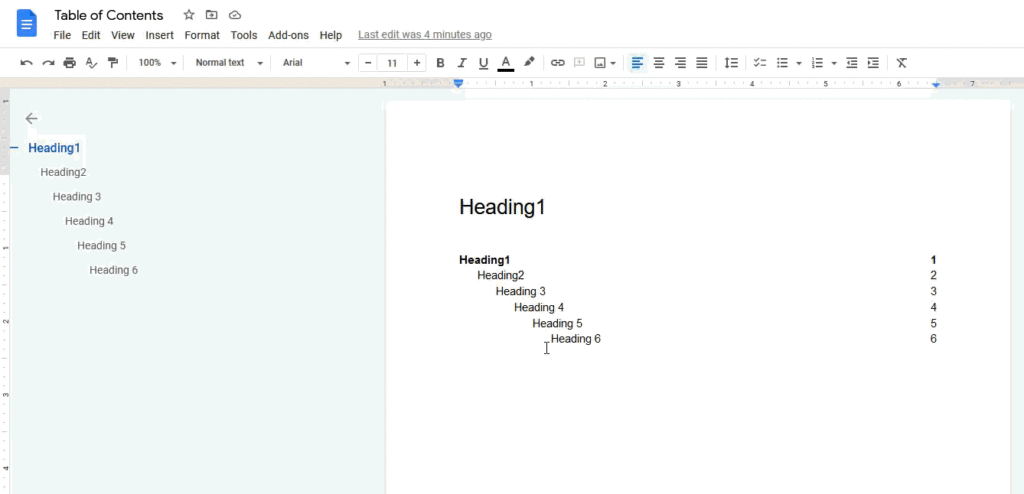
If you make any changes manually within the table of contents box, make sure you do not click on the refresh icon (update table of contents icon).
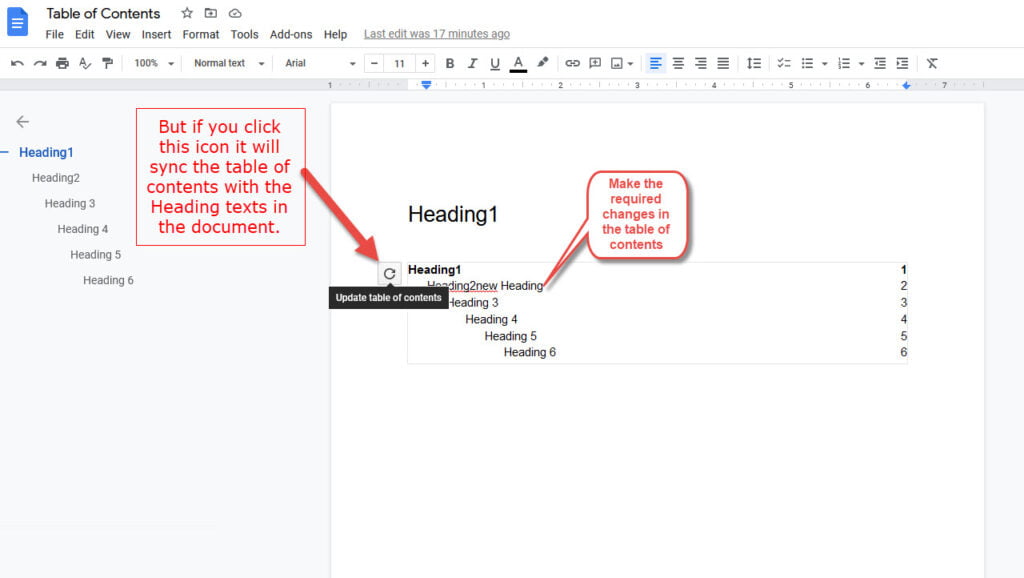
If you click on the refresh icon and update the table of contents, this will sync the table of contents with the heading texts in the contents of the Google doc. And all the changes that you made manually inside the table of contents box will be lost.
Auto Update Table of contents in Google Docs
This table of contents in Google docs that we have added can auto update as and when we make changes to the heading texts or subheading texts within the Google doc contents. Just as shown in the image below:
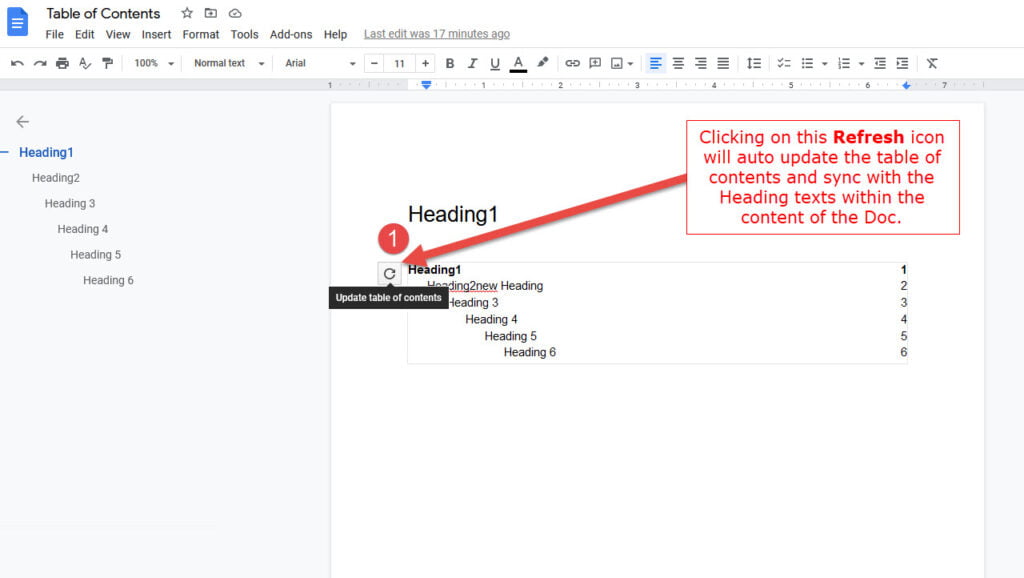
If you have made any changes to the heading or sub heading texts in the Google doc contents and instead of manually updating the table of contents, you can simply click on the refresh icon to update the changes in the table of contents automatically.
How to delete table of contents in Google Docs
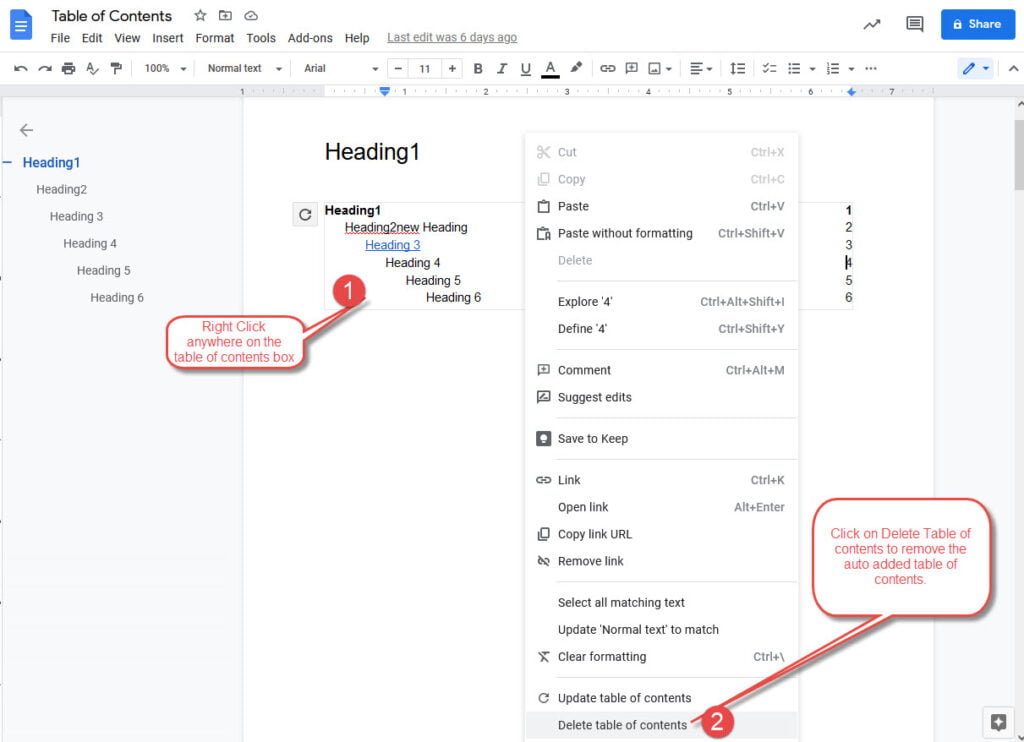
Open the Google doc and right click anywhere on the table of contents box. You should see a Google docs menu giving a list of options, at the bottom of the list of options you should see ‘Delete table of contents‘ option. Click on it and the table of contents in Google docs will be deleted.
Just as indicated in the screenshot below:
How to add links to table of contents in Google Docs
We can also add table of contents in Google docs with links to the corresponding section within the google doc.
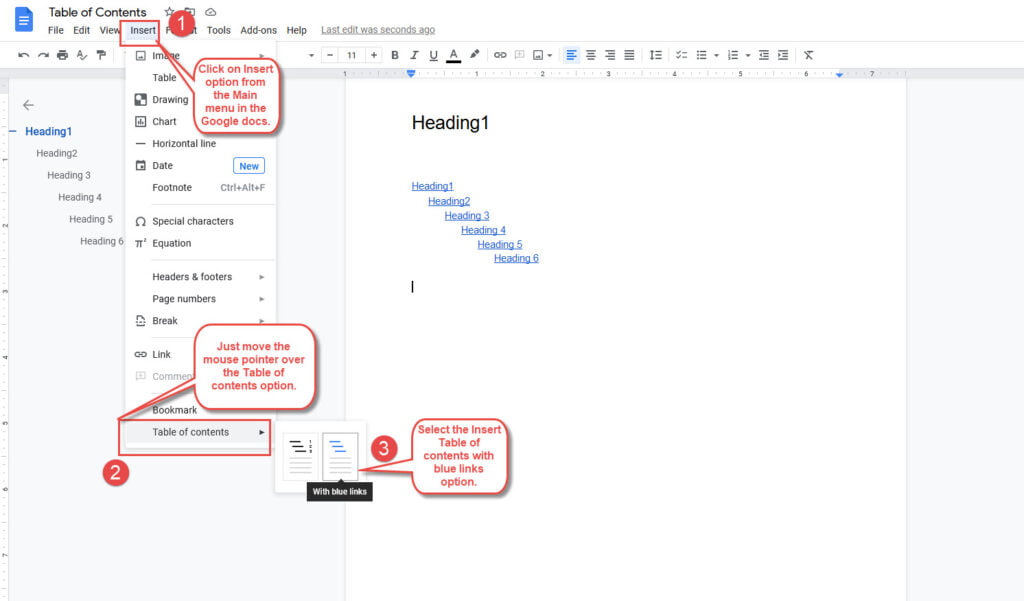
To add table of contents with links in the existing Google doc, click on the Insert option from the Main menu in the Google as indicated by step 1 in the above image. This will show a drop down menu, at the bottom move the mouse pointer over table of contents option and select the second option with blue links as indicated in the above image marked as [3].
