You can change margins in Google docs either using the Page setup option from the main menu bar or using the left & right indents on the ruler. Google docs is a web-based online word processor offered by Google similar to the likes of Microsoft Word. All users who have a Gmail account can use this service for free. This post we will explore how to change Margins in Google Docs using two different methods.
Setting up the correct margins or changing the existing default margin setup in Google docs is required for better presentation or a basic requirement when submitting your Thesis.
How to Change Margins in Google Docs
Change Margins in Google Docs using Page Setup option
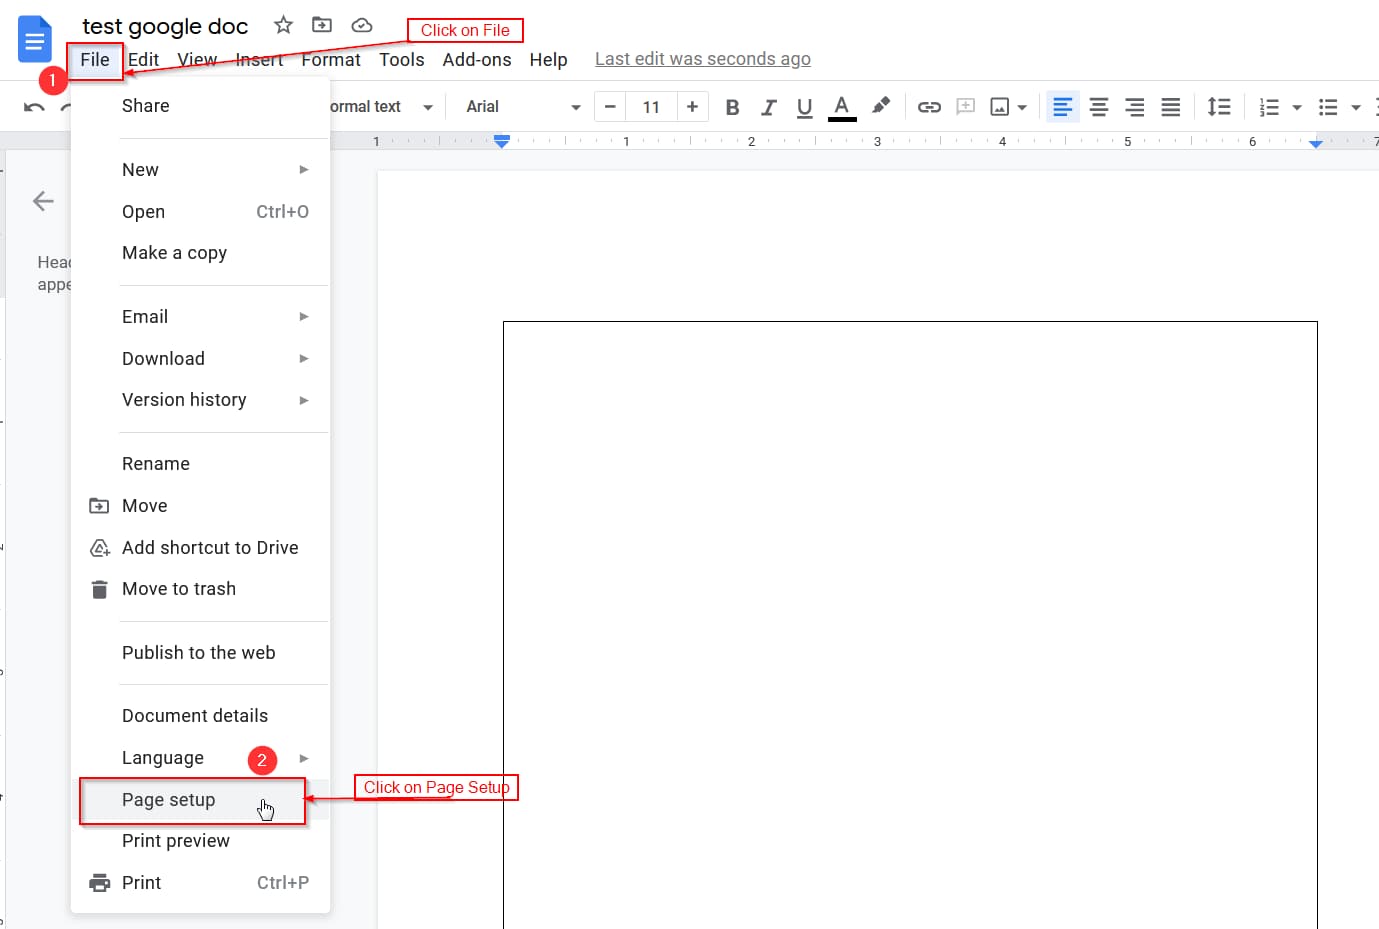
Step 1: From the Google Docs page, we should see the main menu bar. Click on the File option, and a sub-menu should show up, giving another set of options. From the list, click on Page Setup (3rd option from the bottom) as shown in the image below:
Step 2: Clicking on the Page setup option will open the page setup dialog box giving various options such as page orientation, paper size, page color, and page margins. On the right-hand side inside the dialog box, you can use the text boxes to set or change the margins for the current Google doc as per requirement (in inches). After entering the new margins for top, bottom, right, and left-click on the OK button to save the new margins as illustrated in the image below:
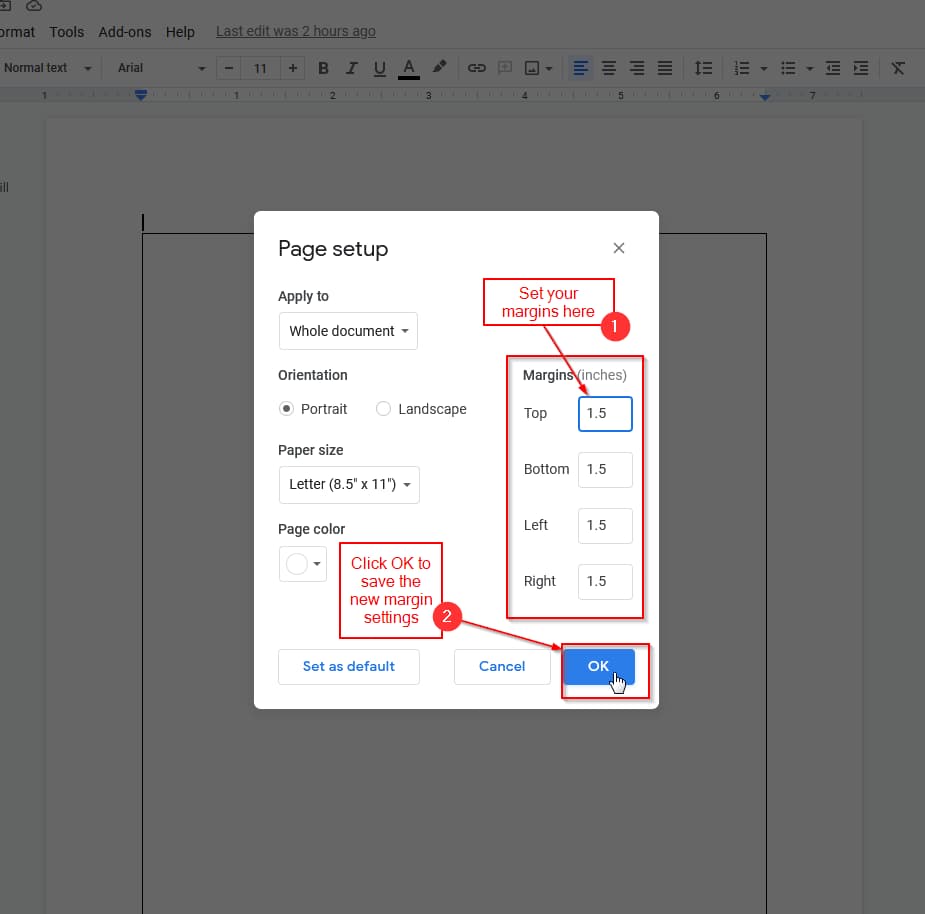
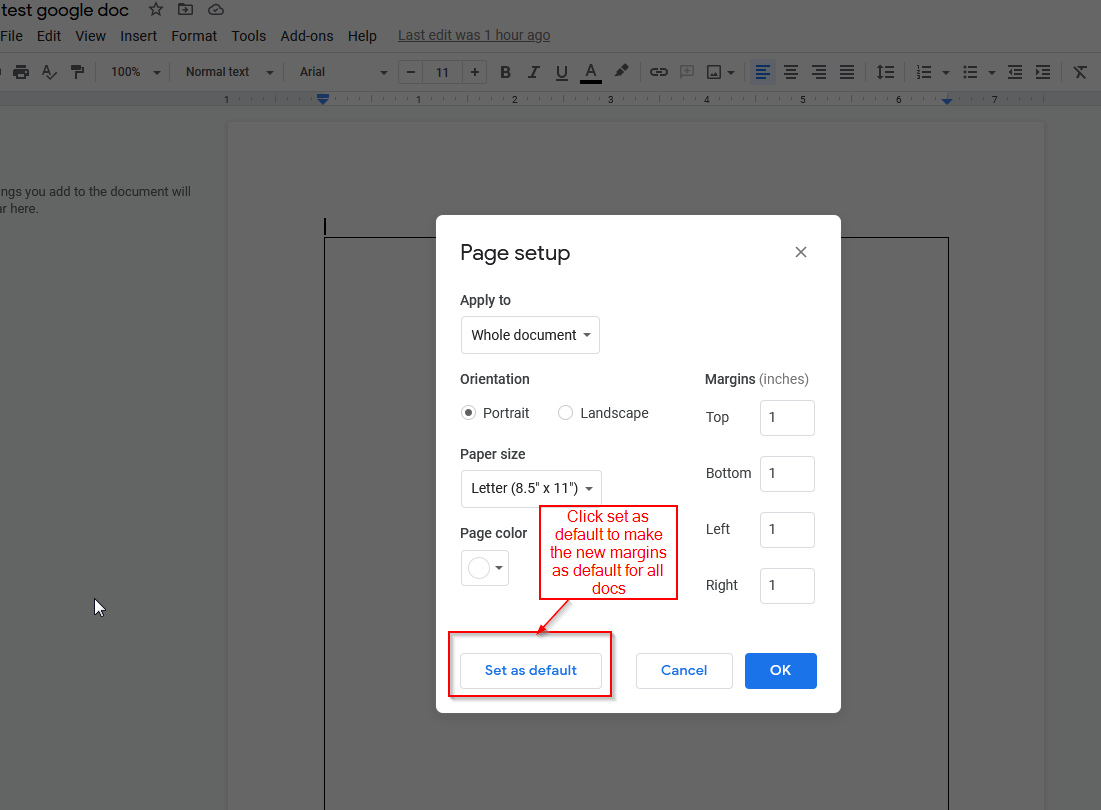
Step 3: The default page margins in Google Docs are 1 (in inches) on all four sides. If you plan to use new custom margins as set in Step 2 more frequently, you could set the custom margin as default for all the google docs you will use in the future or till you change it again. The custom margins can be set as default can do this by clicking on the set as default button as shown in the image below:
Change Margins in Google Docs using left & Right indents in the ruler
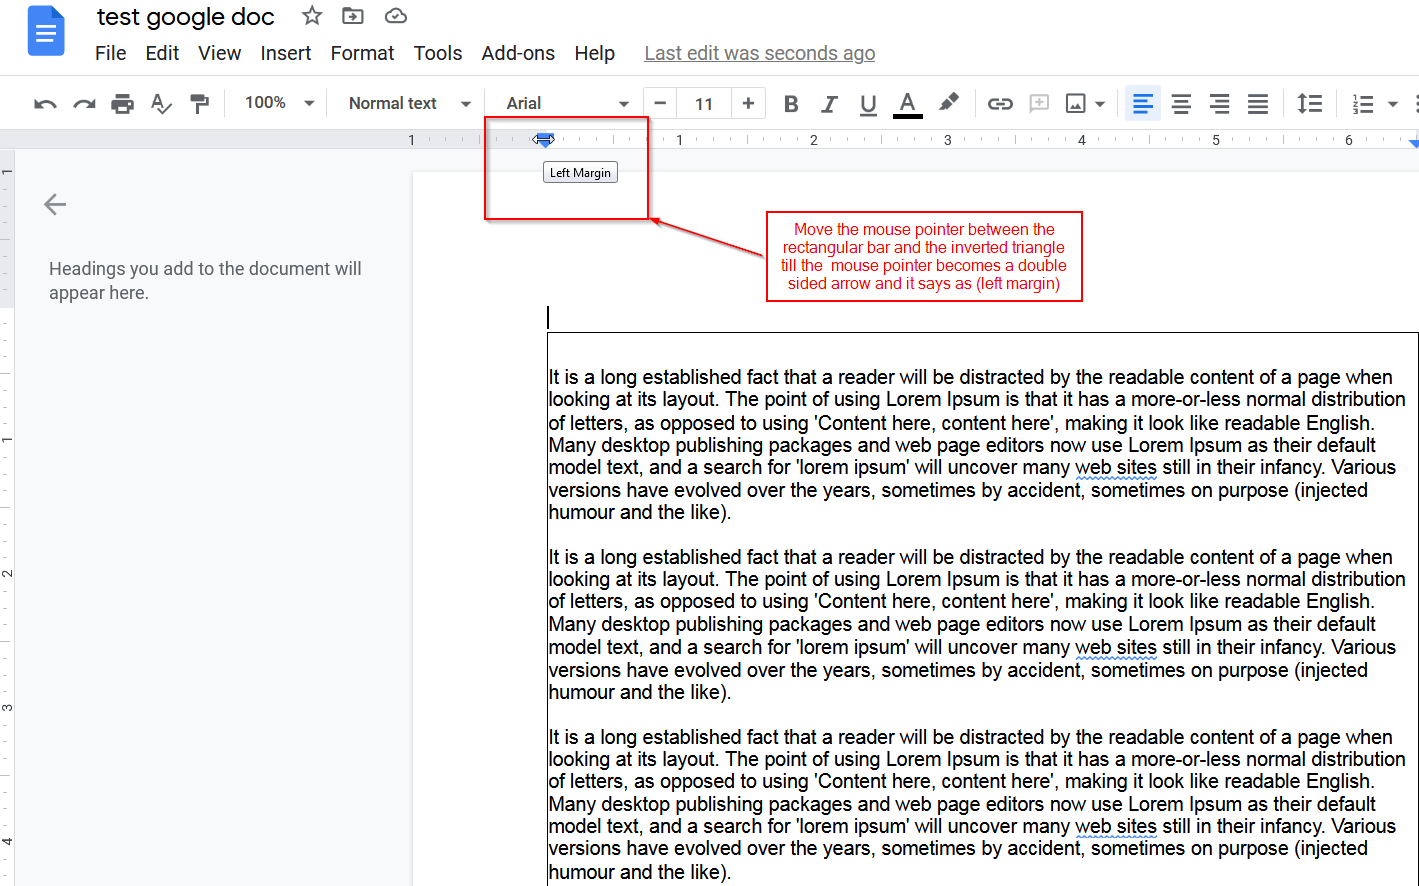
Step 1: In this method, from the Google docs page just below the main menu bar, you should see a ruler with an inverted triangle on the left and right-hand sides. Just move the mouse pointer between the rectangular bar and the inverted triangle on the left-hand side till the mouse pointer becomes a two-sided arrow(↔) and indicates as left margin as shown in the image below:
Step 2: After you see the pointer change to a two-sided arrow, click and drag as per your requirement, and you should also see the new margin as you drag the margin bar left or right as shown in the image below:

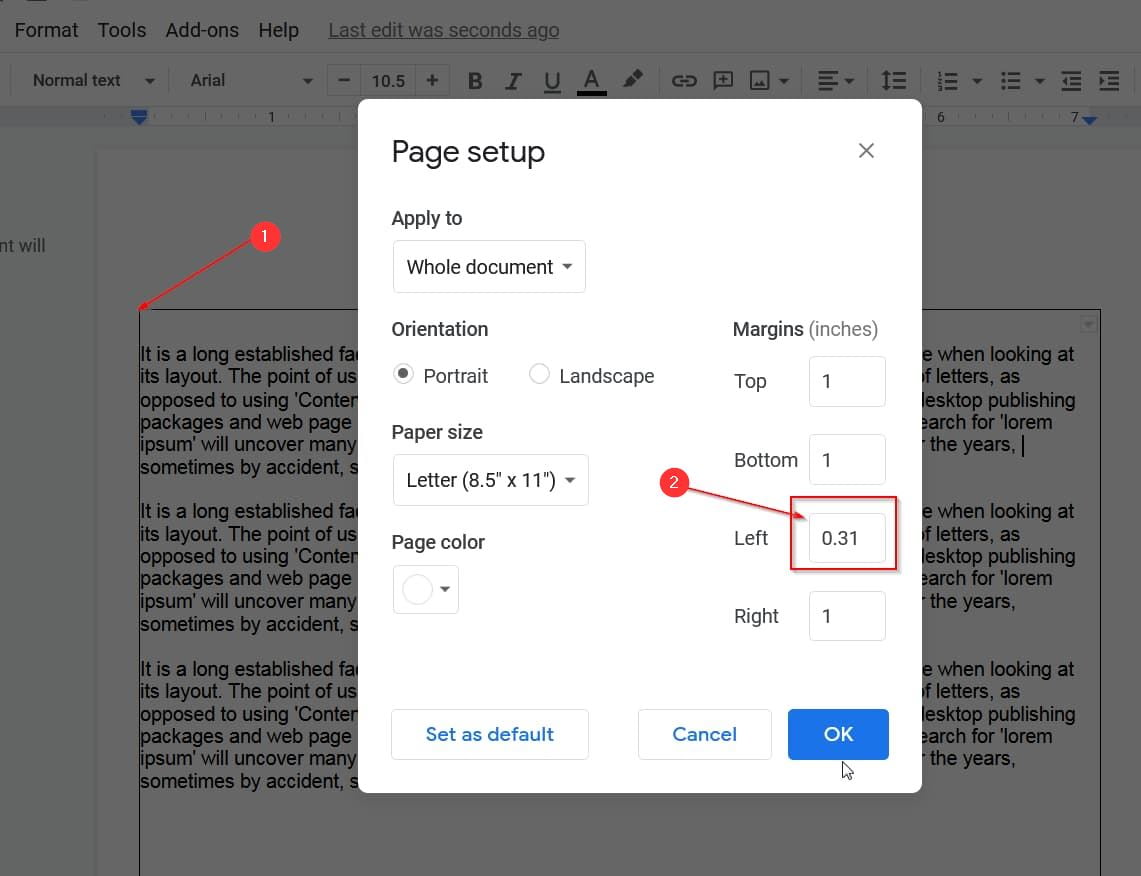
In the image below, you should be able to see the entire left page margin has changed(marked as [1]) after dragging the triangle on the ruler. To verify the same, we could open up the page setup from the file menu and see that the left margin has changed from 1 to 0.31 inches(indicated as [2]) in the image below:
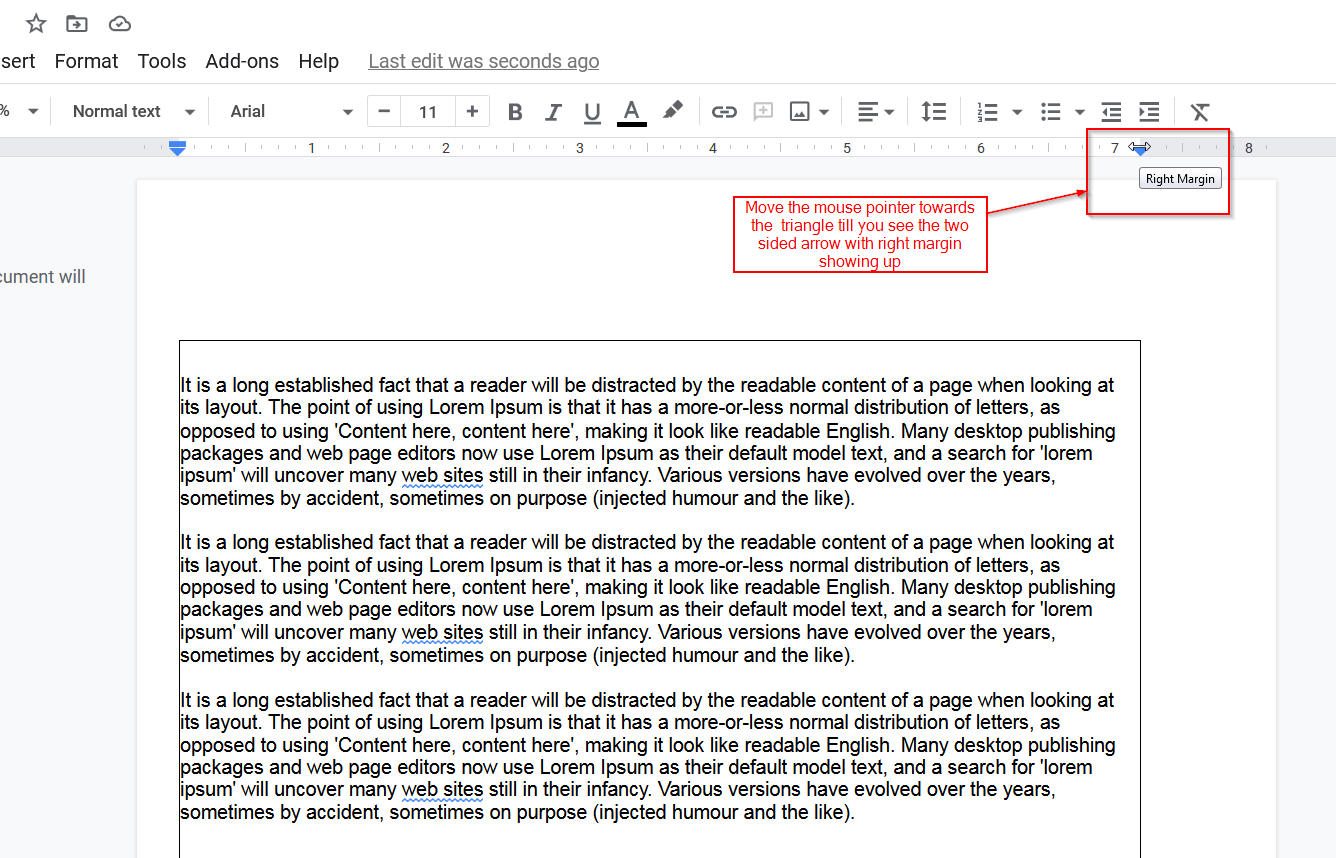
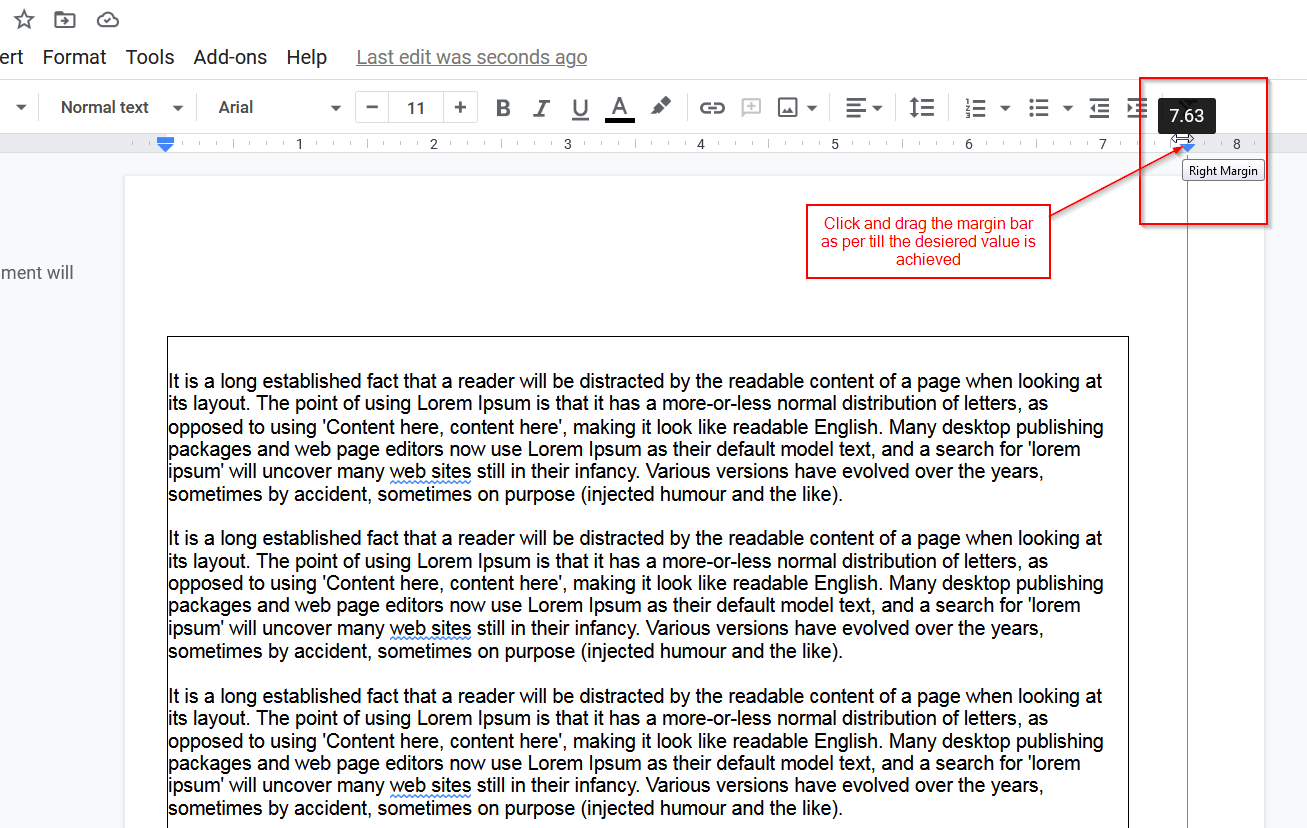
Step 3: Similar to what we did in step 2, move the mouse pointer towards the inverted triangle towards the right-hand side on the ruler, till the point changes to arrow and shows tooltip as right margin as illustrated in the image below:
Click the right margin and drag it outwards towards the right end of the page to increase the right margins, just as shown in the image below:
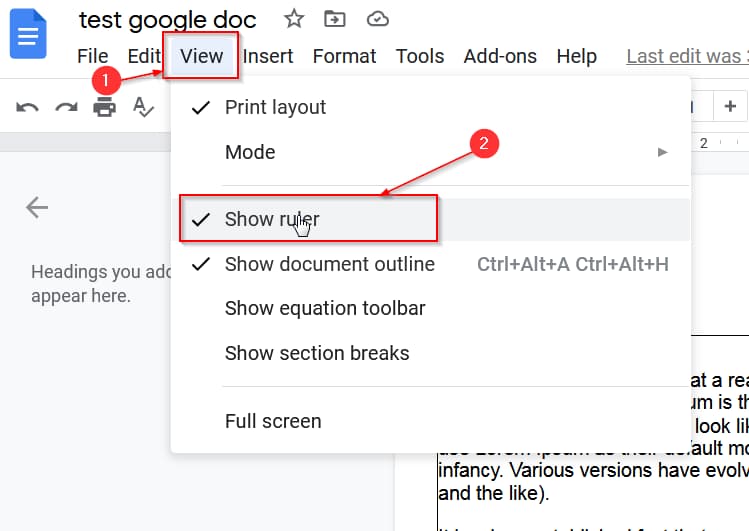
How to Toggle the ruler ON or OFF to change margins in Google Docs
In the second method, we used the Google docs ruler to change margins in Google Docs, both the right and left margins of the Google doc. In this case, if you do not see the ruler show up in your google doc. You can easily turn it on or off by going to the view option from the menu bar, then click on Show Ruler to enable it, as illustrated in the image below: