We have been using Microsoft Word as the default document editor for most of the time. However, with the advancement in cloud technologies, web-based document editors like Google Docs are increasingly finding their use as the default document editor. In this post, we will explore different ways to create a hanging indent in Google docs, whether writing a research paper for an international journal or your own Ph.D. thesis, citations form an important part, and citations need to be added as per MLA format, which requires the use of Hanging Indent.
Method 1: Create Hanging Indent in Google Docs using Format option
We will use the format option from the Main menu bar to format the highlighted text shown in the image below with a hanging indent.
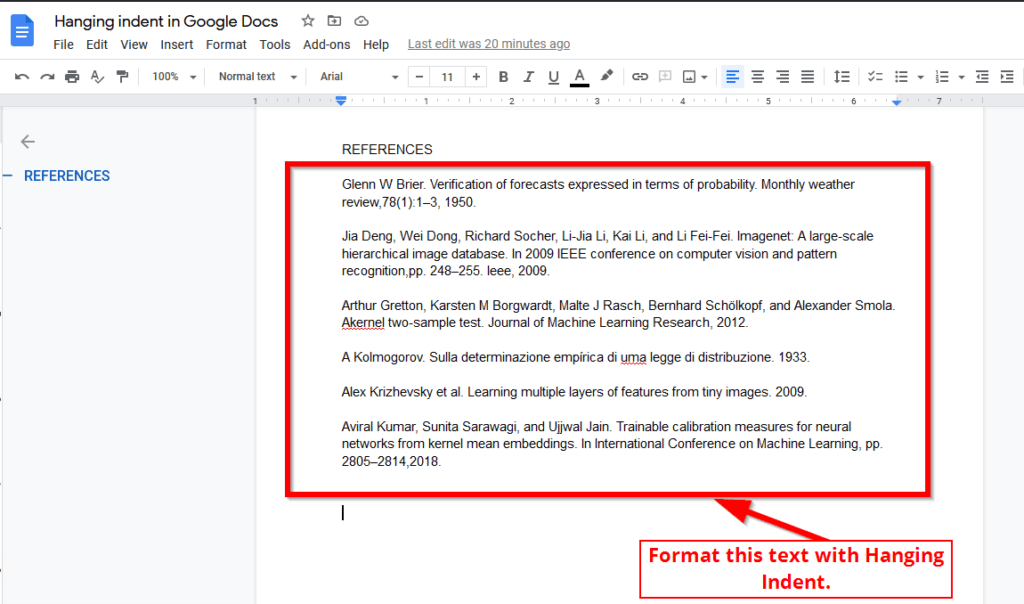
Step 1: From the Google docs document page, first select the entire text that needs to be formatted with a hanging indent marked as [1]. After selecting the text, from the top menu bar, click on the Format option. Marked as [2] and illustrated in the screenshot below:
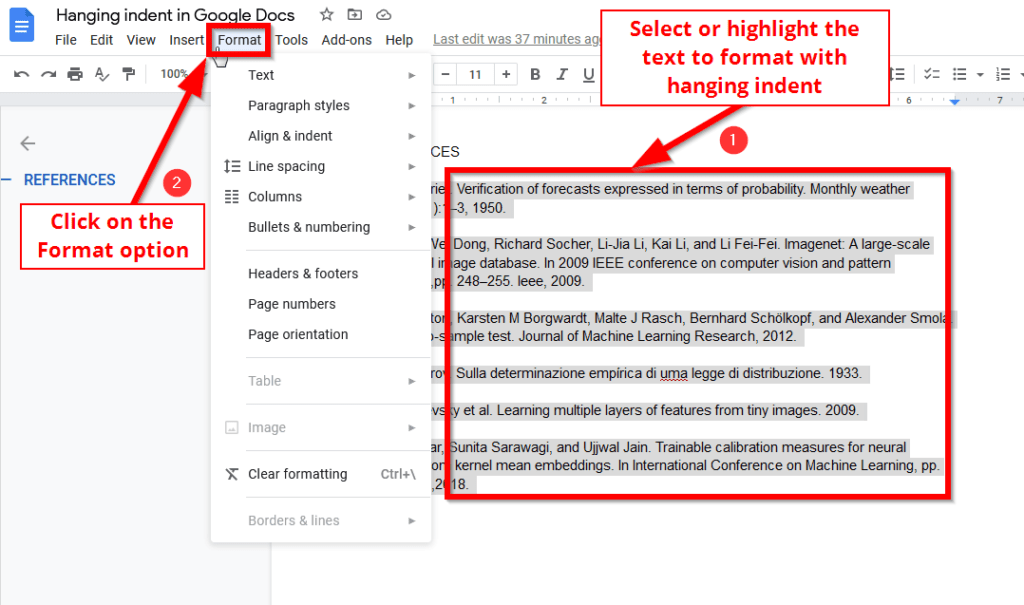
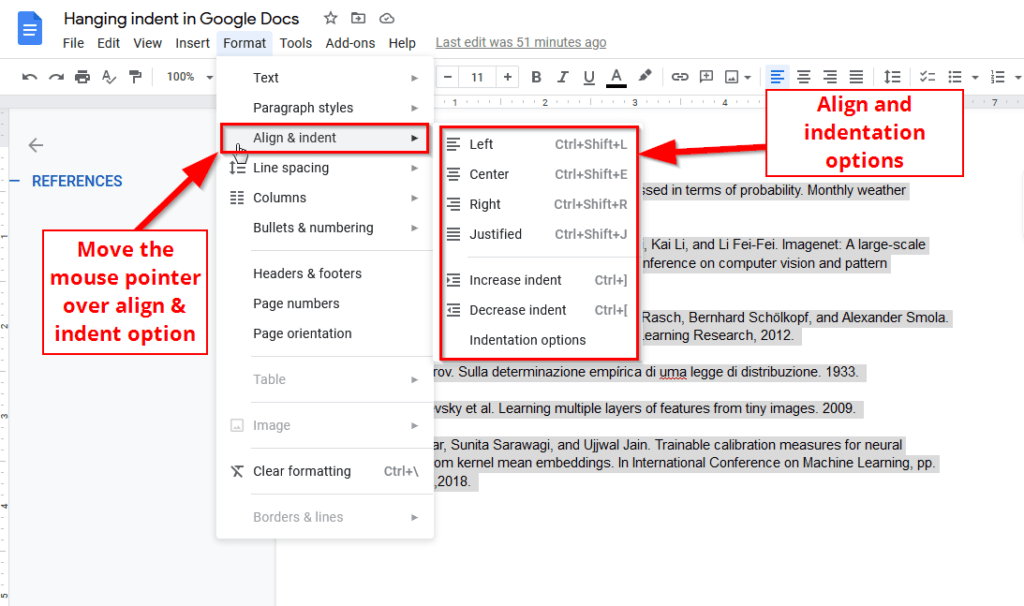
Step 2: Clicking on the format option will show another sub-menu with additional options. From the list of options under the format option, move the mouse pointer over Align & Indent. Align & Indent will now display all the Google docs alignment and Indentation options. Highlighted in the screenshot below:
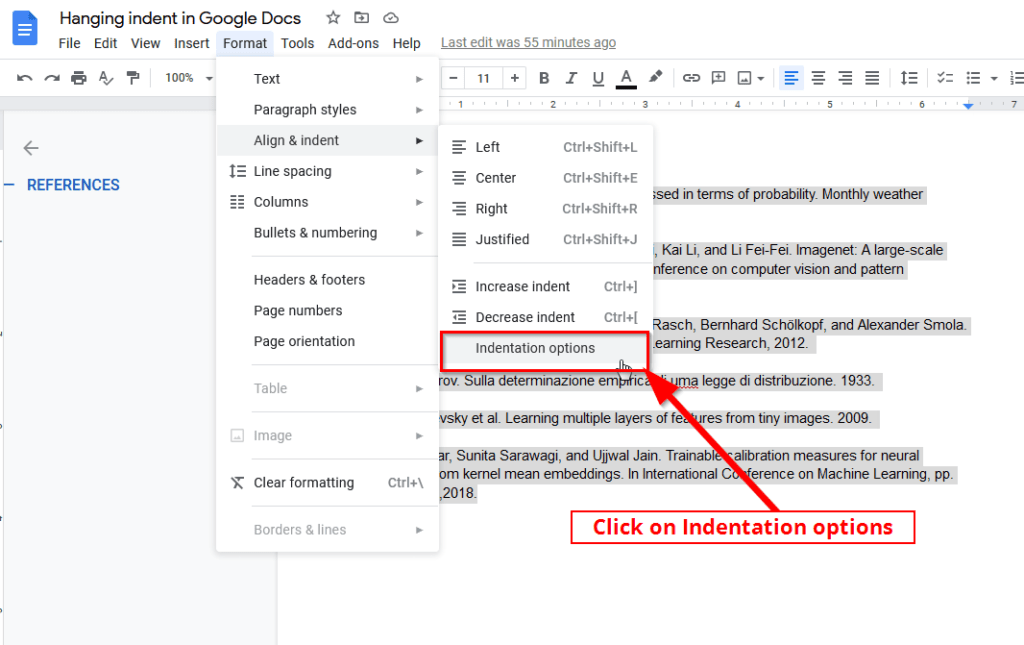
Step 3: With the text still selected, click on Indentation Options under Align & Indent as shown in the image below:
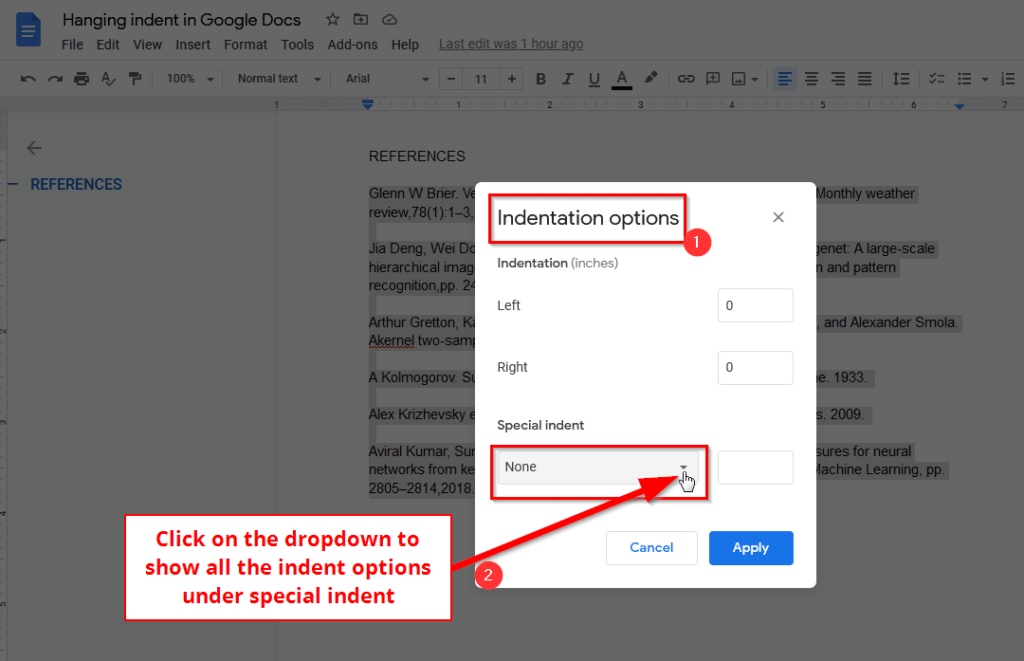
Step 4: This will open an Indentation options dialog box with additional special indentation options, in that click on the drop marked as [2] in the image below
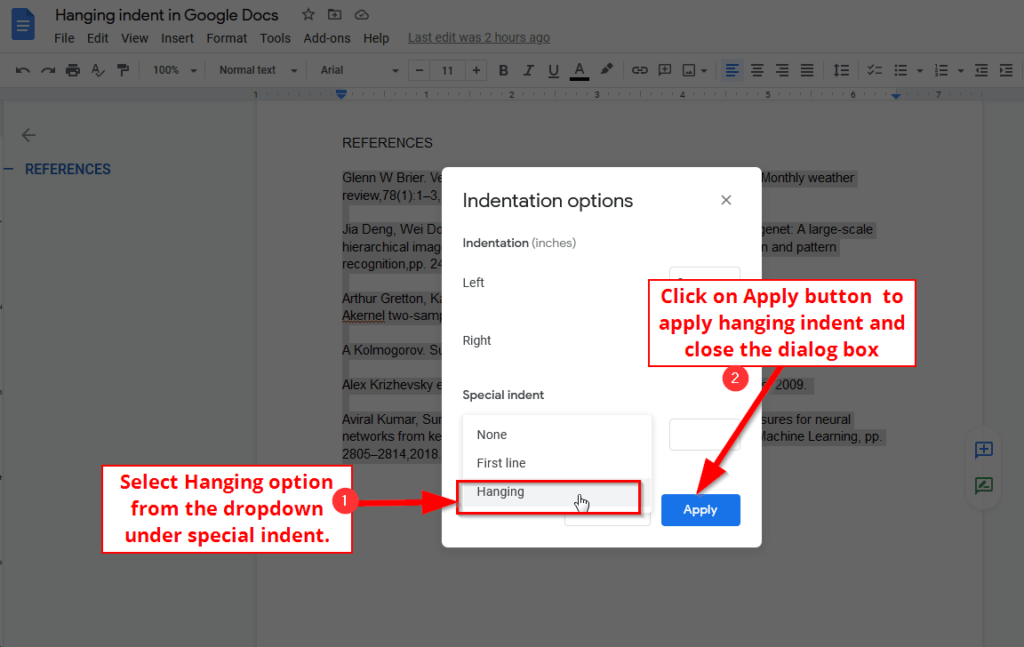
Step 5: From the drop-down menu under special indent, select Hanging indent and then click on Apply button to apply hanging indent settings to the highlighted text as indicated in the image below:
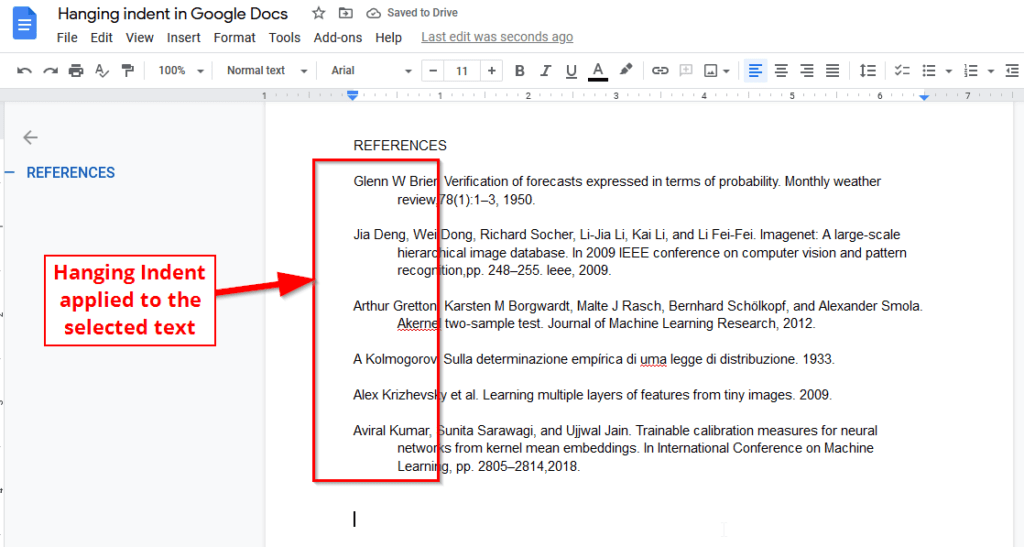
Step 6: Hanging indent is now applied to the selected text, and the same is illustrated in the image below:
Method 2: Create Hanging Indent in Google Docs Manually
To create a hanging indent in Google docs manually, we will use the Ruler, and the line indents to hang the indent manually. Follow the steps below:
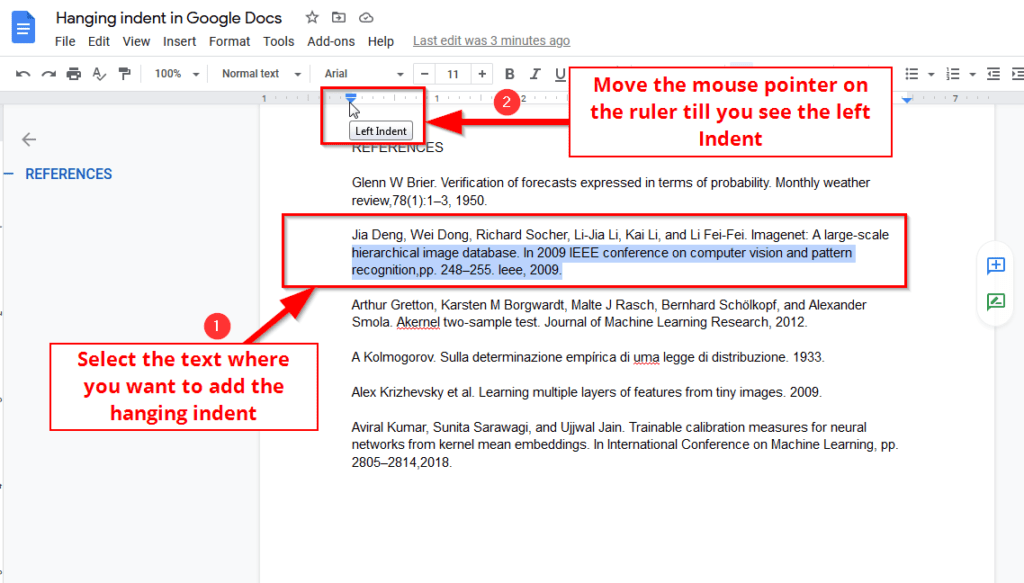
Step 1: First, similar to the previous method of creating a hanging indent in Google docs. Select the text where you want to implement the hanging indent marked [1] in the image below, then move the mouse pointer over the inverted blue triangle on the ruler till it shows a tooltip as left indent as indicated in the image below marked as [2]
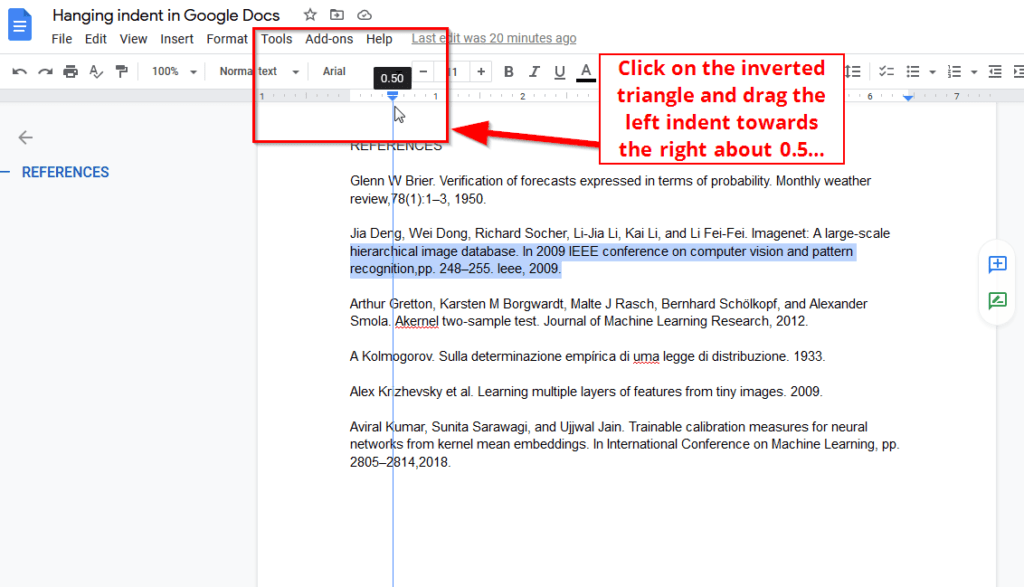
Step 2: Click on the inverted blue triangle and drag it towards the right side for about 0.5 inches, as illustrated in the image below:
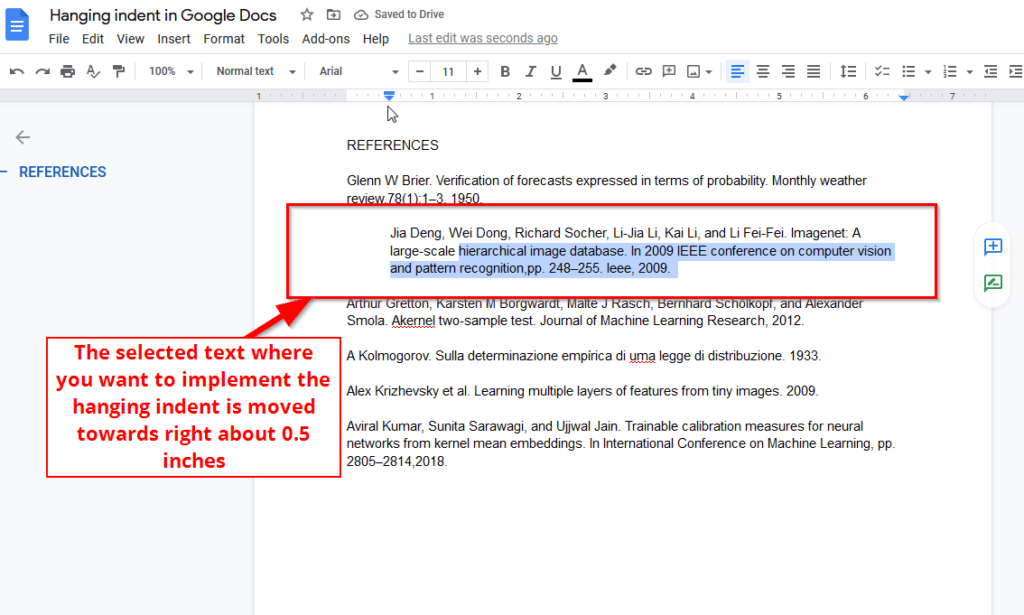
Step 3: Now, you should see the selected text where you want to add the hanging indent is moved towards the right by about 0.5 inches, similar to the screenshot below:
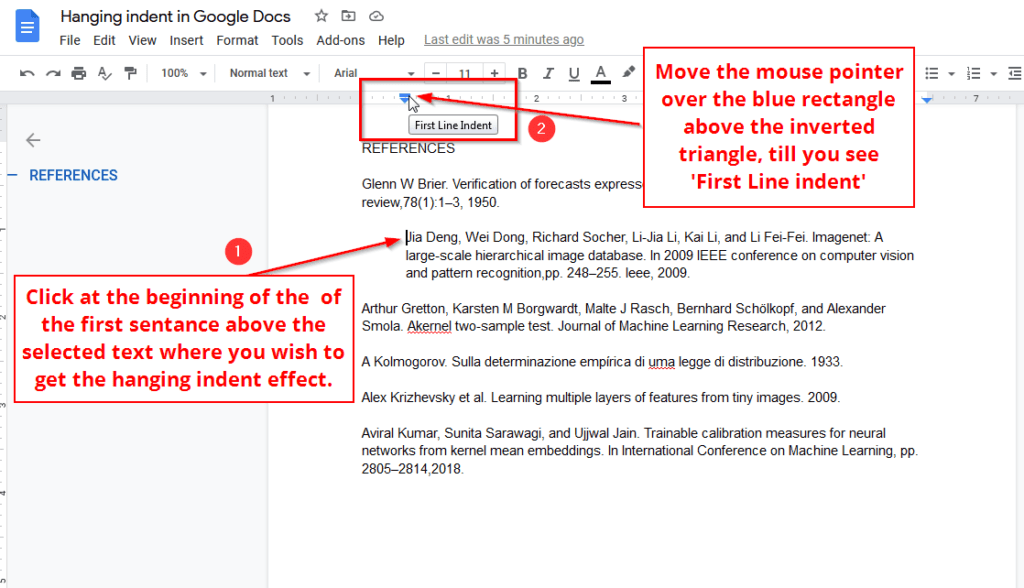
Step 4: Click at the beginning of the first line above the selected text to place the cursor at the start of the sentence. Move the mouse pointer over the small blue rectangle above the inverted triangle till you see a small tooltip indicating ‘First Line Indent’ as highlighted in the screenshot below:
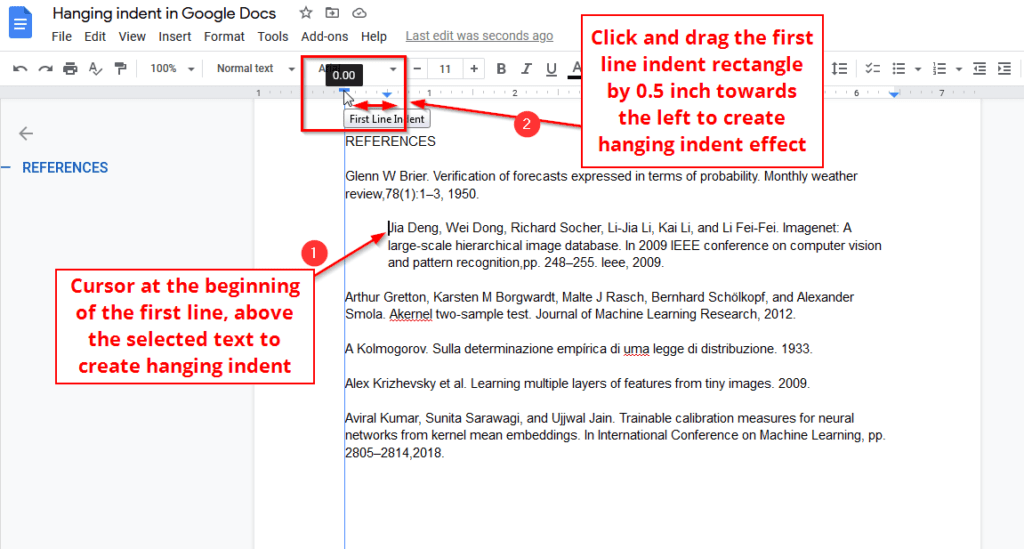
Step 5: With the cursor at the start of the first line above the selected text for hanging indent. Click and drag the first line indent rectangle towards the left by 0.5 inches to create the hanging indent in google docs as indicated in the image below:
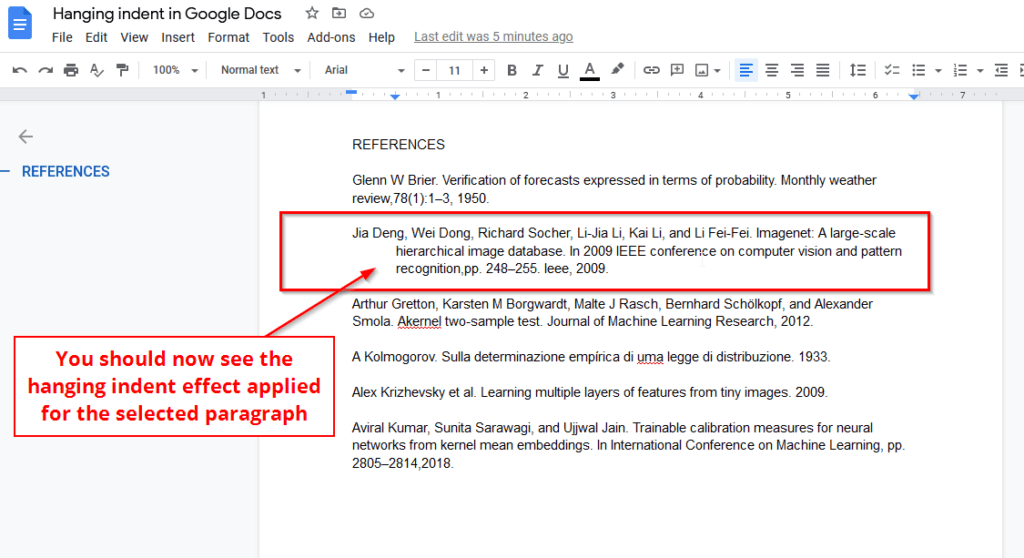
Step 6: We can now see the Hanging Indent applied to the selected text in this Google doc, as illustrated in the image below. The same process can be repeated to create a hanging indent in google docs for other citations or references in the rest of the document.
The amount of indentation is 0.5 inches by default in Google docs. We could set the preferred value as per requirement.
